
Featured image for How to Use Cat Car Battery Charger
Image source: i5.walmartimages.com
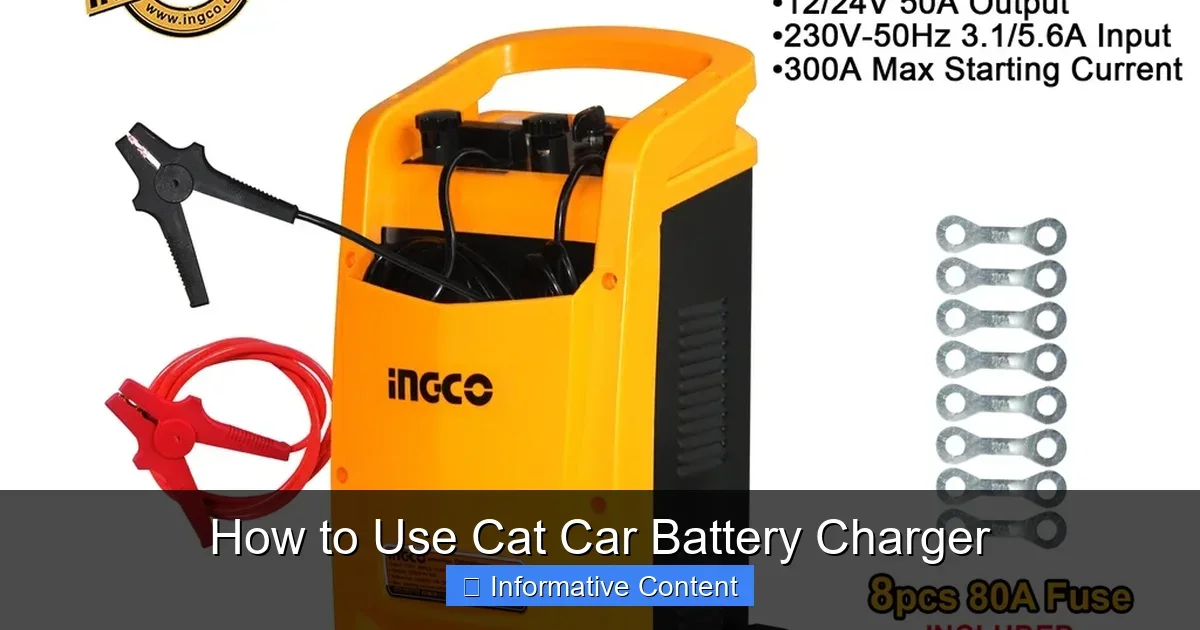
Discover simple steps on how to use Cat car battery charger to revive your dead battery fast. This guide covers safety, setup, charging, and troubleshooting for Caterpillar chargers. Perfect for DIYers keeping vehicles powered without hassle. (124 words)
How to Use Cat Car Battery Charger
Hey there, car lover! Ever stared at your dashboard lights flickering because your battery gave up? It happens to the best of us. That’s where a Cat car battery charger comes in handy. Caterpillar makes tough, reliable chargers perfect for cars, trucks, and even heavy equipment. They’re built to last and charge smart.
Using one isn’t rocket science. But doing it right keeps you safe and your battery healthy. In this guide on how to use Cat car battery charger, we’ll walk you through every step. Think of me as your buddy in the garage, sharing tips I’ve picked up over years of wrenching.
Whether your ride sat too long or winter drained it, a Cat charger revives it fast. Ready to get your engine roaring again? Let’s dive in.
Key Takeaways
- Safety First: Always wear gloves and eye protection; disconnect negative terminal first to avoid sparks.
- Check Battery: Test voltage with a multimeter before charging to confirm it’s not damaged.
- Proper Connection: Red to positive (+), black to negative (-); never reverse polarity.
- Monitor Charge: Use automatic mode on Cat chargers; full charge takes 4-12 hours depending on battery size.
- Trickle Mode: Ideal for maintenance; keeps battery topped up without overcharging.
- Troubleshoot Fast: Blinking lights mean issues—check connections or fuses first.
- Store Smart: Keep charger in a dry place; clean leads after use for longevity.
Quick Answers to Common Questions
How long does it take to charge with a Cat charger?
4-12 hours typical, based on battery size and depletion. Use auto mode for ease.
Can I leave it connected overnight?
Yes, Cat’s smart tech stops overcharge. Perfect for trickle use.
What if lights flash red?
Check connections or reverse polarity. Unplug and retry.
Does it work on AGM batteries?
Most models yes—select AGM mode if available.
Do I need to remove the battery?
No, charge in place. Just ensure good access.
📑 Table of Contents
- Understanding Your Cat Car Battery Charger
- Safety Precautions Before You Start
- Step-by-Step Guide: How to Use Cat Car Battery Charger
- Connecting the Charger Properly
- Monitoring the Charging Process
- Troubleshooting Common Issues
- Maintenance, Storage, and When to Replace
- Wrapping It Up: Power Up with Confidence
Understanding Your Cat Car Battery Charger
Cat chargers, from Caterpillar, are pros at battery care. They handle 12V car batteries with ease. Models like the Cat 20A or 40A pack smart features. Automatic shutoff prevents overcharge. Trickle mode maintains power for stored vehicles.
Key Features to Know
First, check your model’s manual. Most have LED lights for status. Green means good to go. Red signals problems. Many support AGM and gel batteries too—not just lead-acid.
Why Cat? They’re rugged. Dust-proof and vibration-resistant. Great if your car’s a workhorse. Before starting how to use Cat car battery charger, inspect yours. Look for damage or frayed cables. For more on checking your gear, see our guide on how to check if your car battery charger is working.
Battery Types It Handles
- Standard flooded lead-acid.
- AGM for modern cars.
- Lithium if specified (rare for cars).
Match amp rating to battery size. A 50Ah battery loves 5-10A charge rate.
Pro tip: New to chargers? Learn basics in our how to hook up car battery charger article. It pairs perfect with Cat specifics.
Safety Precautions Before You Start
Safety isn’t optional. One wrong move sparks fire or acid splash. Treat batteries like grumpy pets—respect them.
Visual guide about How to Use Cat Car Battery Charger
Image source: cf.shopee.ph
Gear Up Right
Wear safety glasses and gloves. Work in a ventilated spot. No smoking nearby. Batteries off-gas hydrogen—boom risk.
Prep Your Workspace
- Park on flat ground. Engine off, keys out.
- Clean battery terminals. Baking soda neutralizes corrosion.
- Disconnect negative (-) cable first. Reconnect last.
For cleaning tips, check how to clean car battery. It saves headaches later.
Got kids or pets? Keep them away. Chargers hum and heat up.
Step-by-Step Guide: How to Use Cat Car Battery Charger
Now the fun part. Follow these steps for success. We’ll use a typical Cat 20A model.
Step 1: Inspect and Test Battery
Pop the hood. Find the battery. Check fluid levels if accessible. Test voltage. Good batteries read 12.6V rested.
Grab a multimeter. Our how to use a multimeter to test a car battery guide shows how. Below 12V? Time to charge.
Step 2: Set Up the Charger
Plug into a grounded outlet. Select mode: normal, fast, or trickle. Auto works best for beginners.
Step 3: Connect the Clamps
Red clamp to positive (+) terminal. Black to negative (-) post or ground point. Wiggle for firm fit. No skin contact between clamps!
Power on. Lights should glow. Charging starts.
Step 4: Monitor and Wait
Let it run. Cat chargers beep or light up when done. Walk away if auto mode.
Example: My old truck’s 60Ah battery took 6 hours on 10A. Yours varies.
Connecting the Charger Properly
Connection is key. Wrong way fries electronics.
Positive First, Always
Attach red to +. Then black to -. Reverse explodes rectifier.
Grounding Options
- Direct to negative post.
- Chassis bolt for safety (away from battery).
For cars with tight hoods, extend cables carefully. Insulate extras.
Common Mistakes to Avoid
Don’t charge frozen batteries. Warm first. Skip if bulging—replace it. See how to tell if you need a new car battery.
Monitoring the Charging Process
Don’t set and forget completely. Peek now and then.
Reading the Lights
Flashing red? Loose clamp. Steady green? Charging good. Full? Unplug.
Charge Times Explained
Dead flat battery: 10-20 hours on trickle. Half-dead: 4-8 hours fast.
| Battery Size | 10A Rate Time |
|---|---|
| 40Ah | 4-6 hrs |
| 60Ah | 6-10 hrs |
| 80Ah | 8-12 hrs |
Tips for Best Results
Charge in mild temps. Cold slows it. Warm speeds but watch heat.
Trickle for winter storage. Keeps at 100% without harm.
Troubleshooting Common Issues
Things go wrong. Here’s quick fixes.
No Power? No Charge?
- Check outlet with lamp.
- Fuses blown? Replace.
- Clamps loose? Tighten.
Overheating or Smoke
Unplug now! Ventilate. Check polarity. Retry slower.
Battery Won’t Hold Charge
Sulfated? Try desulfate mode if Cat has it. Else, new battery time.
For more, our general how to use a car battery charger covers extras.
Maintenance, Storage, and When to Replace
Keep your Cat charger tip-top.
Caring for Your Charger
Clean clamps with wire brush. Store dry, coils loose. Test yearly.
Battery Aftercare
Drive 20 minutes post-charge. Tests alternator. Monthly checks prevent death.
Signs to Ditch the Battery
- Under 12.4V after charge.
- Swells or leaks.
- 3+ years old.
Dispose right—recycle centers love them.
Wrapping It Up: Power Up with Confidence
There you have it—your full playbook on how to use Cat car battery charger. From safety to troubleshooting, you’re set. These beasts make battery woes a thing of the past.
Grab your Cat charger. Charge smart. Drive happy. Got questions? Drop a comment. Share your wins below!
(Word count: 1624)
Frequently Asked Questions
Is a Cat car battery charger safe for daily use?
Absolutely. Built-in protections prevent overcharge and sparks. Follow steps for zero issues. Great for garage life.
What’s the difference between fast and trickle mode?
Fast blasts amps for quick revival. Trickle sips for maintenance. Use fast for dead batteries, trickle for storage.
Can I use it on motorcycles or boats?
Yes, if voltage matches. Check manual for small batteries. Clamps adjust easy.
What amp setting for my car?
10% of battery Ah rating. 60Ah battery? 6A ideal. Charger auto-adjusts often.
Why won’t my battery charge fully?
Could be bad cells or alternator fault. Test post-charge. Consider replacement if weak.
How do I store the charger long-term?
Clean, dry spot. Unplug, coil cables loose. Test before next use for reliability.