To trickle charge a car battery means slowly feeding a low, steady current into it over a long period, preventing self-discharge and maintaining its full charge. This process is ideal for batteries in vehicles stored for extended periods, helping to prolong battery life and ensure the car is ready to start when needed, all while minimizing the risk of overcharging with modern maintainers.
Learning how to trickle charge your car battery can save you from unexpected breakdowns and extend your battery’s lifespan. This comprehensive guide walks you through the entire process, explaining what trickle charging is, why it’s beneficial, and the simple steps to do it safely and effectively, covering everything from preparation to common mistakes.
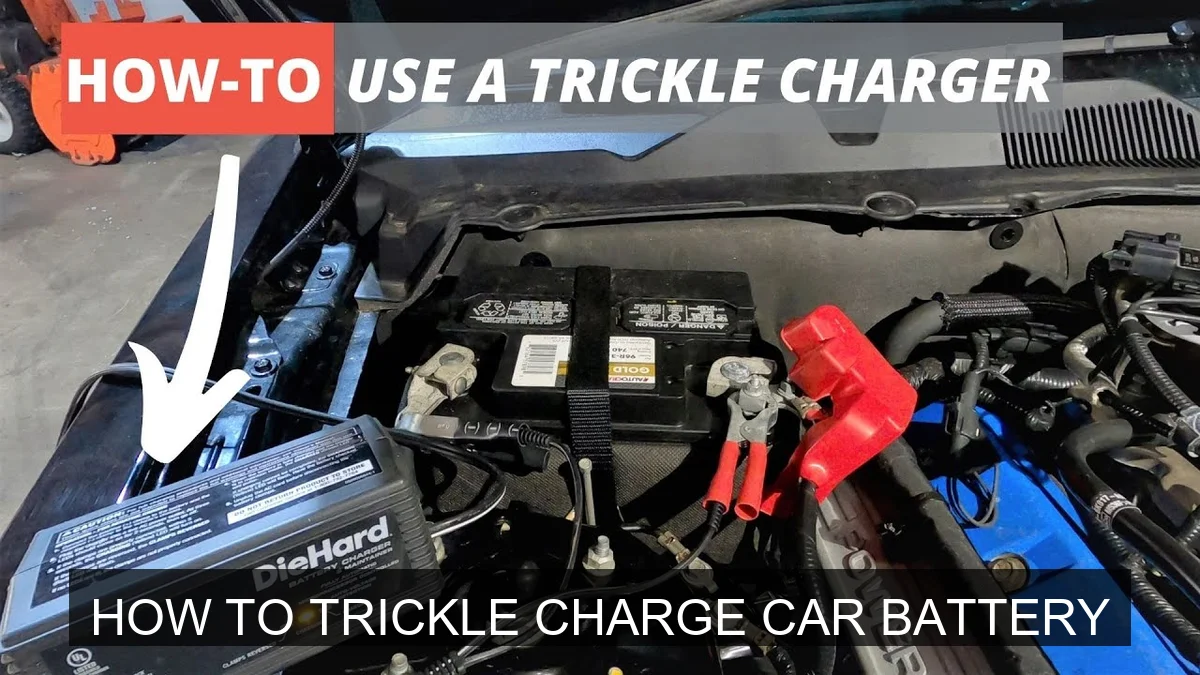
Image source: Ytimg
📋 Table of Contents
- 🔹 Understanding Trickle Charging
- 🔹 Why Trickle Charge Your Car Battery?
- 🔹 How to Trickle Charge a Car Battery: A Step-by-Step Guide
- 🔹 Key Considerations and Best Practices
- 🔹 Common Mistakes to Avoid When Trickle Charging
- 🔹 Practical Scenarios for Trickle Charging
- 🔹 Frequently Asked Questions (FAQ)
- 🔹 Conclusion
There’s nothing quite like the frustration of a dead car battery, especially when you haven’t driven your vehicle in a while. But what if there was a simple way to keep your battery in top shape, ready to go whenever you are? That’s where knowing how to trickle charge your car battery comes in handy.
This guide is all about helping you understand the ins and outs of trickle charging. We’ll explore what it means, why it’s so useful, and walk you through the process step-by-step. By the end, you’ll feel confident in maintaining your car battery, potentially saving you time, money, and a lot of headaches.
Understanding Trickle Charging
Let’s start with the basics: what is trickle charging? Imagine your car battery as a glass of water. Over time, even if you don’t drink from it, some water evaporates. A car battery slowly loses its charge, a process called “self-discharge.” Trickle charging is like adding a tiny, steady drip of water back into the glass to keep it full, without letting it overflow.
Essentially, a trickle charger delivers a very low current (usually less than 1.5 amps) to your car battery over an extended period. This low current is just enough to counteract the battery’s natural self-discharge rate, keeping it topped up and ready for action. It’s not designed to quickly recharge a deeply depleted battery; rather, it’s for maintenance.
Trickle Chargers vs. Smart Chargers/Battery Maintainers
While the term “trickle charger” is often used broadly, it’s helpful to understand a key distinction, especially with modern technology. An older, traditional trickle charger constantly delivers its low current, which could potentially overcharge a battery if left connected indefinitely, especially with lead-acid batteries that might ‘boil’ their electrolyte if constantly overcharged.
Today, most devices marketed as “trickle chargers” are actually “smart chargers” or “battery maintainers.” These are much more sophisticated. They monitor the battery’s voltage and charge state, turning on and off as needed. They’ll charge the battery to full, then switch to a float mode, only delivering current when the voltage drops. This prevents overcharging and makes them much safer for long-term connection.
Why Trickle Charge Your Car Battery?
You might be wondering, why is trickle charging important? There are several compelling reasons to consider using one:
Prevents Self-Discharge: All car batteries, even when not in use, slowly lose their charge. This is especially true in colder weather. A trickle charger combats this, keeping your battery at its optimal voltage.
Extends Battery Life: Allowing a battery to discharge significantly and then fully recharge repeatedly can stress its internal components. By keeping the battery consistently charged, you minimize this stress, potentially extending its overall lifespan.
Ideal for Stored Vehicles: If you have a classic car, a motorcycle, an RV, a boat, or even a second car that sits idle for weeks or months, a trickle charger is invaluable. It ensures the battery stays healthy during storage, so your vehicle is ready to start when you are.
Maintains Readiness: Imagine needing your vehicle in an emergency after it’s been parked for a while. A well-maintained battery ensures it starts reliably, without any surprises.
Combats Parasitic Drains: Modern vehicles often have small electrical components (like alarm systems, infotainment memory, or onboard computers) that constantly draw a tiny bit of power, even when the car is off. This “parasitic drain” can slowly kill a battery over time. A trickle charger offsets this drain.
How to Trickle Charge a Car Battery: A Step-by-Step Guide
Ready to learn the practical steps? Here’s how to trickle charge a car battery safely and effectively.
1. Gather Your Tools and Ensure Safety
Before you begin, gather your equipment and prioritize safety.
- Trickle Charger/Battery Maintainer: Make sure it’s compatible with your battery type (e.g., lead-acid, AGM, Gel).
- Safety Gear: Gloves and eye protection are a must. Batteries contain corrosive acid and produce flammable gases.
- Clean Cloth/Brush: For cleaning battery terminals.
- Well-Ventilated Area: Crucial for dissipating any gases produced during charging.
Important Safety Note: Never work on a battery near open flames, sparks, or anything that could ignite hydrogen gas. Avoid smoking.
2. Prepare the Battery
You can usually charge the battery while it’s still in the car, but make sure the vehicle is turned off and the ignition key is removed.
- Clean Terminals: Use a wire brush or battery terminal cleaner to remove any corrosion or dirt from the battery terminals. Clean terminals ensure a good electrical connection.
- Identify Polarity: Locate the positive (+) and negative (-) terminals. The positive terminal is usually larger and marked with a plus sign, while the negative is smaller and marked with a minus sign. They might also be color-coded (red for positive, black for negative).
3. Connect the Charger
This is where proper connection is key. Do NOT plug in the charger yet!
Connect the Positive Clamp: Attach the red (positive) clamp of the trickle charger to the positive (+) terminal of the battery. Ensure a firm connection.
Connect the Negative Clamp: Attach the black (negative) clamp of the trickle charger to an unpainted metal part of the car’s frame or engine block, away from the battery. This helps prevent sparks near the battery, where hydrogen gas might accumulate. If the battery is out of the car, connect the negative clamp directly to the negative (-) terminal.
Pro Tip: Always connect the positive first, then the negative to the chassis. When disconnecting, reverse the order: negative first, then positive. This minimizes spark risk.
4. Plug in the Charger
Once the clamps are securely attached, you can plug the trickle charger into a wall outlet. Many modern chargers will then perform a self-test or indicate their status with lights.
5. Monitor the Process
A smart charger or maintainer will typically have indicator lights that show its status:
- Charging: Often a red or amber light.
- Fully Charged/Maintenance Mode: Usually a green light.
If you’re using an older, simpler trickle charger without smart features, you’ll need to monitor the charging time more closely to avoid overcharging. However, for most modern users, a “trickle charger” is actually a smart maintainer that will automatically switch modes.
6. Disconnect Safely
When you’re ready to use your car or if the battery maintainer indicates the battery is fully charged and in float mode:
Unplug the Charger: Disconnect the charger from the wall outlet first.
Remove the Negative Clamp: Detach the black (negative) clamp from the car’s chassis (or battery terminal, if out of the car).
Remove the Positive Clamp: Detach the red (positive) clamp from the positive (+) battery terminal.
Key Considerations and Best Practices
To get the most out of your trickle charging efforts and ensure safety, keep these points in mind:
Battery Type Matters: Most car batteries are lead-acid (flooded, AGM, or Gel). Ensure your charger is suitable for your specific battery type. Using the wrong charger setting can damage the battery.
Choose a Smart Maintainer: For long-term connection, a smart battery maintainer is almost always a better choice than a basic, unregulated trickle charger. It automatically monitors and adjusts, preventing overcharging.
Ventilation is Crucial: Even smart chargers can produce small amounts of hydrogen gas. Always charge in a well-ventilated area to prevent gas buildup.
Check Battery Fluid (if applicable): For traditional flooded lead-acid batteries, it’s good practice to check the electrolyte levels periodically, especially before starting a long charging cycle. Top up with distilled water if needed (but only after charging, and never overfill).
Temperature Effects: Batteries charge less efficiently in very cold temperatures and can be stressed by very hot temperatures. Store and charge batteries in a moderate environment whenever possible.
Common Mistakes to Avoid When Trickle Charging
Even with simple tasks, errors can happen. Here are common pitfalls to steer clear of:
Incorrect Polarity: Connecting the positive clamp to the negative terminal, or vice-versa, can damage the battery, the charger, or even cause a fire. Always double-check your connections.
Overcharging (with old chargers): Leaving an old, non-smart trickle charger connected indefinitely can lead to overcharging, causing battery damage, electrolyte boil-off, and reduced lifespan.
Undercharging: Not allowing enough time for the battery to reach full charge or repeatedly interrupting the charging process can also harm the battery over time.
Poor Ventilation: Charging in an enclosed space without proper airflow is dangerous due to potential hydrogen gas buildup. Always ensure good ventilation.
Ignoring Battery Type: Using a charger meant for one battery type (e.g., standard lead-acid) on another (e.g., AGM) without the correct settings can lead to inefficient charging or damage.
Charging a Damaged Battery: Never try to charge a visibly damaged, swollen, or leaking battery. It could be extremely dangerous.
Practical Scenarios for Trickle Charging
Let’s look at a few examples where trickle charging is especially useful:
| Scenario | Why Trickle Charge? | Benefit |
|---|---|---|
| Seasonal Vehicles (e.g., classic cars, motorcycles, RVs) | These vehicles are stored for months, allowing batteries to self-discharge and potentially die. | Keeps the battery fully charged, ready for use at any time, and extends its life during off-season storage. |
| Infrequently Driven Cars (e.g., second family car, car for long commutes) | Modern cars have parasitic drains that slowly deplete the battery when not driven regularly. | Offsets parasitic drains, ensuring the car starts reliably even after sitting for a week or two. |
| Vehicles with Constant Power Demands (e.g., security systems, GPS trackers) | Some installed accessories draw power even when the vehicle is off, leading to faster discharge. | Provides a continuous low-level charge to compensate for these draws, maintaining battery health. |
Frequently Asked Questions (FAQ)
What is trickle charging?
Trickle charging is the process of supplying a very low, steady current to a car battery to counteract its natural self-discharge. It’s primarily used to maintain a battery’s charge level over extended periods, not to rapidly recharge a dead battery.
Why is trickle charging important?
It’s important because it helps prevent your car battery from completely draining when the vehicle isn’t in use, which can extend the battery’s lifespan and ensure your car starts reliably whenever you need it. It’s especially useful for vehicles stored for long durations.
How long does it take to trickle charge a car battery?
The duration for trickle charging isn’t about speed; it’s about maintenance. A modern smart charger or battery maintainer can be left connected indefinitely. It will charge the battery to full and then switch to a “float” or maintenance mode, topping up the charge as needed. For a partially discharged battery, it might take several hours or even a day to reach full charge before entering maintenance mode.
Can you overcharge a car battery with a trickle charger?
With older, unregulated trickle chargers, yes, it was possible to overcharge a battery if left connected for too long. However, most “trickle chargers” sold today are actually smart battery maintainers. These devices have built-in intelligence to prevent overcharging by monitoring the battery’s voltage and switching to a maintenance (float) mode once the battery is full.
When should you trickle charge your car battery?
You should trickle charge your car battery when your vehicle will be parked or stored for more than a few weeks, or if it’s an infrequently driven car. It’s also beneficial if your vehicle has constant small electrical draws (parasitic drains) even when off. This helps keep the battery healthy and ready to go.
Conclusion
Mastering how to trickle charge your car battery is a simple yet powerful way to ensure your vehicle is always ready for the road. It’s not just about avoiding inconvenient jump-starts; it’s about smart maintenance that prolongs the life of a crucial, and often expensive, car component.
By understanding what trickle charging means, why it matters, and following the clear steps for safe connection, you can confidently take care of your battery. Remember to prioritize safety, use a smart battery maintainer when possible, and avoid common mistakes. Your car battery, and your peace of mind, will thank you for it.