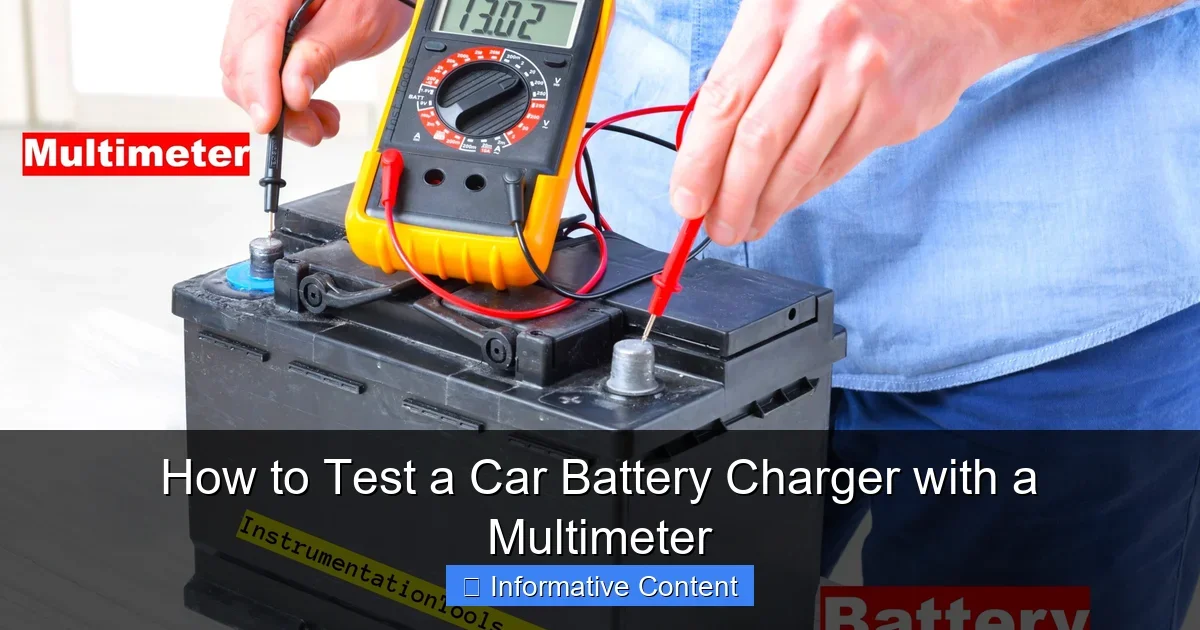
Featured image for How to Test a Car Battery Charger with a Multimeter
Image source: instrumentationtools.com
Testing your car battery charger with a multimeter is easy and saves money on repairs. Follow these steps to check voltage output, ensure safe charging, and spot faults fast. Keep your car running smoothly every time. (92 words)
How to Test a Car Battery Charger with a Multimeter
Hey there, car buddy. Ever had your car battery charger let you down right when you need it? Maybe it won’t charge, or your battery dies anyway. Frustrating, right? That’s why knowing how to test a car battery charger with a multimeter is a game-changer. It’s a quick DIY task that spots problems early.
Don’t worry if you’re new to this. We’ll walk through it step by step, like I’m right there in your garage with you. No fancy tools needed beyond a multimeter. You’ll save cash on shop visits and feel like a pro. Plus, a working charger keeps your rides reliable.
Ready to dive in? Let’s gear up and get testing. By the end, you’ll know if your charger is good or needs the boot.
Key Takeaways
- Safety first: Wear gloves and eye protection before testing to avoid shocks or acid spills.
- Tools needed: A digital multimeter, charger, leads, and a test battery make the job simple.
- No-load test: Check AC input and DC output without a battery to verify basic function.
- Load test: Connect to a battery and measure charging amps for real-world performance.
- Good readings: Expect 13.5-14.5V DC output; anything below 12V signals a problem.
- Fix common issues: Clean connections or replace fuses if voltage is low.
- Regular checks: Test yearly to prevent dead batteries and stranded drives.
Quick Answers to Common Questions
What’s a normal voltage for a car battery charger?
Expect 13.5-14.5V DC on output. Higher briefly on dead batteries, but stable is key.
Can I test without a battery?
Yes, for no-load voltage. But always load test for real performance.
What if my charger shows no voltage?
Check fuses, outlet, and cords. If zero, it’s likely dead.
Is it safe to test amps?
Use the 10A port and inline setup. Start low to avoid meter damage.
How often should I test my charger?
Once a year or before winter. Catches issues early.
📑 Table of Contents
Gear Up: Tools and Safety Basics
Before you start testing your car battery charger with a multimeter, grab the right stuff. Safety comes first. Always unplug the charger from the wall. Wear safety glasses and rubber gloves. Batteries can spark or leak acid. Work in a well-ventilated spot, away from kids or pets.
What You’ll Need
- Digital multimeter: Set it to DC volts (20V range) and amps if possible. Cheap ones work fine.
- Car battery charger: The one you’re testing. Smart chargers are trickier but doable.
- Jumper cables or alligator clips: For safe connections.
- Fuses and wires: Extras in case.
Pro tip: Check your multimeter batteries first. A dead meter is no help. If you’re unsure about battery health, learn how to use a multimeter to test a car battery too.
Step 1: Visual Inspection and Prep
Look over your charger. Cracks, burns, or frayed cords? Toss it. Safety first. Check the fan if it has one – it should spin free. Inspect plugs and clips for corrosion. Clean with baking soda water if needed.
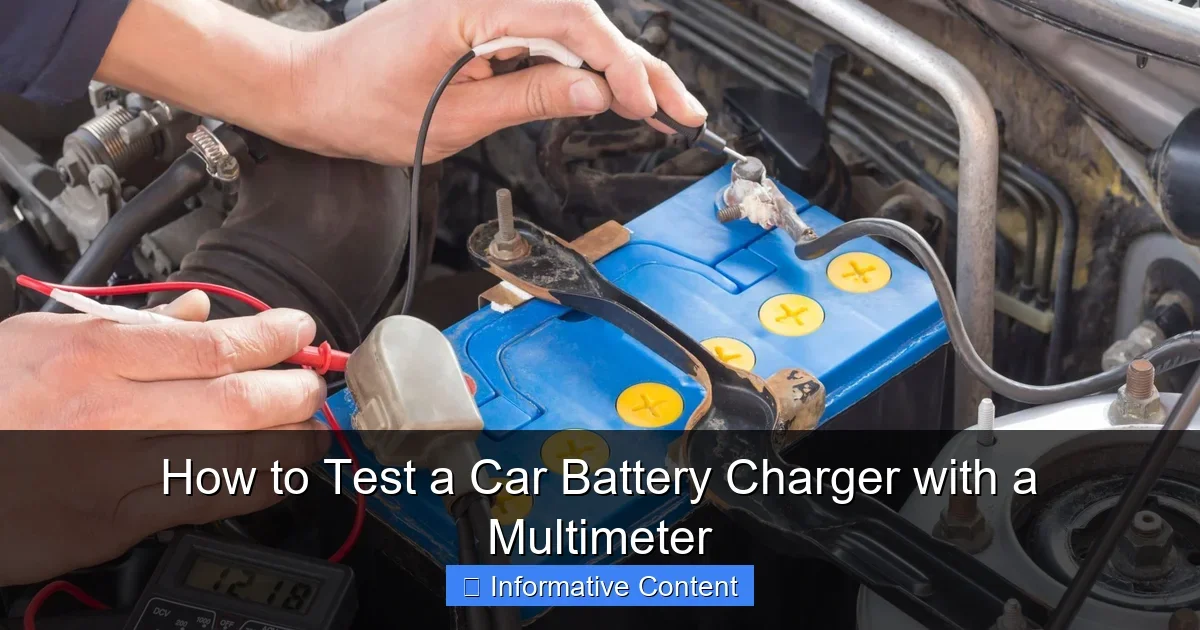
Visual guide about How to Test a Car Battery Charger with a Multimeter
Image source: tontio.com
Power Outlet Check
Plug in elsewhere. Bad outlets fool you. Test with a lamp. Good? Move on.
Wipe terminals. Dirt blocks flow. Now, set your multimeter to AC volts (200V). Probe the wall outlet. Should read 110-120V in the US. Low? Fix that first.
Step 2: No-Load Voltage Test
Time to test without a battery. This checks if the charger powers up. Unplug clips. Plug charger into wall. Let it hum or light up.
Measure DC Output
Set multimeter to DC volts, 20V scale. Touch red probe to positive clip, black to negative. What do you see?
- 13.8-14.5V: Normal for most chargers.
- Below 12V: Faulty transformer or rectifier.
- Over 15V: Risky – could overcharge batteries.
Example: My old trickle charger read 14.2V. Perfect. If yours is low, like 10V, it’s toast. For more on chargers, see how to use a car battery charger.
Tip: Note the amps rating on your charger. We’ll check that next.
Step 3: Loaded Test with a Battery
Now the real deal. Hook up a test battery. Disconnect car battery first if testing in vehicle. Positive to positive, negative to negative. Firm clips, no spark.
Check Charging Voltage
Multimeter on DC volts. Probe battery terminals while charging. Fully charged battery? Expect 13.5-14.5V. Dead one? Up to 15V okay briefly.
Watch for 30 minutes. Voltage stable? Good. Drops? Charger weak.
Amps Test (Trickier but Key)
Switch to DC amps (10A scale). Inline: Charger positive to red probe, black probe to battery positive. Start low. 2-10A typical for standard chargers.
Caution: High amps fry meters. Use 10A port. My 10A charger pulled 8A on a low battery. Spot on.
If unsure on battery state, read how to check a car battery with a multimeter.
Step 4: Advanced Checks for Smart Chargers
Modern chargers auto-adjust. They have modes: charge, maintain. Test each.
Float Mode Test
After full charge, it drops to 13.2-13.8V. Probe it. Wrong? Faulty circuit.
Ripple Voltage
Set to AC volts on DC output. Low ripple (<0.5V) means clean power. High? Bad diodes.
Example: Cheap charger had 2V ripple. Fried my battery. Quality ones? Clean as new.
Bonus: Temperature. Feels hot? Let cool, retest. Overheat kills chargers.
Troubleshooting Common Failures
No output? Check fuses inside (unplugged!). Blown? Replace same amp.
Low Voltage Fixes
- Clean internals with compressed air.
- Test diodes with multimeter diode mode.
- Bad fan? Spins output down.
Sparks or hums loud? Capacitor issue. Best buy new. See how to check if your car battery charger is working for more tips.
Intermittent? Wiggle cords while testing. Loose wires inside.
Maintenance and When to Replace
Test your charger yearly. Store cool and dry. Covers prevent shorts.
Pro Tips
- Label with test date and readings.
- Match charger amps to battery size.
- Upgrade to smart models for safety.
Readings off consistently? Time for new. Don’t risk dead batteries mid-winter.
Wrapping It Up: Drive Confident
There you have it, friend. Now you know how to test a car battery charger with a multimeter like a boss. From no-load checks to full loads, you’ve got the skills. Regular tests mean fewer headaches and longer battery life.
Grab that multimeter and test today. Your car will thank you. Questions? Drop a comment. Safe wrenching!
(Word count: 1628)
🎥 Related Video: How to Test a Car Battery with a Multimeter
📺 Steve’s Garage
In this Steve’s Garage video I show you a couple simple things you can do with a multimeter to test the health of your car battery …
Frequently Asked Questions
Do I need a fancy multimeter to test a car battery charger?
No, a basic digital one works great. Just ensure it measures DC volts and amps up to 10A. Cheap models from hardware stores do the job fine for DIY testing.
What causes a car battery charger to fail?
Common culprits include blown fuses, bad diodes, frayed cords, or overheating. Dust buildup also hurts. Regular cleaning and storage prevent most issues.
Can I test a smart charger the same way?
Yes, but check modes separately: charge, float, repair. Voltage varies by mode, so read your manual. They auto-adjust, so stability is crucial.
Is 12V output okay on my charger?
No, that’s too low for charging. A good battery rests at 12.6V; chargers need 13.5V+ to push charge. Low means faulty rectifier or transformer.
What if voltage drops under load?
Weak power supply or bad connections. Clean clips and retest. If persists, replace the charger to avoid undercharging your battery.
Should I test the charger on my car battery?
Yes, for accurate results, but disconnect ground cable first for safety. Engine off, key out. This simulates real use best.