Don’t throw away that seemingly dead car battery just yet! Many car batteries can be brought back to life, saving you money and hassle. This guide offers a comprehensive, step-by-step approach to safely restoring a car battery, covering everything from initial assessment and essential safety precautions to cleaning, desulfation, and proper recharging techniques, empowering you to extend your battery’s lifespan and avoid costly replacements.
How to Restore a Car Battery
Have you ever walked out to your car, turned the key, and heard nothing but a click or a sad, struggling whine? It’s a frustrating experience that often points to a dead car battery. Most people’s first thought is to simply replace it, which can be an unexpected and costly expense. But what if there was another option? What if you could breathe new life into that seemingly defunct power source?
The good news is that in many cases, you absolutely can restore a car battery. While not every battery can be saved, many suffer from common issues like sulfation or low electrolyte levels, which are entirely fixable with the right approach. Learning how to restore a car battery can save you money, reduce waste, and give you a greater understanding of your vehicle’s essential components. This comprehensive guide will walk you through the process, providing clear, step-by-step instructions and crucial safety tips to help you successfully restore a car battery.
Why Your Car Battery Might Need Restoration
Car batteries, specifically lead-acid batteries, power your vehicle’s starter, lights, and accessories. Over time, and especially with neglect or improper charging, they can lose their ability to hold a charge effectively. One of the most common culprits is a process called sulfation, where lead sulfate crystals build up on the battery plates, hindering the chemical reaction needed to produce electricity. Other issues might include corrosion on the terminals, low electrolyte levels, or simply being discharged for too long. Instead of buying a new one, you might be able to restore a car battery suffering from these conditions.
Key Takeaways
- Safety First: Always prioritize safety by wearing appropriate personal protective equipment (PPE) like gloves and eye protection, and ensure adequate ventilation when working with car batteries.
- Assess Condition Thoroughly: Before attempting to restore a car battery, perform a visual inspection and check its voltage. Not all batteries are salvageable; physical damage or extremely low voltage might indicate it’s time for replacement.
- Sulfation is the Main Culprit: The primary reason most car batteries fail prematurely is sulfation, the buildup of lead sulfate crystals on the battery plates. Desulfation is often the core of the restoration process.
- Cleaning is Crucial: Removing corrosion from battery terminals and the battery case improves conductivity and can prevent further deterioration, significantly aiding in the restoration process.
- Proper Charging is Key: Use a smart battery charger with a desulfation mode, if available, and always follow up with a slow, controlled recharge cycle to properly recondition the battery.
- Maintenance Extends Life: Post-restoration, regular maintenance like keeping terminals clean, checking electrolyte levels (for flooded batteries), and using a trickle charger for vehicles stored long-term will prevent future issues and prolong battery life.
- Know When to Replace: Understand that some batteries are beyond repair due to internal damage or prolonged neglect. Sometimes, replacing the battery is safer and more economical than attempting a restoration.
Quick Answers to Common Questions
Can I use Epsom salt to restore a car battery?
While some DIY methods suggest using Epsom salt to desulfate a battery, this is generally not recommended. It can provide a temporary boost in some cases but often leads to long-term damage and a shorter battery life. Specialized desulfation chargers are a much safer and more effective solution.
How long does it take to restore a car battery?
The time it takes to restore a car battery can vary significantly. Cleaning and checking electrolyte levels might take 30-60 minutes, but the desulfation and recharging process with a smart charger can take anywhere from a few hours to several days, depending on the battery’s condition and the charger’s settings.
Is it safe to restore a car battery at home?
Yes, it can be safe if you follow all safety precautions, including wearing PPE, ensuring good ventilation, and avoiding ignition sources. However, mishandling battery acid or incorrectly charging a battery can be dangerous. If you’re unsure, it’s always best to consult a professional.
What type of water should I use to top off my battery?
Only use distilled water to top off the electrolyte levels in flooded car batteries. Tap water contains minerals and impurities that can damage the battery’s internal components and significantly reduce its lifespan. Never add battery acid unless specifically advised by a professional for a specific battery type.
How do I know if my car battery is sealed or flooded?
Flooded (or “wet cell”) batteries typically have removable caps or plugs on the top, allowing you to access and check the individual cells. Sealed, maintenance-free, AGM (Absorbed Glass Mat), or Gel cell batteries do not have these removable caps; they are completely sealed units and you cannot add water to them.
📑 Table of Contents
Understanding Your Car Battery and Why It Fails
Before you attempt to restore a car battery, it helps to understand a little about how it works and what typically causes it to fail. Most car batteries are lead-acid batteries, comprising lead plates submerged in an electrolyte solution (a mixture of sulfuric acid and water). When the battery discharges, a chemical reaction produces lead sulfate and water. When it charges, this reaction reverses.
The Enemy: Sulfation
The most common reason a car battery loses its capacity is sulfation. When a battery is left discharged for an extended period, or if it’s consistently undercharged, the lead sulfate crystals on the plates can harden and grow. These hardened crystals act as an insulator, blocking the electrolyte from reacting with the lead plates. This reduces the battery’s ability to accept a charge and deliver power. It’s a primary target when you set out to restore a car battery.
Other Causes of Battery Degradation
While sulfation is a major factor, other issues can contribute to a failing battery:
- Low Electrolyte Levels: In flooded (maintainable) lead-acid batteries, the water in the electrolyte can evaporate over time, exposing the plates and leading to damage.
- Corrosion: Buildup on the battery terminals can impede the flow of electricity, making it seem like the battery is dead.
- Internal Shorts: This is a severe internal failure, often caused by plate degradation, and usually means the battery is beyond repair.
- Physical Damage: Cracks, bulges, or leaks indicate irreparable damage.
Knowing these potential issues helps you diagnose whether you truly have a chance to restore a car battery or if it’s time for a replacement.
Safety First: Essential Precautions Before You Begin
Working with car batteries involves corrosive chemicals, explosive gases, and high electrical currents. Safety is paramount. Never skip these steps when you try to restore a car battery.
Personal Protective Equipment (PPE)
Always wear the following:
- Safety Glasses or Goggles: Battery acid can cause severe eye damage.
- Acid-Resistant Gloves: Protect your hands from corrosive battery acid.
- Old Clothing: Battery acid can eat through fabric, so don’t wear your best clothes.
Ventilation is Key
When batteries charge or discharge, they produce hydrogen gas, which is highly flammable and explosive. Work in a well-ventilated area, preferably outdoors or in an open garage, to disperse any gases. Avoid enclosed spaces.
Eliminate Ignition Sources
No smoking, open flames, or sparks near the battery. Even a small spark from connecting jumper cables incorrectly can ignite hydrogen gas. Remove any metal jewelry that could accidentally short the battery terminals.
Have a Spill Kit Ready
Keep a box of baking soda and a spray bottle of water nearby. Baking soda effectively neutralizes battery acid. If you spill acid, immediately sprinkle baking soda on it, let it fizz, and then rinse with water.
Disconnecting the Battery
Always disconnect the negative (-) terminal first, then the positive (+) terminal. This prevents accidental shorts against the car’s body. When reconnecting, attach the positive terminal first, then the negative.
Assessing Your Battery’s Condition
Before you start any restoration efforts, you need to determine if your battery is even a candidate for revival. Not every “dead” battery can be saved.
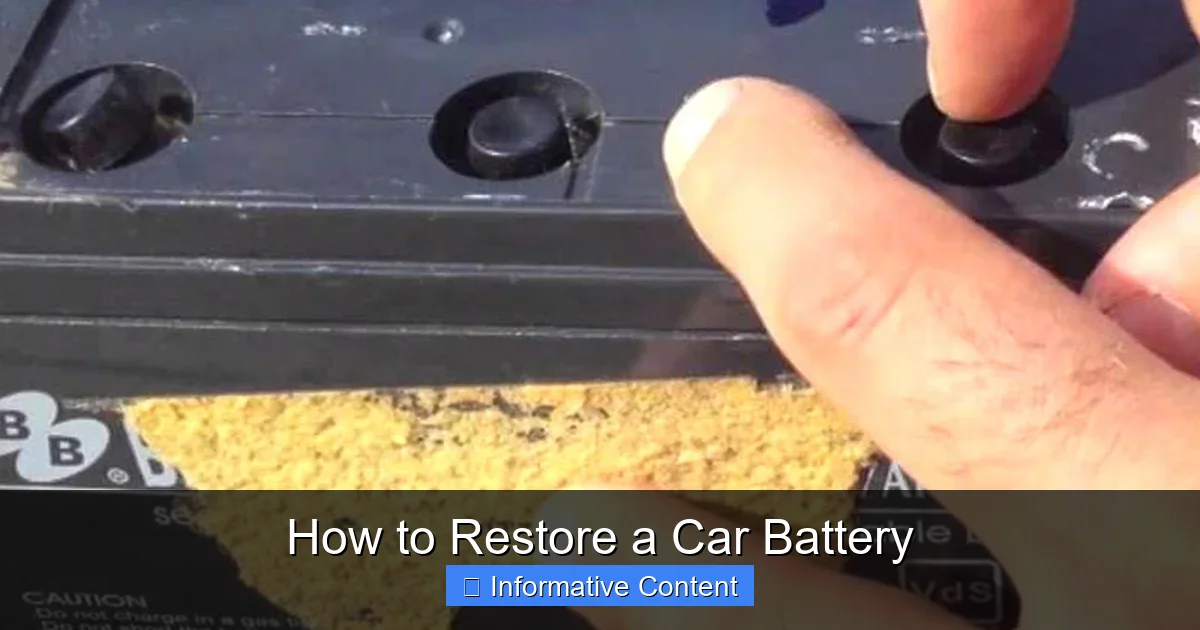
Visual Inspection
Start with a thorough visual check. Look for any signs of physical damage:
Visual guide about How to Restore a Car Battery
Image source: carbatteryworld.com
- Cracks or Bulges: These indicate internal damage and mean the battery is irreparable.
- Leaks: Any signs of electrolyte leaking are a red flag. Do not attempt to restore a car battery that is leaking.
- Corrosion: White, powdery, or greenish-blue deposits on the terminals or battery case. This is often fixable.
- Missing Caps: For flooded batteries, ensure all vent caps are present and intact.
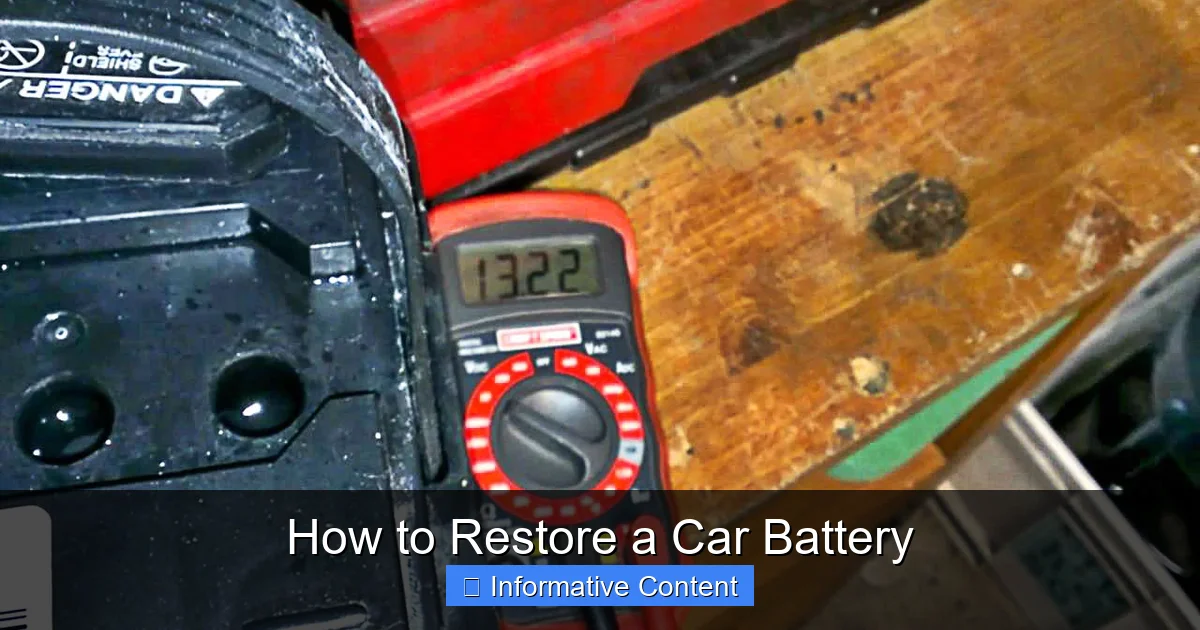
Checking Voltage with a Multimeter
A digital multimeter is an inexpensive and essential tool. Set it to measure DC voltage (VDC).
- Connect the red (positive) probe to the positive (+) terminal of the battery.
- Connect the black (negative) probe to the negative (-) terminal.
- Read the voltage display.
Here’s what the readings typically mean for a 12V car battery:
- 12.6V or higher: Fully charged.
- 12.4V-12.6V: Partially charged, still healthy.
- 12.0V-12.4V: Discharged but likely recoverable.
- Below 12.0V: Deeply discharged. Restoration is possible but will be challenging.
- Below 10.5V: May have an internal short or be severely sulfated. Chances of successful restoration are significantly lower.
Load Testing (Optional but Recommended)
A load tester simulates the demands of starting your car. It gives a better indication of the battery’s health than just a voltage reading. Many auto parts stores will perform a load test for free. If the battery fails a load test even after a full charge, it might be beyond repair, even if you try to restore a car battery.
The Restoration Process: Step-by-Step Guide
Once you’ve determined your battery is a candidate, you can begin the process to restore a car battery.
Step 1: Disconnect and Remove the Battery
Following the safety guidelines:
- Using a wrench, disconnect the negative (-) terminal first, then the positive (+) terminal.
- Carefully remove any hold-down clamps or straps.
- Lift the battery out of the tray. Be careful; batteries are heavy. Use a battery carrying strap if available.
Step 2: Clean the Battery and Terminals
Corrosion can prevent a good electrical connection and mimic a dead battery.
- Make a Cleaning Solution: Mix a tablespoon of baking soda with a cup of warm water to create a paste.
- Apply and Scrub: Apply the paste to the corroded terminals and battery top. The baking soda will neutralize any acid and react with the corrosion. Use an old toothbrush or a wire brush specifically designed for battery terminals to scrub away all the deposits.
- Rinse and Dry: Rinse the battery thoroughly with clean water, ensuring no baking soda residue remains. Dry the battery completely with a clean cloth. A clean battery is ready for the next step to restore a car battery.
Step 3: Check and Top Off Electrolyte Levels (Flooded Batteries ONLY)
NOTE: This step only applies to traditional flooded lead-acid batteries with removable cell caps. If you have a sealed, maintenance-free, or AGM/Gel battery, skip this step entirely. Attempting to open a sealed battery can be dangerous and damage it.
- Remove Cell Caps: Carefully pry off the cell caps to expose the electrolyte in each cell.
- Inspect Levels: Look inside each cell. The electrolyte should cover the lead plates. If the level is low, the plates will be exposed.
- Add Distilled Water: ONLY add distilled water. Tap water contains minerals that can damage the battery. Fill each cell until the plates are covered by about half an inch of water, but do not overfill. Leave some airspace for gas expansion.
- Replace Caps: Securely replace all the cell caps.
Step 4: Desulfation and Recharging
This is the core process to restore a car battery suffering from sulfation.
Using a Smart Charger with Desulfation Mode:
Many modern “smart” battery chargers have a dedicated desulfation mode or will automatically attempt to desulfate a battery that appears to be sulfated. This is the safest and most effective method for the average DIYer.
- Connect the Charger: Connect the positive (+) clamp of the charger to the positive (+) terminal of the battery. Connect the negative (-) clamp to the negative (-) terminal.
- Select Mode: Plug in the charger and select the “desulfation” or “recondition” mode if available. If not, a standard “smart” charging mode will often incorporate a desulfation cycle.
- Charge Cycle: Allow the charger to complete its full cycle, which can take several hours or even days, depending on the battery’s condition and the charger’s features. These chargers typically apply high-frequency pulses to break down the sulfate crystals.
- Monitor: Keep an eye on the battery for any signs of overheating or unusual smells.
Old-School Low-Amp Charging (Less Recommended for Desulfation):
For batteries that are merely deeply discharged without severe sulfation, a slow, low-amp charge (e.g., 2-5 amps) can often bring them back. This method won’t effectively desulfate but can gradually recondition a weak battery.
- Connect the charger.
- Select a low amp setting.
- Charge for 12-24 hours, checking voltage periodically. Do not overcharge.
Once the desulfation and charging cycle is complete, the charger should indicate that the battery is fully charged. You can then recheck the voltage with your multimeter. A successful attempt to restore a car battery should show 12.6V or higher.
Maintaining Your Battery Post-Restoration
You’ve worked hard to restore a car battery; now it’s time to keep it healthy. Proper maintenance can significantly extend its lifespan and prevent future issues.
Regular Cleaning
Periodically check your battery terminals for corrosion. If you see any, clean it off immediately using the baking soda paste method. A thin layer of dielectric grease or battery terminal protector can help prevent future corrosion.
Check Electrolyte Levels (Flooded Batteries)
For maintainable batteries, check the electrolyte levels every few months, especially in hot climates. Top off with distilled water as needed.
Keep It Charged
The worst thing for a battery is to leave it discharged, as this promotes sulfation.
- Drive Regularly: Short trips might not fully recharge your battery. Take longer drives periodically to ensure it gets a full charge from the alternator.
- Use a Trickle Charger/Battery Maintainer: If your vehicle sits unused for extended periods (weeks or months), connect it to a trickle charger or battery maintainer. These devices deliver a small, continuous charge to keep the battery topped off without overcharging it. This is a vital step to keep your restored car battery in good condition.
Protect from Extreme Temperatures
Extreme heat and cold can both reduce battery life. While you can’t control the weather, ensuring good airflow around the battery and protecting it from direct sun in summer can help.
When to Replace vs. Restore: Knowing When to Give Up
While it’s often possible to restore a car battery, there are times when replacement is the only safe and practical option. Knowing when to call it quits can save you time, effort, and potential safety risks.
Signs the Battery is Beyond Repair:
- Physical Damage: Cracks, bulges, or leaks in the battery casing. These are severe and dangerous.
- Internal Short Circuit: If your battery consistently shows very low voltage (e.g., below 10.5V) even after charging attempts, or if one cell boils excessively while others don’t, it likely has an internal short.
- Extreme Age: Car batteries typically last 3-5 years. If your battery is significantly older than this and showing signs of failure, it might simply be at the end of its natural life.
- Fails Load Test: If the battery still fails a load test after attempting to restore a car battery and fully recharging it, its capacity is too low to reliably start your vehicle.
- Repeated Failures: If you successfully restore a car battery only for it to quickly fail again, it’s a strong indicator that its internal components are too degraded for a lasting fix.
In these scenarios, the safest and most reliable course of action is to purchase a new battery. The cost of a new battery is often outweighed by the frustration and potential hazards of relying on a compromised one.
Conclusion
Learning how to restore a car battery can be a rewarding and cost-effective skill. By understanding the common causes of battery failure, prioritizing safety, and following a methodical approach to cleaning, desulfation, and recharging, you can often extend the life of your car battery and avoid an unnecessary replacement. Remember that consistent maintenance, like keeping terminals clean and ensuring proper charge, is key to preventing future issues.
While not every battery can be brought back from the brink, many can. So, the next time your car struggles to start, consider giving your battery a second chance. With the right tools and knowledge, you might just restore a car battery and get back on the road with a renewed sense of accomplishment and a fatter wallet. Always remember to put safety first, and if in doubt, consult a professional or opt for a new battery for peace of mind.
Frequently Asked Questions
What causes a car battery to die prematurely?
The most common cause of premature car battery death is sulfation, where lead sulfate crystals build up on the battery plates, hindering its ability to hold a charge. Other factors include consistent undercharging, deep discharges, extreme temperatures, and general neglect like not keeping terminals clean.
Can all car batteries be restored?
No, not all car batteries can be restored. Batteries with physical damage like cracks or bulges, internal short circuits, or those that are extremely old and degraded are typically beyond repair. Restoration is most effective for batteries suffering primarily from sulfation or deep discharge without significant internal damage.
What tools do I need to restore a car battery?
You’ll need essential safety gear like safety glasses and acid-resistant gloves. Other necessary tools include a multimeter for voltage checks, a wire brush or battery terminal cleaner, baking soda, distilled water (for flooded batteries), and most importantly, a smart battery charger, ideally one with a desulfation or reconditioning mode.
Will restoring a car battery void my car’s warranty?
Attempting to restore a car battery itself usually won’t void your car’s warranty, as the battery is a consumable item. However, if the restoration process causes damage to the battery or other vehicle components due to improper handling, any resulting issues might not be covered by your car’s warranty. Always proceed with caution.
How long will a restored car battery last?
The lifespan of a restored car battery varies greatly depending on its initial condition, the success of the restoration process, and subsequent maintenance. A well-restored battery could last another year or two, but it typically won’t achieve the lifespan of a brand-new battery. Regular charging and proper care are crucial for maximizing its extended life.
Is adding battery acid to a dead battery a good idea?
No, it is generally a very bad idea to add battery acid to a dead car battery. Batteries lose water through evaporation, not acid, so adding more acid can throw off the electrolyte’s balance and permanently damage the battery. Only add distilled water to maintain electrolyte levels in flooded batteries.