Learning how to properly charge a car battery is a super useful skill that can save you from a lot of hassle. This comprehensive guide walks you through every step, from understanding your battery and charger to crucial safety precautions and common mistakes to avoid. Get ready to confidently power up your vehicle’s heart!
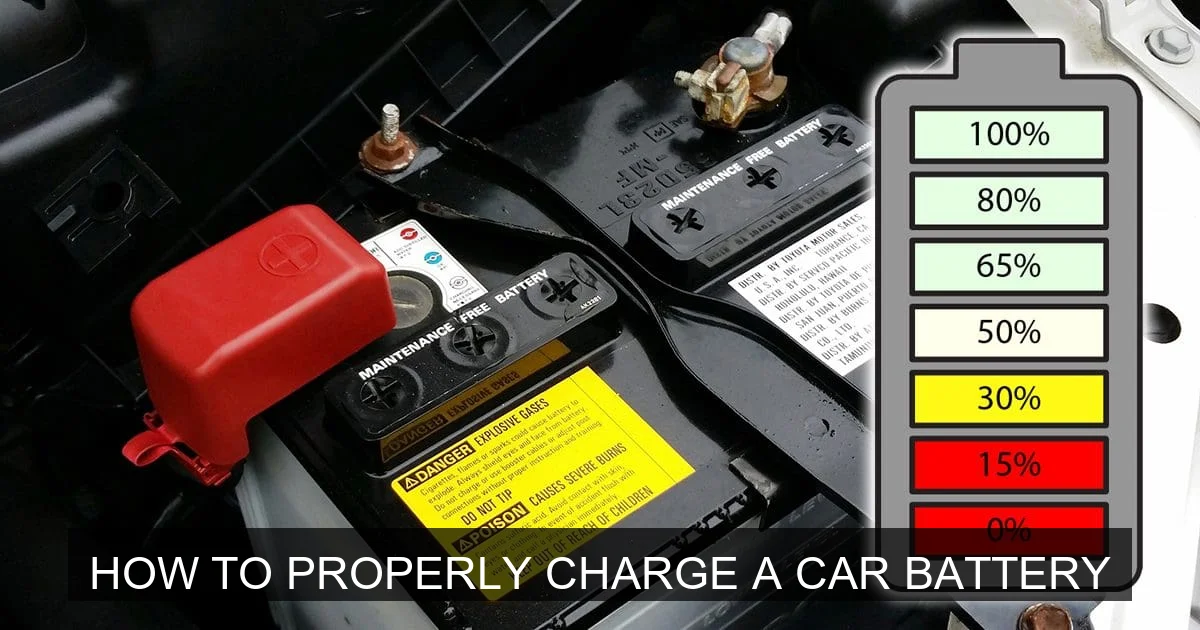
Image source: Bestcaraudio
📋 Table of Contents
- 🔹 How to Properly Charge a Car Battery (Direct Answer)
- 🔹 Introduction: Bringing Your Battery Back to Life
- 🔹 What Does “Charging a Car Battery” Really Mean?
- 🔹 Why You Might Need to Charge Your Car Battery
- 🔹 Understanding Your Car Battery and Charger
- 🔹 Safety First: Essential Precautions Before You Begin
- 🔹 Step-by-Step Guide: How to Properly Charge a Car Battery
- 🔹 How Long Does It Take to Charge a Car Battery?
- 🔹 Common Mistakes to Avoid When Charging a Car Battery
- 🔹 Tips for Maintaining Your Car Battery’s Health
- 🔹 Real-Life Scenarios: When to Charge vs. When to Call for Help
- 🔹 Frequently Asked Questions About Battery Charging
- 🔹 Conclusion: Powering Up with Confidence
How to Properly Charge a Car Battery (Direct Answer)
To properly charge a car battery, you’ll need a suitable battery charger, a well-ventilated area, and careful attention to safety. First, ensure your car is off and the area is clear. Connect the positive (+) charger clamp to the positive battery terminal and the negative (-) clamp to a grounded metal part of the car’s frame, away from the battery. Set the charger according to your battery type and size, monitor the process, and disconnect the cables in reverse order once complete.
Introduction: Bringing Your Battery Back to Life
Ever gone to start your car, only to be met with that disheartening click-click-click, or worse, complete silence? A dead car battery is a common headache, but it doesn’t always mean the end of the road for your battery. Often, it just needs a good charge. Knowing how to properly charge a car battery isn’t just a useful skill; it’s a way to keep your vehicle reliable and potentially save yourself a roadside emergency.
In this guide, we’re going to break down everything you need to know. We’ll cover what charging actually means, why it matters, the different types of batteries and chargers, and a clear, step-by-step process to get your battery juiced up safely and effectively. Let’s dive in and learn how to properly charge a car battery with confidence!
What Does “Charging a Car Battery” Really Mean?
When we talk about how to properly charge a car battery, we’re really talking about reversing a chemical reaction. A car battery, usually a lead-acid type, generates electricity through a chemical process that changes lead and sulfuric acid into lead sulfate and water. As your battery discharges (powers your car), this process happens. When you charge it, you’re sending an electrical current back into the battery, which reverses the chemical reaction, turning the lead sulfate back into lead and sulfuric acid, ready to provide power again.
This process is crucial because it restores the battery’s ability to hold a charge, ensuring it can reliably start your engine and power your car’s electrical systems. A proper charge helps extend the battery’s life and maintains its overall health.
Why You Might Need to Charge Your Car Battery
There are several common reasons why you might find yourself needing to properly charge a car battery. Understanding these can help you prevent future issues:
- Left Lights On: Accidentally leaving headlights or interior lights on overnight is a classic culprit.
- Infrequent Driving: Cars that sit unused for long periods can develop discharged batteries. The car’s electrical systems still draw a small amount of power, slowly draining the battery.
- Short Trips: If you only drive short distances, your alternator might not have enough time to fully recharge the battery after starting the engine.
- Cold Weather: Extreme cold can reduce a battery’s capacity and thicken its internal fluids, making it harder for the battery to deliver power.
- Failing Alternator: Sometimes, the problem isn’t the battery itself, but the alternator, which is responsible for charging the battery while the car runs. If it’s not working, your battery won’t get topped up.
- Aging Battery: Batteries don’t last forever. As they age, their ability to hold a charge diminishes, making them more prone to going flat.
Knowing the “why” helps you understand when a simple charge will fix the problem, or if you might need to look deeper into your car’s electrical system.
Understanding Your Car Battery and Charger
Before you jump into how to properly charge a car battery, it’s really important to know a little about your battery and the charger you’ll be using.
Car Battery Types
Most car batteries are 12-volt lead-acid batteries, but they come in different variations:
- Flooded (Wet Cell): These are the most common type. They contain liquid electrolyte, which you can sometimes top off with distilled water.
- AGM (Absorbed Glass Mat): These batteries use glass mats to hold the electrolyte. They are sealed, maintenance-free, and more resistant to vibration.
- Gel Cell: Similar to AGM, but they use a gelled electrolyte. They are also sealed and maintenance-free.
It’s vital to use a charger compatible with your battery type, especially for AGM and Gel batteries, which can be damaged by incorrect charging profiles.
Types of Battery Chargers
Not all chargers are created equal. Here are the main types:
- Trickle Chargers: These deliver a low, steady current over a long period. Great for maintaining a charge on stored vehicles, but slow for deeply discharged batteries.
- Smart (Automatic) Chargers: These are the most recommended. They can detect the battery’s voltage and condition, then adjust the charging rate as needed. They often have multiple stages (desulfation, bulk, absorption, float) and prevent overcharging.
- Manual Chargers: These require you to monitor the charging process closely, as they don’t automatically shut off. They can easily overcharge and damage a battery if left unattended.
- Jump Starters: While they give a quick burst of power to start a car, they aren’t meant for fully charging a battery. They just provide enough power to get the engine running so the car’s alternator can take over.
For safely learning how to properly charge a car battery, a smart charger is usually your best bet.
Safety First: Essential Precautions Before You Begin
Working with car batteries involves electricity and corrosive chemicals, so safety is absolutely paramount. Don’t skip these steps!
- Wear Protective Gear: Always put on safety glasses or goggles and acid-resistant gloves. Battery acid can cause serious burns.
- Ventilation is Key: Batteries can produce hydrogen gas, which is highly flammable and explosive. Always charge in a well-ventilated area, away from sparks, flames, or anything that could ignite it. Never charge in an enclosed garage without opening doors and windows.
- Turn Everything Off: Make sure your car’s ignition is off, and all accessories (lights, radio, etc.) are turned off before you start.
- Remove Jewelry: Metal jewelry can conduct electricity and cause severe burns or short circuits. Take off rings, watches, and bracelets.
- No Smoking: Absolutely no smoking or open flames near the battery during charging.
- Read Your Charger’s Manual: Every charger is a bit different. Always read and follow the manufacturer’s specific instructions.
Taking these precautions seriously makes the process of how to properly charge a car battery much safer.
Step-by-Step Guide: How to Properly Charge a Car Battery
Okay, let’s get into the nitty-gritty of how to properly charge a car battery. Follow these steps carefully:
Step 1: Preparation is Everything
- Park Safely: Park your car on a level surface in a well-ventilated area, away from anything flammable. Engage the parking brake.
- Turn Off Engine and Accessories: Ensure the car’s engine is off and all electrical accessories are switched off. Remove the key from the ignition if possible.
- Locate the Battery: Most batteries are under the hood, but some are in the trunk or under the back seat. Consult your car’s owner’s manual if you can’t find it.
- Clean Terminals (If Needed): If you see any corrosion (a white or bluish powdery substance) on the battery terminals, gently clean it off with a wire brush and a mixture of baking soda and water. Rinse with clean water and dry thoroughly. Corroded terminals can prevent a good electrical connection.
Step 2: Connecting the Charger
- Identify Terminals: Locate the positive (+) terminal (usually red, with a plus sign) and the negative (-) terminal (usually black, with a minus sign).
- Connect Positive Clamp: Attach the red (+) clamp from the charger to the positive (+) battery terminal. Make sure it’s a tight, secure connection.
- Connect Negative Clamp: Attach the black (-) clamp from the charger to an unpainted, metal part of the car’s frame or engine block, away from the battery and fuel lines. This is crucial for safety to prevent sparks near the battery, which could ignite hydrogen gas. Do not connect the negative clamp directly to the negative battery terminal unless specifically instructed by your charger’s manual for certain applications, or if the battery is removed from the car.
Step 3: Setting the Charger
- Plug in the Charger: Only after both clamps are securely connected, plug the battery charger into an electrical outlet.
- Select Settings: If your charger has settings for voltage (e.g., 6V, 12V) or battery type (e.g., standard, AGM, Gel), select the correct ones for your car battery. For most modern cars, it’ll be 12V. If there’s a charge rate setting (e.g., 2A, 10A), a lower amp setting is generally safer for a slower, deeper charge, especially for smaller batteries or if you have plenty of time. A higher amp setting will charge faster but can generate more heat.
- Start Charging: Turn on the charger. Many smart chargers will automatically begin a diagnostic and charging cycle.
Step 4: Monitoring the Charge
- Observe and Wait: Allow the charger to do its work. Keep an eye on the charger’s indicator lights or display. A smart charger will typically show progress and indicate when the charge is complete (often with a “full” or “float” mode light).
- Check Periodically: If you’re using an older, manual charger, you’ll need to periodically check the battery’s voltage with a multimeter to avoid overcharging. A fully charged 12V car battery should read around 12.6 to 12.8 volts.
- Ventilation: Ensure the area remains well-ventilated throughout the charging process.
Step 5: Disconnecting Safely
- Turn Off Charger: Once the battery is fully charged (as indicated by your smart charger or multimeter reading), turn off the battery charger before disconnecting anything.
- Remove Negative Clamp: First, disconnect the black (-) clamp from the car’s frame or engine block.
- Remove Positive Clamp: Next, disconnect the red (+) clamp from the positive battery terminal.
- Store Charger: Coil the charger cables neatly and store your charger in a dry, safe place.
And that’s how to properly charge a car battery! You’re now ready to start your car.
How Long Does It Take to Charge a Car Battery?
The time it takes to properly charge a car battery can vary quite a bit. It depends on several factors:
- Battery’s State of Discharge: A deeply discharged battery will naturally take much longer to charge than one that’s only slightly drained.
- Battery Capacity (Ah): Larger batteries (higher Amp-hour rating) require more energy to charge fully.
- Charger’s Amperage (A): A charger with a higher amperage output will charge the battery faster than a lower-amperage one. For example, a 10-amp charger will charge faster than a 2-amp “trickle” charger.
- Battery Type: Some battery types (like AGM) can accept a charge faster than traditional flooded batteries, though charging too quickly isn’t always best for battery health.
As a general rule of thumb, you can estimate the charging time using this formula: (Battery Ah / Charger Amps) x 1.25 = Hours to Charge. The 1.25 factor accounts for charging inefficiencies. For instance, a 50 Ah battery with a 10-amp charger would take approximately (50 / 10) x 1.25 = 6.25 hours from completely dead to full. However, smart chargers adjust their rate, so this is just a rough estimate.
For a battery that’s just a bit low, a smart charger might finish in a few hours. For a completely dead battery, it could take anywhere from 8 to 24 hours or even more on a lower-amp charger.
Common Mistakes to Avoid When Charging a Car Battery
Knowing how to properly charge a car battery also means knowing what *not* to do. Avoiding these common mistakes will help you charge safely and effectively:
- Ignoring Safety Gear: Skipping safety glasses or gloves is a huge risk. Battery acid and explosive gases are no joke.
- Poor Ventilation: Charging in a closed space without airflow allows hydrogen gas to build up, creating an explosion hazard.
- Incorrect Connection Order: Connecting the charger to the wall outlet before connecting to the battery, or disconnecting in the wrong order, can cause dangerous sparks. Always connect clamps first, then plug in; unplug charger, then disconnect clamps.
- Connecting Negative to Negative Terminal (on car): Unless the battery is out of the car or your manual says otherwise, always connect the negative clamp to a ground point on the car chassis. Connecting directly to the negative terminal on the battery can cause a spark right where hydrogen gas might be present.
- Using the Wrong Charger Settings: Applying 6V to a 12V battery, or using the wrong battery type setting (e.g., flooded for an AGM), can damage the battery or prevent a full charge.
- Overcharging: Especially with manual chargers, leaving a battery on charge for too long can boil off the electrolyte, warp plates, and permanently damage the battery. Smart chargers largely prevent this, but it’s still good to monitor.
- Charging a Damaged Battery: If your battery is visibly cracked, leaking, or severely swollen, do not attempt to charge it. It’s unsafe and likely beyond repair.
- Charging a Frozen Battery: Never charge a frozen battery. It can explode. Let it thaw completely in a warm place first.
Tips for Maintaining Your Car Battery’s Health
Preventative care is often better than needing to know how to properly charge a car battery in an emergency. Here are some tips:
- Regular Driving: Drive your car regularly and for sufficient lengths of time (at least 20-30 minutes) to allow the alternator to fully recharge the battery.
- Clean Terminals: Keep battery terminals clean and free of corrosion. A thin layer of dielectric grease can help prevent future buildup.
- Check Electrolyte Levels (Flooded Batteries): For traditional flooded batteries, periodically check the electrolyte levels (if your battery allows access). Top up with distilled water if needed, never tap water.
- Insulate in Cold Weather: Battery insulation blankets can help protect your battery from extreme cold, which can drain its power.
- Use a Trickle/Smart Charger for Stored Cars: If you store your car for extended periods, connect it to a smart maintainer or trickle charger to keep the battery topped up.
- Test Annually: Have your battery tested by a professional at least once a year, especially as it ages. They can check its charge level and overall health.
Real-Life Scenarios: When to Charge vs. When to Call for Help
Knowing how to properly charge a car battery is a great skill, but sometimes, a charge just isn’t enough. Here are some situations:
- Scenario 1: You left your lights on.
Action: This is a perfect case for a proper battery charge. Follow the steps outlined in this guide. The battery is likely just drained, not damaged.
- Scenario 2: Your car has been sitting for months.
Action: Start by properly charging the battery. If it charges fully and holds a charge, great! If it struggles to hold a charge after a few days, it might be time for a replacement, as extended discharge can cause permanent damage.
- Scenario 3: Your car dies while driving.
Action: This usually isn’t just a dead battery; it often points to a failing alternator. Your car needs to be inspected by a mechanic, as charging the battery won’t fix the underlying problem.
- Scenario 4: Your battery looks swollen or is leaking.
Action: Do NOT attempt to charge it. This indicates severe internal damage and is a safety hazard. Call roadside assistance or a mechanic immediately to have it safely removed and replaced.
- Scenario 5: The battery charges but still won’t start the car, or starts very weakly.
Action: Even if it charges, the battery might have lost its capacity to deliver enough cranking amps. It’s likely time for a new battery. Other issues like a bad starter motor could also be at play, so professional diagnosis might be needed.
Frequently Asked Questions About Battery Charging
What’s the difference between charging and jump-starting?
Jump-starting provides a temporary surge of power from another vehicle or a jump pack to get your engine running. It doesn’t fully charge your battery; it just gives it enough juice for the alternator to take over. Charging, on the other hand, is a slower, deliberate process that fully replenishes the battery’s energy reserves.
Can I overcharge a car battery?
Yes, you can. Overcharging can lead to gassing, electrolyte loss (boiling), plate damage, and a shortened battery lifespan, especially with older, manual chargers. Modern smart chargers are designed to prevent overcharging by switching to a “float” or “maintenance” mode once the battery is full.
Is it okay to charge a battery while it’s still in the car?
Yes, it’s generally safe to charge a battery while it’s still in the car, provided you follow all safety precautions, especially ensuring good ventilation and connecting the negative clamp to a ground point on the chassis away from the battery. This minimizes the risk of sparks near the battery’s vent gases.
What are the signs of a fully charged battery?
A smart charger will usually indicate “full” or switch to a maintenance mode. If using a multimeter, a fully charged 12V lead-acid battery should read between 12.6 and 12.8 volts (after sitting for a few hours with no load). In flooded batteries, the electrolyte specific gravity might also be checked with a hydrometer.
When should I replace my car battery instead of charging it?
You should consider replacing your battery if it’s old (typically 3-5 years), struggles to hold a charge even after a full charge, shows visible signs of damage (swelling, leaks), or consistently tests as weak by a professional. If your car won’t start even after charging, or if it dies shortly after starting, replacement is often necessary.
Conclusion: Powering Up with Confidence
Learning how to properly charge a car battery is a fundamental skill for any car owner. It empowers you to tackle minor battery issues yourself, saving time and hassle. By understanding your battery, using the right charger, and meticulously following safety protocols, you can confidently bring your battery back to life.
Remember, always prioritize safety, follow the steps, and know when a charge is enough versus when professional help or a replacement battery is needed. With this knowledge, you’re now equipped to keep your car’s heart beating strong!