
Always prioritize safety and correct connection when attaching a trickle charger to your car battery to prevent hazards and ensure effective charging. Begin by connecting the red positive clamp to the battery’s positive terminal. Then, attach the black negative clamp to an unpainted metal part of the car chassis away from the battery (for negative ground systems) or directly to the negative terminal (for positive ground systems), before finally plugging the charger into an outlet.
Ever walked out to your car, ready to start your day, only to be met with that dreaded silence or a pathetic clicking sound? We’ve all been there. A dead car battery is more than just an inconvenience; it can throw a wrench into your entire schedule, leaving you feeling stranded and frustrated. While jump-starting is a common quick fix, it’s often a reactive solution to an ongoing problem.
What if there was a simple, proactive way to keep your car’s heart – its battery – healthy and fully charged, preventing those unwelcome surprises? That’s where a trickle charger comes into play. Think of it like a slow, steady IV drip for your battery, keeping it topped up without overfeeding it. It’s an incredibly useful tool, especially if you don’t drive your car every day, have a vehicle stored for the winter, or just want to extend your battery’s lifespan.
Connecting a trickle charger to your car battery might seem a bit intimidating at first glance, with all those wires and clamps. But don’t worry! It’s actually a straightforward process that anyone can master with a little guidance. In this comprehensive guide, we’ll walk you through every step, ensuring you can confidently and safely connect your trickle charger, giving your car battery the consistent care it deserves. Let’s get started and banish those dead battery blues for good!
Key Takeaways
- Prioritize Safety: Always wear safety glasses and ensure good ventilation.
- Identify Terminals: Clearly locate your car battery’s positive (+) and negative (-) posts.
- Attach Positive: Connect the red (+) charger clamp to the positive battery terminal first.
- Connect Negative: Secure the black (-) clamp to a metal chassis point, away from battery.
- Plug in Last: Only plug your trickle charger into the AC outlet once clamps are secure.
- Disconnect Safely: Unplug AC, then remove negative, then positive clamp in reverse order.
- Monitor Charging: Observe charger indicators; smart chargers manage battery health automatically.
Quick Answers to Common Questions
What’s the very first step to connecting my trickle charger?
Always connect the red positive (+) clamp of your trickle charger to the positive (+) terminal on your car battery first. Make sure you get a good, clean connection!
Where does the black negative clamp go when connecting a trickle charger?
After the red clamp, connect the black negative (-) clamp to a metal part of the car chassis away from the battery, or directly to the negative (-) battery terminal if your car manual specifies. This helps prevent sparks near the battery.
Do I need to disconnect my car battery before using a trickle charger?
Generally, no, you don’t need to disconnect your car battery before connecting a trickle charger. Modern trickle chargers are designed to be safely connected to a battery still in the vehicle.
What’s the correct order to connect and disconnect a trickle charger?
To connect your trickle charger, go positive first, then negative. To disconnect, reverse the order: always remove the negative clamp first, then the positive clamp to ensure safety.
Can I connect a trickle charger directly to the battery terminals every time?
While you can often connect both clamps directly to the battery terminals (positive to positive, negative to negative), connecting the negative clamp to a chassis ground point is often recommended for safety, especially in older vehicles, to minimize spark risk near battery gases. Always consult your car or trickle charger manual for the best practice!
📑 Table of Contents
- Why Your Car Battery Needs a Little TLC (and What a Trickle Charger Does)
- Essential Safety First: Before You Even Touch a Cable
- Gathering Your Gear: What You’ll Need for a Smooth Connection
- Step-by-Step Guide: Connecting Your Trickle Charger Like a Pro
- Understanding Your Trickle Charger: Features and Smart Habits
- Troubleshooting Common Issues and Pro Tips
Why Your Car Battery Needs a Little TLC (and What a Trickle Charger Does)
Your car battery is a hardworking component, but it’s not invincible. Even when your car is parked and turned off, its battery slowly loses charge. This is a natural process called self-discharge, and it’s compounded by what we call “parasitic drains” – tiny amounts of electricity used by things like your car’s clock, alarm system, or onboard computer memory. Over time, these small drains can add up, especially if your car sits for extended periods.
The Silent Killer: Battery Drain
Imagine your car sitting in the garage for a week, a month, or even longer. While you might think it’s completely off, those little electrical components are still drawing power. This constant, low-level drain can slowly deplete your car battery’s charge. A severely discharged battery can even suffer permanent damage, shortening its overall lifespan. This is particularly true for older batteries or in very cold weather, which further reduces battery efficiency.
Enter the Trickle Charger: Your Battery’s Best Friend
A trickle charger, often also called a battery maintainer or battery tender, is designed to provide a low, continuous charge to your car battery. Its primary job isn’t to rapidly recharge a completely dead battery – for that, you’d typically use a more powerful traditional car battery charger. Instead, a trickle charger maintains a healthy charge level, compensating for natural self-discharge and parasitic drains. It’s like having a dedicated nurse for your battery, ensuring it never gets too weak. This gentle charging prevents sulfation (a common cause of battery failure) and helps keep your battery in optimal condition, ready to start your car whenever you need it.
Trickle Charger vs. Fast Charger: Knowing the Difference
It’s important to understand that not all car battery chargers are the same. Knowing the difference between a trickle charger and a fast charger is key to proper battery care:
- Fast Chargers (Standard Chargers): These are designed to quickly replenish a significantly discharged battery. They deliver a higher amperage (e.g., 10-20 amps) and can recharge a battery in a few hours. However, using a fast charger for prolonged periods can overcharge and damage a battery, leading to gassing and overheating.
- Trickle Chargers (Maintainers): These are “smart” chargers that typically deliver a very low amperage (e.g., 1-3 amps). Modern trickle chargers, often called “smart chargers” or “battery maintainers,” go a step further. They monitor the battery’s voltage and current, automatically switching between charging and maintenance modes. This prevents overcharging, making them ideal for long-term connection without supervision. They are perfect for keeping a battery topped up in vehicles stored for weeks or months, such as classic cars, motorcycles, RVs, or even your daily driver during a long vacation.
Here’s a quick overview of charger types:
| Charger Type | Primary Purpose | Amperage Output | Key Feature |
|---|---|---|---|
| Standard/Fast Charger | Recharge dead/low battery quickly | High (5-20+ Amps) | Quick charging capability |
| Trickle Charger (Basic) | Slowly recharge; maintain charge | Low (0.5-3 Amps) | Consistent, low-rate charge |
| Smart Charger/Maintainer | Maintain charge long-term; prevent overcharge | Very Low (0.75-5 Amps) | Automatic monitoring and pulsing |
| Jump Starter | Provide immediate power to start | Very High (Instant Amps) | Portable, for emergency starts only |
Essential Safety First: Before You Even Touch a Cable
Safety should always be your top priority when working with car batteries and electrical equipment. Batteries contain corrosive acid and can produce explosive hydrogen gas, so a little caution goes a long way. Think of these steps as your pre-flight checklist for a safe connection.
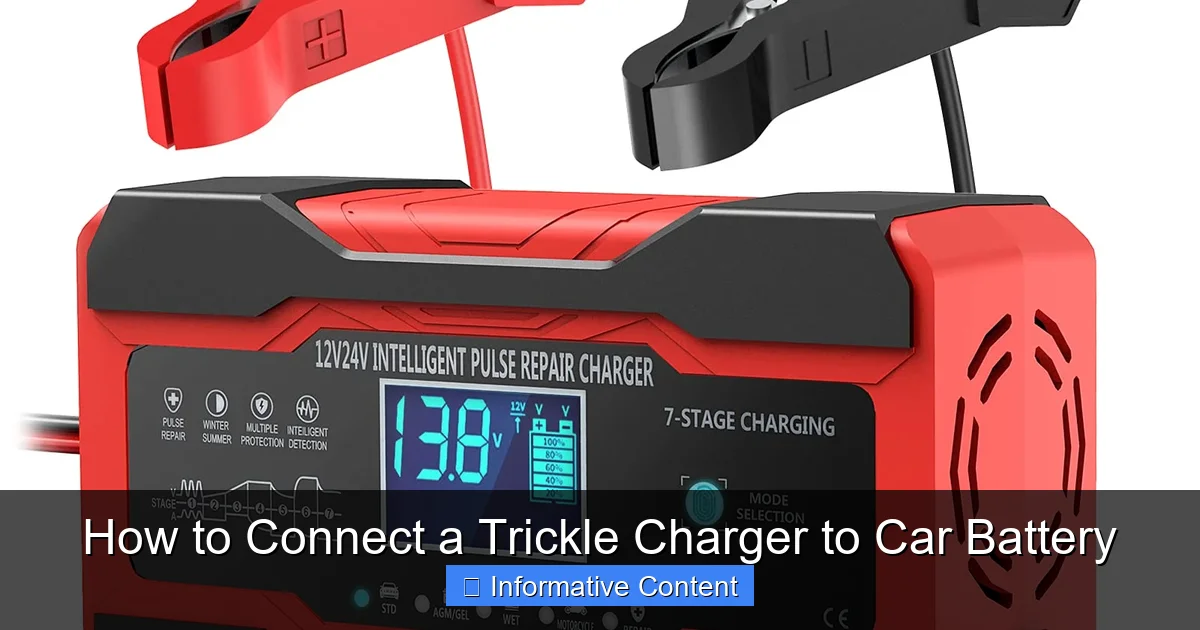
Visual guide about trickle charger car battery
Image source: m.media-amazon.com
Read Your Charger’s Manual
This might seem obvious, but it’s often overlooked! Every trickle charger is a little different. Your charger’s instruction manual contains specific warnings, operating procedures, and troubleshooting tips unique to your model. Take a few minutes to read through it carefully. It might specify unique connection points or modes that are essential for safe operation.
Ventilation is Key
Car batteries can release hydrogen gas, especially during charging. This gas is highly flammable and explosive. Always work in a well-ventilated area, preferably outdoors or in an open garage. Avoid working in confined spaces without good airflow. Open your garage door or work near an open window to ensure any gases disperse quickly.
Protective Gear: Your Personal Shield
Protecting yourself from potential hazards is crucial:
- Safety Glasses: Always wear eye protection. If battery acid splashes, it can cause severe eye damage.
- Gloves: Chemical-resistant gloves (like rubber or nitrile) will protect your hands from battery acid, which is highly corrosive.
- Avoid Metal Jewelry: Rings, watches, and bracelets can conduct electricity, potentially causing a short circuit if they accidentally touch the battery terminals. It’s best to remove them before you start.
- Appropriate Clothing: Wear old clothes that you don’t mind getting stained or damaged, just in case of acid splashes.
Identify Your Battery Type
Most modern cars use 12-volt lead-acid batteries, but knowing the specific type (e.g., standard flooded, AGM, Gel) is important because some chargers have specific settings for different battery chemistries. Your trickle charger manual will specify compatible battery types. Using the wrong setting can damage your battery. If unsure, a “standard” or “flooded” setting is usually safe for most conventional car batteries. Newer smart chargers often detect the battery type automatically.
Gathering Your Gear: What You’ll Need for a Smooth Connection
Before you begin the actual connection process, it’s helpful to have all your tools and supplies organized and within reach. This makes the job quicker, safer, and less stressful. Imagine trying to find a wrench with acid on your gloves – not fun!
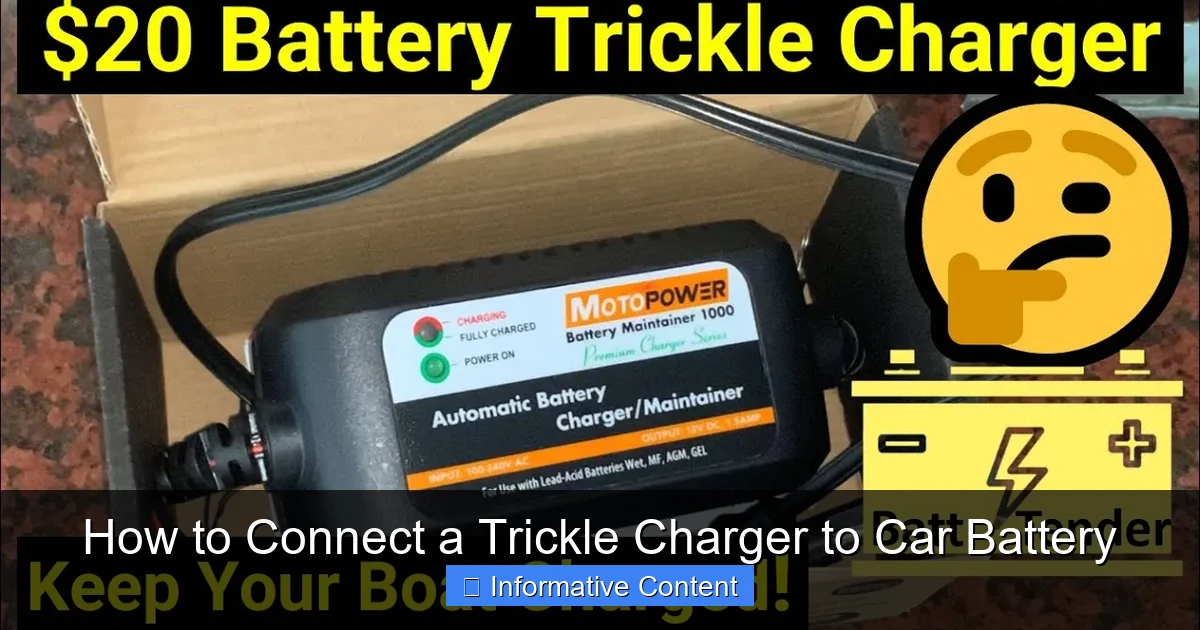
Visual guide about trickle charger car battery
Image source: i.ytimg.com
The Trickle Charger Itself
Obviously, you’ll need your trickle charger. Make sure it’s in good condition, with no frayed wires or damaged clamps. Ensure the power cord is long enough to reach an electrical outlet without needing extension cords (though a heavy-duty, outdoor-rated extension cord can be used if absolutely necessary, but directly plugging into an outlet is always better).
Basic Tools for Access
Depending on your car, you might need a few simple tools:
- Wrench or Socket Set: Some batteries are secured with a hold-down clamp, or their terminals might be covered by plastic caps that require a wrench to remove. Often, a 10mm or 13mm wrench is sufficient for battery terminal bolts, but check your car’s manual.
- Wire Brush or Battery Terminal Cleaner: Corrosion can build up on battery terminals, hindering a good electrical connection. A wire brush with stiff bristles is perfect for scrubbing away any white or bluish-green crusty buildup.
Cleaning Supplies
Keeping your battery terminals clean ensures a good connection and prolongs battery life.
- Baking Soda and Water Solution: A paste made from baking soda and water is excellent for neutralizing battery acid and cleaning corrosion. Mix about two tablespoons of baking soda with a cup of water.
- Old Rag or Paper Towels: For wiping away the cleaning solution and drying the terminals.
- Battery Terminal Protector Spray (Optional): After cleaning, a spray can help prevent future corrosion.
Step-by-Step Guide: Connecting Your Trickle Charger Like a Pro
Alright, you’ve got your gear, you’re wearing your safety glasses, and you’ve read the manual. Now comes the main event – connecting the trickle charger to your car battery. Follow these steps carefully, and you’ll be a pro in no time.
Step 1: Park Safely and Turn Off Everything
First things first, park your car on a level surface in a well-ventilated area. Make sure the parking brake is engaged, and the car is in “Park” (for automatic transmissions) or “Neutral” (for manual transmissions). Turn off your engine, headlights, radio, and any other accessories. Remove the key from the ignition to prevent any accidental electrical draws or surges during the connection process. Safety and preparedness are paramount!
Step 2: Locate and Prepare Your Battery
Pop your car’s hood. Your battery is usually under the hood, often on one side near the front. Some vehicles, especially newer ones, might have the battery located in the trunk, under the back seat, or even in a fender well. Consult your car’s owner’s manual if you can’t find it. Once located, identify the positive (+) and negative (-) terminals. The positive terminal is usually marked with a plus sign (+) and often has a red cap or cable. The negative terminal is marked with a minus sign (-) and usually has a black cable. If there’s any corrosion on the terminals, use your wire brush and baking soda solution to clean them thoroughly. A clean connection is a strong connection!
Step 3: Connect the Positive Clamp (Red to Red)
This is where the actual connection begins. Take the red (positive) clamp from your trickle charger. Connect it securely to your car battery’s positive (+) terminal. Make sure the clamp has a firm, direct grip on the terminal or the terminal post itself, not just on a cable leading away from it. A loose connection can generate heat and cause problems.
Step 4: Connect the Negative Clamp (Black to Ground)
Now, take the black (negative) clamp from your trickle charger. Do NOT connect it directly to the negative (-) terminal of the battery. This is a crucial safety step to prevent sparks near any potential hydrogen gas emanating from the battery. Instead, connect the black clamp to a clean, unpainted metal part of your car’s chassis or engine block. Look for a solid metal bolt, a bracket, or an unpainted frame component that is away from any moving parts, fuel lines, or hot exhaust manifolds. This provides a good “ground” connection for the electrical circuit. If your car battery is in the trunk or cabin, the manual will typically indicate a designated grounding point or you might be advised to use the negative battery terminal directly if the battery is sealed, but always check your specific car and charger manual for these exceptions.
Step 5: Plug in the Charger and Monitor
Once both clamps are securely connected (red to positive battery terminal, black to a metal ground on the car chassis), you can plug your trickle charger into a standard electrical outlet. Your charger should power on, and many modern smart chargers will have indicator lights that show the charging status (e.g., “charging,” “fully charged,” “maintain mode”). Leave the charger connected for as long as needed – trickle chargers are designed for long-term connection to maintain the battery’s health. Periodically check on the charger to ensure it’s operating correctly and that no warning lights are illuminated.
Step 6: Disconnecting When Done
When you’re ready to use your car or if you’ve decided the charging is complete, the disconnection process is the reverse of the connection process, with a similar emphasis on safety:
- Unplug the Charger: First, unplug the trickle charger from the electrical outlet.
- Remove the Negative Clamp: Next, remove the black (negative) clamp from the car’s chassis or ground point.
- Remove the Positive Clamp: Finally, remove the red (positive) clamp from the car battery’s positive (+) terminal.
- Secure and Close: Replace any terminal covers and close your car’s hood or access panel.
Understanding Your Trickle Charger: Features and Smart Habits
Connecting a trickle charger is just the first step. To truly get the most out of your battery care routine, it helps to understand some of the features modern chargers offer and adopt smart habits for battery longevity.
Beyond the Basics: Smart Chargers and Battery Maintainers
Today’s trickle chargers are often far more advanced than the basic models of yesteryear. These “smart chargers” or “battery maintainers” typically feature microprocessors that monitor your battery’s condition. They don’t just “trickle charge”; they cycle through various stages:
- Desulfation: Some chargers have a mode to break down sulfate crystals that can form on battery plates, especially in deeply discharged batteries. This can sometimes revive a battery that seems to be failing.
- Bulk Charging: Delivers a higher current to bring a deeply discharged battery up to about 80% charge.
- Absorption Charge: Gradually reduces current to bring the battery to 100% charge.
- Float/Maintenance Mode: Once fully charged, the charger switches to a “float” or “maintenance” mode. It provides tiny pulses of current as needed to keep the battery at its peak, without overcharging, making it safe for indefinite connection.
These intelligent features ensure your car battery receives optimal care, maximizing its lifespan and reliability.
Desulfation and Maintenance Modes
If your charger has a “desulfation” mode, it’s a great feature to use if your battery has been deeply discharged for a while. Sulfation is a common cause of battery failure, where lead sulfate crystals build up on the battery plates, reducing its capacity. Desulfation mode sends high-frequency pulses to break down these crystals. Maintenance mode, on the other hand, is what you want for long-term connection, ensuring the battery stays at its optimal charge without being overcharged or undercharged. Most smart chargers automatically switch to this mode once the battery is full.
How Often Should You Use It?
The frequency of trickle charger use depends on your driving habits and your car’s specific needs:
- Infrequent Drivers: If you only drive your car once a week or less, connecting a trickle charger whenever it’s parked can be highly beneficial.
- Seasonal Vehicles: For classic cars, motorcycles, RVs, or boats stored for several months, a battery maintainer is a must-have. It can stay connected continuously throughout the storage period.
- Modern Cars with High Parasitic Drains: Some luxury or high-tech vehicles have more electronics constantly drawing power. Even if you drive regularly, a trickle charger might be a good idea if your car sits for more than a few days at a time.
Generally, for long-term storage, a smart maintainer can be left connected indefinitely. For daily drivers, connecting it overnight once a week or every few days can help prolong battery life.
Troubleshooting Common Issues and Pro Tips
Even with the best intentions, you might run into a snag or two. Don’t worry, many common issues have simple solutions. Here are a few troubleshooting tips and some general advice for peak battery health.
“My Charger Isn’t Working!”
If your trickle charger isn’t showing any signs of life or isn’t charging, here’s what to check:
- Power Outlet: Is the outlet live? Try plugging in another appliance to confirm. Check for tripped circuit breakers.
- Charger’s Power Cord: Is it securely plugged into the wall and into the charger itself (if detachable)?
- Connections: Are the positive and negative clamps securely attached to the battery terminals and ground point? A loose connection is a very common culprit. Wiggle them gently to ensure a good grip.
- Corrosion: Have you cleaned the battery terminals? Corrosion can prevent a good electrical connection.
- Charger Fault: Some smart chargers have built-in diagnostics and might display an error code if there’s an issue with the battery or the charger itself. Consult your manual for code meanings.
- Battery Too Dead: Some very basic trickle chargers might not “kick on” if the battery voltage is extremely low (e.g., below 3-4 volts). A smart charger usually handles this better, but a completely dead battery might need a jump start or a more powerful charger to bring its voltage up slightly before a trickle charger can take over.
Battery Won’t Hold a Charge
If your battery seems fully charged after using the trickle charger but then quickly dies again, it might indicate a more serious issue:
- Old Battery: Car batteries typically last 3-5 years. If yours is older than that, it might simply be at the end of its life and unable to hold a charge effectively, even with a trickle charger.
- Alternator Problem: Your car’s alternator recharges the battery while you drive. If the alternator is failing, the battery won’t get enough charge, leading to repeated drain.
- Excessive Parasitic Drain: While a trickle charger handles normal parasitic drains, an excessive drain (e.g., a faulty interior light switch, a malfunctioning electronic module) can still overpower the charger or quickly drain the battery once the charger is disconnected. An automotive technician can diagnose this.
In these cases, the trickle charger is doing its job, but the underlying problem is with the battery or another part of your car’s electrical system.
Long-Term Storage Tips
If you’re storing a vehicle for an extended period, a trickle charger is invaluable. Here are a few extra tips:
- Clean Your Battery: Before storage, ensure the battery and terminals are clean and free of corrosion.
- Check Fluid Levels: For flooded lead-acid batteries, ensure the electrolyte levels are correct. If low, top up with distilled water (wear safety glasses!).
- Tire Pressure: While not directly battery-related, maintaining proper tire pressure prevents flat spots during long storage.
- Pest Control: If storing indoors, consider pest control to prevent rodents from chewing on wires.
Using a trickle charger regularly is a simple yet effective way to prevent the headaches of a dead battery and extend the life of your car’s power source. It’s a small investment in time and money that pays off in reliability and peace of mind.
There you have it! Connecting a trickle charger to your car battery is a straightforward process when you know the steps and prioritize safety. Remember, this isn’t just about jump-starting your car in an emergency; it’s about proactive maintenance, ensuring your battery stays healthy, strong, and ready to go whenever you are. By following these guidelines, you’re not just charging a battery; you’re investing in the longevity and reliability of your vehicle.
So, the next time you leave your car parked for an extended period, or even just for a few days, consider giving your battery that gentle, consistent love it deserves with a trickle charger. It’s a small habit that makes a huge difference in avoiding those unwelcome dead battery surprises and keeping you confidently on the road. Happy charging!
🎥 Related Video: How to Connect A Trickle Charger To Your Battery!
📺 RobMotive
The correct way to hook up a battery trickle charger. Great if you’re gonna be away for a while! #batterycharger #carbattery #howto …
Frequently Asked Questions
What is a trickle charger and why would I use one for my car battery?
A trickle charger provides a slow, steady current to your car battery, helping to maintain its charge over time. This is particularly useful for vehicles stored for extended periods or those driven infrequently, preventing battery discharge and extending its lifespan.
What are the basic steps to connect a trickle charger to a car battery?
First, ensure your car’s ignition is off and the charger is unplugged. Connect the red positive (+) clamp to the positive terminal of your car battery, then connect the black negative (-) clamp to the negative terminal or a grounded metal part of the car chassis away from the battery. Finally, plug in the charger.
Which battery terminal should I connect first when hooking up a trickle charger?
Always connect the red positive (+) clamp to the positive terminal of the car battery first. Then, connect the black negative (-) clamp to the negative terminal or, preferably, to a grounded metal part of the car’s chassis, away from the battery itself, to minimize spark risk.
Do I need to disconnect my car battery from the vehicle before connecting a trickle charger?
In most cases, it is not necessary to disconnect your car battery from the vehicle. Modern smart trickle chargers are designed to be safely connected while the battery remains in the car, monitoring the charge and preventing overcharging.
How long should I leave a trickle charger connected to my car battery?
If you’re using a modern “smart” or “maintainer” trickle charger, it can often be left connected indefinitely. These chargers automatically monitor the battery’s charge and switch to a maintenance mode once fully charged, preventing overcharging and keeping your car battery optimally conditioned.
Is it safe to leave a trickle charger connected to my car battery for extended periods?
Yes, it is generally safe to leave a modern, automatic trickle charger connected to your car battery for long durations, even weeks or months. These smart chargers are designed to cycle on and off as needed, maintaining the battery’s charge without overcharging it, which is ideal for stored vehicles.