Connecting a car battery safely requires careful attention to detail and a specific sequence. Always prioritize personal safety by wearing gloves and eye protection, then disconnect the negative terminal first from the old battery, followed by the positive. When connecting the new battery, reverse the order: positive terminal first, then negative, ensuring all connections are secure and corrosion-free for optimal performance.
How to Connect a Car Battery
So, your car battery has finally given up the ghost, or perhaps you’re performing routine maintenance. Whatever the reason, you’re faced with the task of replacing or connecting a car battery, and it can feel a little daunting. Wires, terminals, acid – it all sounds like a recipe for a bad day if you don’t know what you’re doing, right?
But don’t worry! Connecting a car battery is a perfectly manageable DIY task for most car owners, as long as you approach it with the right knowledge, tools, and a healthy respect for safety. This comprehensive guide will walk you through every step of how to connect a car battery, ensuring you do it correctly, safely, and without any hiccups. We’ll cover everything from preparing your workspace and yourself to the precise order of connecting the terminals and what to do once everything is hooked up.
By the end of this article, you’ll have the confidence and know-how to tackle this job like a pro. We’ll break down the process into easy-to-understand sections, complete with practical tips and common pitfalls to avoid. So, roll up your sleeves (but make sure you put on your safety gear first!), and let’s get your car powered up and ready to hit the road! Learning how to connect a car battery properly is a valuable skill for any driver.
Key Takeaways
- Safety First: Always wear appropriate personal protective equipment (PPE) like gloves and eye protection to prevent acid burns or electrical shocks when working with car batteries.
- Disconnect Negative First: When removing an old battery, always disconnect the negative (black) terminal first to prevent accidental short circuits and protect your vehicle’s electronics.
- Connect Positive First: When installing a new battery, always connect the positive (red) terminal first before the negative to maintain safety and prevent sparks.
- Cleanliness is Crucial: Ensure the battery tray, terminals, and cable clamps are free of dirt, rust, and corrosion for optimal electrical conductivity and to prevent future issues.
- Secure Connections: Double-check that all terminal connections are tight and secure. Loose connections can lead to poor performance, starting issues, and even damage to your car’s electrical system.
- Proper Disposal: Never dispose of an old car battery in regular trash. Take it to an automotive parts store, recycling center, or hazardous waste facility for proper, environmentally friendly recycling.
- Final Inspection: After connecting, perform a visual check for any loose wires, tools left in the engine bay, or anything that looks out of place before attempting to start the vehicle.
Quick Answers to Common Questions
Which terminal do you connect first when putting a car battery in?
When connecting a new car battery, you should always connect the positive (+) terminal first. This minimizes the risk of accidental short circuits or sparks.
Is it bad to connect the negative terminal first?
Yes, connecting the negative terminal first when installing a battery is generally considered unsafe. If your wrench slips and touches a grounded metal part of the car while you’re connecting the positive cable, it can cause a significant spark or short circuit.
What happens if you touch the positive and negative terminals at the same time?
Touching both terminals simultaneously with a metal object will create a direct short circuit, generating a large spark, intense heat, and potentially damaging the battery or causing an explosion. This is extremely dangerous.
Do I need to charge a new car battery before connecting it?
Most new car batteries come pre-charged and ready for installation. However, it’s a good idea to check the voltage with a multimeter before installing; if it’s below 12.6 volts, a trickle charge might be beneficial to ensure optimal initial performance.
What tools do I need to connect a car battery?
You’ll typically need safety glasses, heavy-duty gloves, a terminal wrench (often 10mm or 13mm), a wire brush for cleaning, and optionally a battery terminal protector spray and a battery puller strap.
📑 Table of Contents
Safety First: Essential Precautions
Before you even think about touching a wrench or a battery terminal, safety must be your absolute top priority. Car batteries contain sulfuric acid, produce explosive hydrogen gas, and can deliver a powerful electrical shock. Ignoring safety steps is not an option when you want to learn how to connect a car battery.
Gather Your Gear
Having the right tools and protective equipment readily available makes the job safer and smoother. Here’s what you’ll need:
- Safety Glasses or Goggles: Essential to protect your eyes from battery acid splashes or sparks.
- Heavy-Duty Gloves: Protect your hands from acid, grime, and sharp edges. Nitrile or rubber gloves are ideal.
- Terminal Wrench or Socket Set: Usually a 10mm or 13mm wrench/socket for battery terminals and hold-down clamps. An open-end wrench can work, but a ratcheting socket wrench is often easier.
- Wire Brush: For cleaning battery terminals and cable clamps.
- Battery Terminal Cleaner/Protector: A spray or grease that prevents corrosion.
- Baking Soda and Water Mixture: Keep a paste of baking soda and water handy to neutralize any spilled battery acid.
- New Car Battery: Ensure it’s the correct type and size for your vehicle.
- Battery Puller/Strap (Optional): Makes lifting the heavy battery easier and safer.
- Memory Saver (Optional but Recommended): A device that plugs into your car’s OBD-II port or cigarette lighter to maintain power to your car’s computer, preventing loss of radio presets, clock settings, and engine fault codes.
Prioritize Personal Safety
- Ventilation: Work in a well-ventilated area. Batteries release hydrogen gas, which is highly flammable and explosive.
- No Sparks or Flames: Absolutely no smoking, open flames, or sparks near the battery. Remove any jewelry, especially rings, which can conduct electricity and cause severe burns if they short-circuit the battery.
- Stable Surface: Ensure your car is on a flat, stable surface with the parking brake engaged.
- Turn Off Everything: Make sure the car’s engine is off, the ignition is off, and all accessories (radio, lights, etc.) are turned off before you begin.
Vehicle Safety Checks
A few quick checks on your vehicle are also important before you start to connect a car battery:
- Parking Brake: Engaged.
- Gear Selector: In “Park” (automatic) or “Neutral” (manual).
- Ignition Off: Keys out of the ignition is even better, if possible.
- Identify Terminals: Locate the positive (+) and negative (-) terminals. The positive terminal is usually larger and marked with a plus sign, often covered with a red cap. The negative terminal is smaller, marked with a minus sign, and typically has a black cap or no cap. Remember this for when you need to connect a car battery.
Disconnecting the Old Battery: The Critical First Step
Before you can learn how to connect a car battery, you first need to know how to safely disconnect the old one. This sequence is crucial to prevent short circuits and damage to your vehicle’s electrical system.
Locate the Battery and Terminals
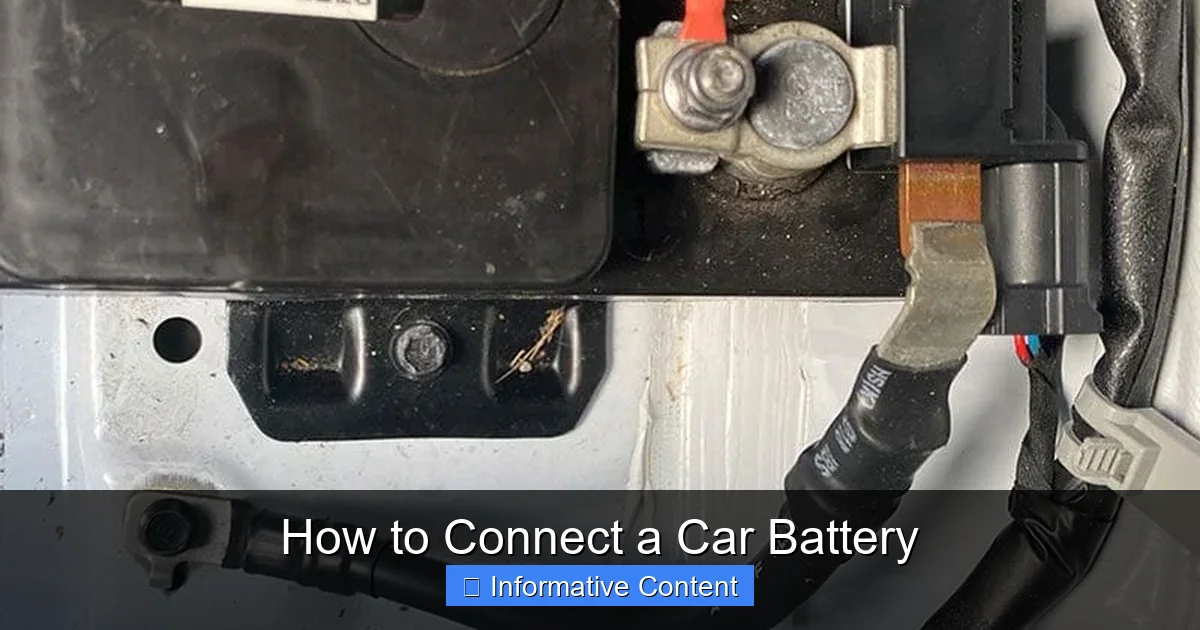
Most car batteries are found under the hood, but some vehicles place them in the trunk, under the rear seat, or even in the fender. Once located, identify the positive (red, +) and negative (black, -) terminals. This knowledge is fundamental for how to connect a car battery later on.

Visual guide about How to Connect a Car Battery
Image source: vehiclefreak.com
Disconnecting the Negative Terminal (Always First!)
This is arguably the most important step in the entire process of how to connect a car battery (or disconnect it). Using your terminal wrench or socket, loosen the nut on the negative (-) terminal clamp. It doesn’t need to be completely removed, just loose enough for the clamp to slide off the battery post. Once loose, carefully twist and pull the negative cable off the battery post. Move it away from the battery so it cannot accidentally come into contact with the positive terminal or any metal part of the car.
Why negative first? Disconnecting the negative cable first eliminates the ground path. If your wrench accidentally touches a metal part of the car while you’re disconnecting the negative, nothing will happen. If you were to disconnect the positive first, and your wrench touched a metal part of the car, it would create a direct short circuit to the battery’s negative terminal, resulting in sparks, potential damage to the wrench or battery, and even an explosion.
Disconnecting the Positive Terminal
Now that the negative cable is safely out of the way, you can proceed with the positive terminal. Loosen the nut on the positive (+) terminal clamp and carefully remove the cable from the post. Again, move it away from the battery so it doesn’t accidentally reconnect to anything.
Removing the Hold-Down Clamp
Most car batteries are secured in place by a hold-down clamp, which prevents them from moving around while driving. Locate this clamp (it might be a strap, a bar across the top, or a clamp at the base) and loosen or remove the bolts that secure it. Keep these parts safe as you’ll need them for the new battery.
Lifting Out the Old Battery
Car batteries are heavy, often weighing 30-60 pounds or more. Lift with your legs, not your back. If you have a battery puller or strap, use it. Carefully lift the old battery straight up and out of the battery tray. Place it on a stable surface, away from your work area. Remember, even a “dead” battery still contains acid and can pose a hazard.
Preparing for the New Battery
Before you rush to connect a car battery, a little preparation goes a long way in ensuring a long-lasting and reliable connection.
Clean the Battery Tray and Terminals
Inspect the battery tray where the old battery sat. It might have accumulated dirt, corrosion, or even some spilled battery acid. Use your wire brush to scrub away any rust or corrosion. If there’s acid residue (a white powdery substance), sprinkle it with baking soda to neutralize it, then rinse with water and dry thoroughly. A clean tray prevents future corrosion and ensures the new battery sits securely.
Also, take this opportunity to inspect the battery cable clamps. If they are heavily corroded, use your wire brush to clean the inside surfaces where they will make contact with the new battery posts. Clean, shiny metal ensures a good electrical connection when you connect a car battery.
Install the Hold-Down Clamp
Before placing the new battery, make sure the hold-down clamp is in position or ready to be installed. Some clamps attach to the battery base, which is easier to install before the battery is fully seated.
Connecting the New Battery: The Right Way
This is the moment you’ve been waiting for – learning how to connect a car battery correctly. The sequence here is just as critical as when disconnecting.
Positioning the New Battery
Carefully lift the new battery and place it into the clean battery tray. Ensure it’s seated firmly and correctly, with the positive (+) and negative (-) terminals facing the right direction to match your car’s cables. Secure the hold-down clamp or strap firmly, but don’t over-tighten, as you could crack the battery casing.
Connecting the Positive Terminal (Always First!)
Now, take the positive (+) cable (the red one) and place its clamp onto the positive battery post. Ensure the clamp is fully seated on the post. Using your terminal wrench, tighten the nut on the clamp until it’s snug and secure. The clamp should not be able to twist or move by hand. Be careful not to over-tighten, which can strip the threads or damage the battery post.
Why positive first when connecting? If you were to connect the negative first, the entire car’s chassis would be grounded. If your wrench then slipped while connecting the positive cable and touched any metal part of the car, it would create a direct short circuit, leading to sparks and potential danger. By connecting the positive first, the only part of the car that is currently live is the positive cable itself, reducing the risk of accidental shorts.
Connecting the Negative Terminal
Once the positive terminal is securely connected, take the negative (-) cable (the black one) and place its clamp onto the negative battery post. Ensure it’s fully seated. Tighten the nut on the clamp until it is snug and secure, just like you did with the positive terminal. Again, do not overtighten.
As you connect the negative terminal, you might notice a small spark. This is normal and usually nothing to worry about, as it’s the vehicle’s electrical system receiving power for the first time. If you see a large, continuous spark, immediately disconnect the negative cable and check for any tools or metal objects creating a short circuit.
Tighten and Secure
Once both terminals are connected, give them a gentle tug to confirm they are secure. Apply a battery terminal protector spray or grease to both terminals. This helps prevent corrosion, which can reduce battery life and performance. Double-check that all tools are clear of the engine bay and that nothing is resting on the battery.
Final Checks and Testing
You’ve learned how to connect a car battery, and it’s almost time to enjoy the fruits of your labor! But before you crank the engine, a few final checks are in order.
Inspect Everything
- Cable Routing: Ensure the battery cables are routed correctly and aren’t pinched or touching any hot or moving engine parts.
- Tools Removed: Double-check that all your wrenches, rags, and other tools are removed from the engine compartment. Leaving a tool behind can cause serious damage or safety hazards.
- Battery Secure: Confirm the battery hold-down clamp is tight and the battery cannot shift or move.
- Terminal Caps: If your battery came with protective caps for the terminals, put them on now (especially on the positive terminal) to prevent accidental shorts.
Start Your Engine
Now for the moment of truth! Get in your car, put the key in the ignition, and try to start it. It might take a crank or two longer than usual to start up the first time, especially if you didn’t use a memory saver, as the car’s computer might need to relearn some parameters. If the car starts successfully, let it run for a few minutes to allow the alternator to begin charging the new battery.
Troubleshooting Common Issues
- No Start/Clicking Sound: If the car doesn’t start or you only hear a rapid clicking sound, recheck your terminal connections. They might be loose or corroded. Also, check if your new battery came with enough charge. Some new batteries require an initial charge.
- Dashboard Lights Off: If there’s no power at all (no dash lights, no radio), double-check that the battery cables are connected correctly and securely to the battery terminals.
- Smoke or Burning Smell: Immediately turn off the car and disconnect the negative terminal. There might be a short circuit or an improperly routed wire. Do not attempt to restart until the issue is identified and resolved.
Maintenance Tips for a Longer Battery Life
Now that you know how to connect a car battery, you’ll want it to last as long as possible. A little ongoing care can significantly extend your battery’s lifespan.
Regular Cleaning
Periodically check your battery terminals for corrosion (that fuzzy blue or white substance). Clean it off using a wire brush and a baking soda/water paste. Rinse with clean water and dry thoroughly. Apply battery terminal protector after cleaning.
Check for Corrosion
Corrosion isn’t just unsightly; it impedes the flow of electricity, making your battery work harder and potentially shortening its life. Regular visual inspections can catch corrosion early.
Monitor Battery Charge
If your car sits for long periods, consider using a trickle charger or battery maintainer. This keeps the battery topped off and prevents it from discharging completely, which can cause permanent damage. Even modern cars draw a small amount of power when off, leading to slow discharge over time.
Conclusion
Congratulations! You’ve successfully navigated the process of how to connect a car battery, from safety precautions to the final engine start. This DIY skill is incredibly useful and can save you time and money. Remember, the key to a successful battery replacement lies in understanding the correct order of disconnection and connection (negative first off, positive first on), prioritizing safety at every step, and ensuring clean, secure connections. By following these guidelines, you’ll keep your vehicle’s electrical system healthy and your car reliably starting every time. Drive safely, and enjoy the peace of mind that comes with knowing you can handle this essential automotive task!
🎥 Related Video: Which car Battery Terminal to Disconnect First?
📺 Rx Mechanic
Frequently Asked Questions
How long does it take to connect a car battery?
For someone with basic mechanical skills, connecting a car battery usually takes about 15-30 minutes, assuming you have all the necessary tools and the old battery is easy to access. If you encounter significant corrosion or tricky hold-down clamps, it might take a bit longer.
Can I connect a car battery without special tools?
While you can often get by with basic wrenches, a dedicated battery terminal wrench is highly recommended. You’ll definitely need proper safety glasses and gloves to protect yourself from acid and electrical hazards, which are non-negotiable for this task.
What should I do with my old car battery?
Old car batteries contain hazardous materials and should never be thrown in regular trash. Most automotive parts stores, repair shops, and recycling centers will accept old batteries for proper recycling, often offering a core refund when you purchase a new one.
Why do my battery terminals keep corroding?
Corrosion is a common issue and can be caused by battery acid fumes reacting with the metal terminals or by overcharging. Ensuring the battery is securely held, the terminals are clean, and applying anti-corrosion spray after connection can help prevent it. Sometimes, a faulty charging system (alternator) can also contribute.
Do I need to reset anything in my car after connecting a new battery?
After disconnecting and reconnecting a car battery, you might need to reset certain vehicle systems. This can include radio presets, the clock, power window auto-up/down functions, and sometimes the car’s engine computer (ECU) may need to re-learn idle parameters. Driving the car for a short period usually helps the ECU re-learn.
What’s the difference between positive and negative terminals on a car battery?
The positive terminal (usually marked with a ‘+’ and often covered by a red cap) is the power output, while the negative terminal (marked with a ‘-‘ and often with a black cap or no cap) is the ground. The positive terminal connects to the car’s electrical system, and the negative terminal connects to the vehicle’s chassis, completing the circuit.