Learning how to charge a car battery at home is a valuable skill for any vehicle owner. This guide explains the process in detail, focusing on safety, the right equipment, and step-by-step instructions. You’ll discover how to safely revive a drained battery and keep it in good health, ensuring you’re prepared for unexpected power issues.
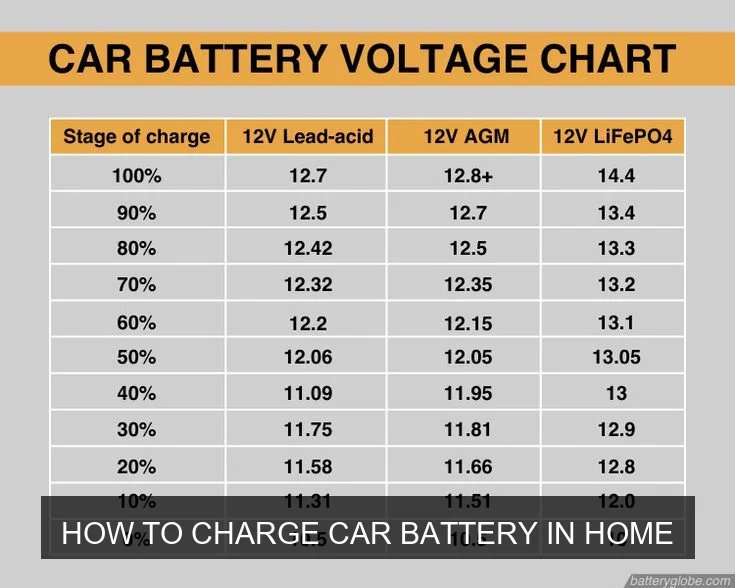
Image source: Pinimg
📋 Table of Contents
- 🔹 Introduction: Why Charging at Home Matters
- 🔹 What is Car Battery Charging and How Does it Work?
- 🔹 Why Would You Need to Charge Your Car Battery in Home?
- 🔹 Critical Safety Measures Before You Begin
- 🔹 Understanding Battery Chargers
- 🔹 Step-by-Step Guide: How to Charge Car Battery in Home
- 🔹 How Long Does it Take to Charge a Car Battery?
- 🔹 Common Mistakes to Avoid When Charging Your Battery
- 🔹 Tips for Maintaining Your Car Battery’s Health
- 🔹 When Not to Charge and When to Seek Professional Help
- 🔹 Frequently Asked Questions (FAQ)
- 🔹 Conclusion
To charge a car battery at home, you’ll need a suitable battery charger, safety gear like gloves and eye protection, and a well-ventilated area. After ensuring safety, connect the charger’s positive clamp to the battery’s positive terminal and the negative clamp to the negative terminal (or a good chassis ground point away from the battery). Set the charger according to its instructions and let it work, monitoring the process especially with manual chargers.
Introduction: Why Charging at Home Matters
There’s nothing quite like the sinking feeling of a car that won’t start. Often, the culprit is a dead battery. While jump-starting is a common solution, sometimes you need a more thorough charge. Knowing how to charge your car battery in home settings can save you time, hassle, and even some money. It’s a practical skill that empowers you to handle minor car troubles yourself.
This comprehensive guide will walk you through everything you need to know about home battery charging. We’ll cover why it’s important, the safety precautions you absolutely must take, the types of equipment involved, and a clear, step-by-step process to get your battery back in action. Our goal is to make this often intimidating task simple and straightforward, so you can confidently tackle it when the need arises.
What is Car Battery Charging and How Does it Work?
A car battery, typically a 12-volt lead-acid type, stores electrical energy that’s vital for starting your engine and powering your vehicle’s accessories when the engine isn’t running. When you charge a car battery, you’re essentially reversing the chemical reaction that occurs when it discharges. An external charger forces an electrical current back into the battery, converting chemical energy back into stored electrical energy.
This process replenishes the battery’s capacity, making sure it has enough power to crank the starter motor, which requires a significant burst of electricity. Think of it like refilling a water bottle after you’ve emptied it; you’re simply restoring its potential.
Why Would You Need to Charge Your Car Battery in Home?
There are several common scenarios where you might find yourself needing to charge your car battery from the comfort of your garage or driveway:
- Infrequent Driving: Cars that sit for long periods (weeks or months) can experience battery drain, as modern vehicles still draw a small amount of power for onboard computers and alarms.
- Leaving Lights On: Accidentally leaving headlights, interior lights, or even a door ajar can quickly drain a battery overnight.
- Cold Weather Effects: Cold temperatures reduce a battery’s capacity and thicken engine oil, making it harder for the starter to turn the engine over. This extra strain can deplete an already weak battery.
- Short Trips: If you only make short drives, your alternator might not have enough time to fully recharge the battery after starting the car. Over time, this leads to a chronically undercharged battery.
- Extending Battery Life: Regularly maintaining a full charge can actually help extend the overall lifespan of your car battery.
In all these situations, knowing how to charge a car battery in home safely and effectively becomes incredibly useful.
Critical Safety Measures Before You Begin
Working with car batteries and electricity demands respect and adherence to safety protocols. Batteries contain corrosive acid and produce flammable hydrogen gas, so caution is paramount. Never skip these steps!
- Ventilation is Key: Always charge batteries in a well-ventilated area. Garages with open doors or outdoor spaces are ideal. This helps disperse any hydrogen gas emitted, preventing it from accumulating and posing an explosion risk.
- Eye and Hand Protection: Wear safety glasses or goggles and acid-resistant gloves. Battery acid can cause severe burns and eye damage.
- No Smoking or Open Flames: Sparks, cigarettes, or any open flame can ignite hydrogen gas. Keep all ignition sources far away from the battery.
- Insulated Tools: Use tools with insulated handles to prevent accidental short circuits, which can cause sparks or even battery explosions.
- Check Battery Condition: Visually inspect the battery. If it’s cracked, leaking, or bulging, do NOT attempt to charge it. These are signs of internal damage, and charging could be dangerous. Seek professional help.
- Read Your Charger’s Manual: Every battery charger is different. Familiarize yourself with its specific instructions, safety features, and settings before use.
- Identify Battery Type: Most car batteries are 12-volt lead-acid. Ensure your charger is compatible with this type and voltage. Some modern cars might use AGM or Gel batteries, which may require specific charging profiles.
Understanding Battery Chargers
When you’re looking to charge your car battery in home, you’ll encounter a few different types of chargers. Understanding their basic functions will help you use them correctly:
Here’s a quick overview:
| Charger Type | General Function | Typical Usage |
|---|---|---|
| Standard (Manual) Charger | Delivers a constant current until manually disconnected. Requires monitoring. | Quick boost for deeply discharged batteries. |
| Smart (Automatic/Microprocessor-Controlled) Charger | Monitors battery’s charge level and adjusts output. Automatically stops charging when full. | General charging, long-term maintenance, safer for extended periods. |
| Trickle Charger | Delivers a very low, constant current over a long period. | Maintaining charge on infrequently used vehicles or stored batteries. Not for rapid charging. |
| Battery Maintainer | A type of smart charger that monitors the battery and provides a “float” charge to keep it topped off without overcharging. | Ideal for vehicles stored for months, like RVs, motorcycles, or classic cars. |
For most home charging needs, an automatic or smart charger is generally the easiest and safest to use, as it reduces the risk of overcharging.
Step-by-Step Guide: How to Charge Car Battery in Home
Once you’ve taken all safety precautions and understand your charger, you’re ready to begin. Follow these steps carefully:
Step 1: Preparation
- Park Safely: Ensure your car is parked on a flat, stable surface, with the engine off and the parking brake engaged.
- Open Hood: Open your car’s hood and locate the battery.
- Gather Tools: Have your battery charger, safety gear (gloves, eye protection), and a wire brush or battery terminal cleaner handy.
Step 2: Clean Battery Terminals (If Necessary)
Corrosion can prevent a good electrical connection. If you see white or blue fuzzy deposits on the terminals:
- Loosen the negative terminal clamp first, then the positive, using a wrench.
- Carefully remove the cables and set them aside where they won’t touch anything.
- Use a wire brush and a mixture of baking soda and water to clean the terminals and cable clamps. Rinse with plain water and dry thoroughly.
- Reconnect the positive cable first, then the negative. Tighten them securely.
Step 3: Connect the Charger to the Battery
This is a critical step for safety and effectiveness.
- Identify Terminals: Locate the positive (+) and negative (-) terminals on your car battery. The positive terminal is usually larger and marked with a plus sign, often with a red cap or cable. The negative terminal has a minus sign and a black cable.
- Connect Positive: Attach the red (positive) clamp from your charger to the positive (+) terminal of your battery. Ensure a solid connection.
- Connect Negative: Attach the black (negative) clamp from your charger.
- For batteries still in the vehicle: Connect the negative clamp to an unpainted, metal part of your car’s chassis or engine block, away from the battery and fuel lines. This helps prevent sparks near the battery, which could ignite hydrogen gas.
- For batteries removed from the vehicle: Connect the negative clamp directly to the negative (-) terminal of the battery.
Step 4: Connect Charger to Power and Set Settings
Only after the clamps are securely attached to the battery (or chassis) should you plug the charger into a wall outlet.
- Plug In: Plug your battery charger into a standard electrical outlet.
- Select Settings: If your charger has settings for voltage (e.g., 6V/12V) or amperage (e.g., 2A/10A), choose the appropriate ones. For most car batteries, you’ll select 12-volt. A lower amperage setting (e.g., 2-4 amps) is a slower, gentler charge that’s generally better for the battery’s long-term health, while a higher setting (e.g., 10-15 amps) will charge it faster.
- Start Charging: Turn on the charger. Many smart chargers will have indicator lights showing they are charging and when the process is complete.
Step 5: Monitor the Charging Process
What you need to do here depends on your charger type:
- Automatic/Smart Chargers: These generally monitor the battery and stop charging when full. You can often leave them connected for longer periods without worry of overcharging.
- Manual Chargers: You MUST monitor these chargers closely. Overcharging can damage the battery. Periodically check the battery’s voltage with a multimeter (a fully charged 12V battery should read around 12.6-12.8 volts). Disconnect when fully charged.
Step 6: Disconnect the Charger
Once the battery is fully charged (or you’ve reached your desired charge level):
- Turn Off Charger: First, turn off the battery charger.
- Unplug: Unplug the charger from the wall outlet.
- Remove Negative Clamp: Carefully remove the black (negative) clamp from the chassis or negative battery terminal.
- Remove Positive Clamp: Remove the red (positive) clamp from the positive battery terminal.
- Close Hood: Securely close your car’s hood.
You’re now ready to start your vehicle!
How Long Does it Take to Charge a Car Battery?
The time it takes to fully charge a car battery depends on several factors:
- Battery Size (Amp-Hours): Larger batteries (higher Amp-Hour rating) take longer to charge.
- Depth of Discharge: A completely dead battery will take significantly longer than one that’s only partially drained.
- Charger Amperage: A charger rated for higher amps (e.g., 10A) will charge faster than one with lower amps (e.g., 2A).
Here’s a general idea:
- Slightly Discharged (e.g., from leaving lights on for an hour): 2-4 hours with a 10A charger.
- Moderately Discharged (e.g., from a few short trips): 4-8 hours with a 10A charger, or 8-12 hours with a 4A charger.
- Deeply Discharged/Dead: 12-24 hours or even more with lower amperage chargers (2-4A). It’s often safer to use a lower amp setting for deeply discharged batteries to prevent overheating.
Smart chargers will typically indicate when the charge cycle is complete, making this easier to manage.
Common Mistakes to Avoid When Charging Your Battery
Even with a clear guide, it’s easy to make small errors. Being aware of these common mistakes can prevent problems:
- Ignoring Safety Gear: Skipping eye protection or gloves is a serious risk. Battery acid and explosive gases are no joke.
- Wrong Polarity: Connecting the positive and negative clamps incorrectly (reversing polarity) can damage your battery, charger, and even your car’s electrical system. Always double-check!
- Overcharging: Especially with manual chargers, leaving a battery on charge for too long at a high rate can boil off the electrolyte, warp plates, and permanently damage the battery. Smart chargers largely prevent this.
- Charging a Damaged Battery: Trying to charge a cracked, leaking, or bulging battery is extremely dangerous and can lead to an explosion.
- Poor Ventilation: Charging in an enclosed space allows hydrogen gas to build up, creating an explosion hazard.
- Not Cleaning Terminals: Corrosion acts as an insulator, preventing a good connection and efficient charging.
- Using the Wrong Charger: Make sure your charger is suitable for a 12-volt lead-acid battery if that’s what your car uses. Some specific battery types (like lithium-ion) require completely different chargers.
Tips for Maintaining Your Car Battery’s Health
Charging your battery is one thing, but maintaining its health is another. Here are some tips to help extend its life:
- Keep Terminals Clean: Regularly check for and clean any corrosion on your battery terminals.
- Check Fluid Levels (If Applicable): For traditional flood-cell batteries (non-sealed), periodically check the electrolyte levels and top up with distilled water if needed. Always consult your car’s manual.
- Drive Regularly: Short trips don’t allow your alternator enough time to fully recharge the battery. Take longer drives periodically to ensure it gets a full charge.
- Limit Accessory Use When Engine is Off: Avoid using the radio, lights, or charging devices extensively when the engine isn’t running.
- Consider a Battery Maintainer: If you store your car for extended periods, a battery maintainer (often called a trickle charger) can keep it topped off without overcharging, preventing deep discharge.
- Insulate in Cold Weather: In extremely cold climates, a battery blanket or insulating cover can help the battery retain its charge and capacity.
When Not to Charge and When to Seek Professional Help
While knowing how to charge a car battery in home is a great skill, there are times when it’s better to step back and let a professional handle it.
- Physical Damage: If your battery has visible cracks, leaks, bulging, or strong sulfur smell, do not attempt to charge it. These are signs of internal damage that could lead to an explosion.
- Battery is Very Old: Car batteries typically last 3-5 years. If yours is beyond that, even a full charge might only be a temporary fix. It’s likely nearing the end of its life.
- Repeated Dead Batteries: If your battery keeps dying even after a full charge, it might indicate a more serious underlying issue, such as:
- A failing alternator (not charging the battery while you drive).
- A parasitic drain (something in your car is constantly drawing power when it shouldn’t be).
- A faulty starter motor.
In these cases, a mechanic can diagnose the root cause.
- Sulfation: If a battery has been deeply discharged for a long time, hard sulfate crystals can form on the plates, making it difficult or impossible for the battery to accept a charge. While some specialized chargers have “desulfation” modes, severe cases may require replacement.
Frequently Asked Questions (FAQ)
Is it safe to charge a car battery in my garage?
Yes, it’s generally safe to charge a car battery in your garage, provided you ensure proper ventilation. Keep the garage door open, or charge near an open window to allow any hydrogen gas to dissipate. Always follow all other safety precautions like wearing eye protection and gloves, and avoiding open flames or sparks.
Can I overcharge a car battery at home?
Yes, it is possible to overcharge a car battery, especially with older, manual chargers. Overcharging can boil off the battery’s electrolyte, cause internal damage, and significantly shorten its lifespan. Modern “smart” or automatic chargers are designed to prevent overcharging by monitoring the battery and automatically reducing or stopping the current once it’s fully charged.
What kind of charger should I use for home charging?
For most home charging needs, an automatic (or “smart”) 12-volt battery charger or maintainer is recommended. These chargers are user-friendly, monitor the battery’s state, and automatically adjust the charging process to prevent overcharging, making them safer and more convenient for beginners.
How often should I charge my car battery if I don’t drive much?
If you don’t drive your car often (e.g., once a week or less), it’s a good idea to connect it to a battery maintainer periodically, perhaps once a month, or continuously if the car is stored for a long time. This will keep the battery topped off and prevent deep discharge, which can extend its life.
What are the signs of a fully charged car battery?
A fully charged 12-volt car battery will typically read around 12.6 to 12.8 volts with a multimeter when the engine is off and the battery has rested for a few hours. Many smart chargers also have indicator lights (often green or “charged”) that signal when the charging cycle is complete.
Conclusion
Knowing how to charge your car battery in home settings is a tremendously useful skill that every car owner can benefit from. It’s a proactive way to avoid being stranded and helps you maintain your vehicle’s essential components. By prioritizing safety, understanding your equipment, and following the correct steps, you can confidently bring a drained battery back to life.
Remember, while home charging is effective for routine issues, it’s also important to recognize when a battery is beyond simple charging and requires professional attention. Always keep safety at the forefront of your mind, and you’ll be well-equipped to handle those unexpected battery woes.