Safety is paramount when attaching a battery charger: ensure your car is off and wear protective gear. Connect the red positive clamp to the battery’s positive terminal first, then the black negative clamp to the negative terminal or a chassis ground point away from the battery to prevent sparks. Finally, double-check secure connections and appropriate charger settings before powering on to safely replenish your battery.
How to Attach a Battery Charger to a Car Battery Step by Step
Ah, the dreaded click-click-click of a dead car battery. We’ve all been there, haven’t we? You hop into your car, ready to start your day or embark on an adventure, turn the key, and… nothing. Or maybe just a weak, struggling cough from the engine before it gives up entirely. It’s a moment that can send a wave of panic, frustration, and even a little bit of helplessness washing over you. Especially if you’re not entirely sure what to do next. The thought of dealing with car batteries, with their mysterious terminals and ominous warnings, can feel like navigating a minefield.
But what if I told you that getting your car battery back to life, or even just maintaining it to prevent future flatlines, is much simpler than it seems? You don’t need to be a seasoned mechanic or possess a secret handshake with automotive gurus. With the right guidance, knowing how to attach a battery charger to a car battery is a skill anyone can master. It’s about demystifying the process, understanding a few basic safety rules, and following a straightforward sequence of steps. Think of me as your friendly guide, walking you through it as if we were tackling this together in your garage.
Learning to properly connect a battery charger not only empowers you to handle unexpected battery issues but also gives you the confidence to perform routine maintenance that can significantly extend your battery’s life. No more waiting for roadside assistance for a simple fix, and no more unnecessary battery replacements because of neglect. By the end of this comprehensive guide, you’ll be well-equipped with the knowledge and confidence to safely and effectively attach a battery charger to a car battery whenever the need arises. Let’s get your car, and your peace of mind, powered up!
Key Takeaways
- Prioritize Safety: Always wear eye protection and gloves.
- Identify Terminals: Locate positive (+) and negative (-) battery posts clearly.
- Connect Positive First: Attach the red (+) clamp to the positive battery terminal.
- Connect Negative Safely: Attach the black (-) clamp to the engine block or negative post.
- Plug-in Charger Last: Connect the charger to an AC power outlet only after clamps are secure.
- Ensure Ventilation: Always charge your car battery in a well-ventilated area.
- Disconnect Safely: Remove AC power, then negative, then positive clamps.
Quick Answers to Common Questions
Which terminal goes first when attaching a battery charger?
Always connect the positive (red) clamp of your battery charger to the battery’s positive (+) terminal first. Then, attach the negative (black) clamp to a metal part of the car chassis away from the battery, or to the negative terminal if your specific battery charger manual allows.
Should my car be on or off when I connect the battery charger?
Your car must be completely off, with the ignition removed and all accessories turned off, before you connect your battery charger. This ensures safety and prevents any potential damage to your vehicle’s electronics.
What’s the safest way to connect a battery charger to avoid sparks?
To minimize sparks, connect the positive (red) clamp first, then the negative (black) clamp to a good chassis ground away from the battery. Always use your battery charger in a well-ventilated area, and ensure the clamps never touch each other.
Can I connect both clamps directly to the battery terminals with my battery charger?
While some advanced smart battery chargers permit connecting both clamps directly, it’s generally safer to attach the negative (black) clamp to a metal ground point on the car’s chassis, away from the battery itself. This reduces the risk of sparking near the battery’s gases.
How do I know if I’ve connected my battery charger correctly?
Before plugging in your battery charger, confirm the red positive clamp is on the positive (+) terminal and the black negative clamp is on a proper ground point or the negative (-) terminal. Many modern battery chargers will indicate a correct connection or warn of reverse polarity once you power them on.
📑 Table of Contents
- Understanding Your Car Battery and Charger
- Safety First: Essential Precautions Before You Begin
- Step-by-Step Guide: How to Attach a Battery Charger to a Car Battery
- Common Charging Scenarios and Practical Tips
- Data Table: Charger Type Comparison
- Advanced Tips and Best Practices for Battery Care
- Conclusion
Understanding Your Car Battery and Charger
Before we dive into the nitty-gritty of how to attach a battery charger to a car battery, it’s really helpful to get acquainted with the stars of our show: your car battery and the various types of chargers out there. Knowing a little about them will make the whole process much clearer and safer.
Types of Car Batteries You Might Encounter
Most cars on the road today use 12-volt lead-acid batteries, but even within that category, there are a few variations:
- Conventional (Flooded) Lead-Acid: These are the traditional batteries that often have removable caps, allowing you to check and top off the electrolyte levels with distilled water. They are generally robust but require a bit more maintenance.
- Maintenance-Free Lead-Acid: Similar to conventional but sealed, meaning you can’t access the electrolyte. They are, as the name suggests, lower maintenance but can still die if not properly cared for.
- AGM (Absorbed Glass Mat) Batteries: These are a step up, often found in newer cars with start-stop technology or in high-performance vehicles. The electrolyte is absorbed in fiberglass mats, making them spill-proof, vibration-resistant, and better performers in extreme temperatures. They also charge faster and last longer.
- Gel Cell Batteries: Less common in cars, these use a gelled electrolyte, making them completely spill-proof and resistant to deep discharges. They require specific charging profiles.
Most standard car battery chargers are designed for 12-volt lead-acid batteries, but some premium models offer settings for AGM and Gel cells. Always check your battery type and charger compatibility!
Exploring Different Battery Chargers
Just like there are different batteries, there’s a charger for every need when you want to attach a battery charger to a car battery:
- Trickle Chargers: These deliver a low, constant current (usually 1-2 amps) over a long period. They’re excellent for maintaining a fully charged battery during long-term storage, preventing self-discharge. They won’t quickly revive a dead battery but are gentle.
- Smart or Automatic Chargers (Battery Maintainers): These are incredibly popular because they’re “set it and forget it.” They use multi-stage charging, meaning they can analyze the battery’s state, charge it optimally, and then switch to a maintenance mode (like a trickle charger) to keep it topped off without overcharging. Many also have desulfation modes to help recover slightly damaged batteries.
- Rapid Chargers (Manual Chargers): These deliver a higher current (10 amps or more) to quickly boost a dead battery. However, they require careful monitoring because they can overcharge and damage a battery if left unattended. Not recommended for long-term use or for beginners.
- Portable Jump Starters: While not technically chargers, these compact devices often contain a small battery and jumper cables. They’re designed to give your car a quick boost to start the engine, but they don’t fully charge your battery. You’ll still need a charger afterward.
Why Charging is Important Beyond Just Starting Your Car
Regularly charging or maintaining your battery isn’t just about preventing that dreaded dead battery scenario. It’s crucial for:
- Extending Battery Life: Batteries prefer to be fully charged. Letting them sit at a low state of charge, especially in extreme temperatures, significantly shortens their lifespan.
- Reliability: A healthy, fully charged battery ensures your car starts reliably every time, reducing stress and inconvenience.
- Optimal Performance: Modern cars rely heavily on electrical systems. A strong battery ensures all these components – from your infotainment system to your engine sensors – receive adequate power.
Now that we’ve got a handle on the basics, let’s move on to the most critical aspect: safety!
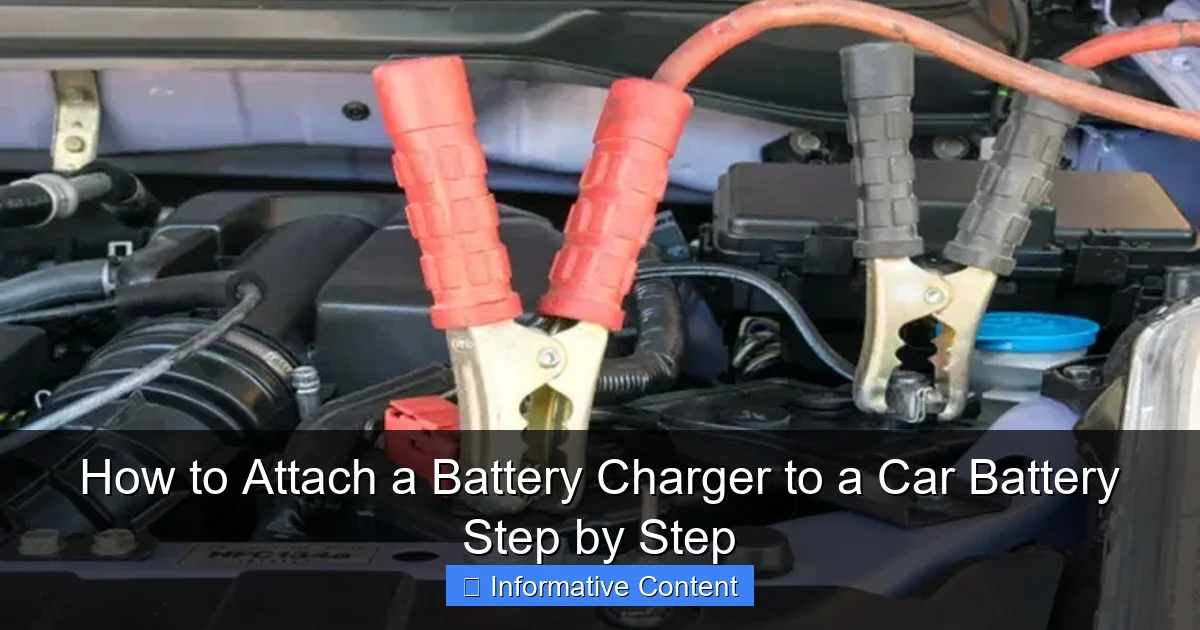
Safety First: Essential Precautions Before You Begin

Visual guide about attach battery charger to car battery
Image source: m.media-amazon.com
Okay, friend, before we even think about how to attach a battery charger to a car battery, we absolutely have to talk about safety. This isn’t just good advice; it’s non-negotiable. Car batteries, while incredibly useful, store a lot of energy and contain corrosive acids and produce flammable gases. A little caution goes a long way in preventing accidents, injuries, or damage.
Protect Yourself: Personal Protective Equipment (PPE)
Think of this as your personal armor for dealing with battery power:
- Safety Glasses or Goggles: This is arguably the most important piece of PPE. Batteries contain sulfuric acid, which can cause severe burns and permanent eye damage if splashed. Always, always wear eye protection.
- Gloves: Chemical-resistant gloves (like nitrile or rubber) protect your hands from battery acid and prevent you from getting grime on your skin.
- Avoid Jewelry: Rings, watches, and bracelets can conduct electricity. If they accidentally bridge battery terminals or touch a live circuit, they can cause a short circuit, resulting in severe burns or even welding the jewelry to the battery, which is a scary thought. Take them off!
- Wear Old Clothes: Battery acid can also eat through fabric, so choose clothing you don’t mind getting stained or damaged.
Secure Your Environment: Environmental Safety
The area where you work is just as important as your personal protection:
- Ventilation is Key: As batteries charge, they release hydrogen gas, which is highly flammable and explosive. Ensure you’re working in a well-ventilated area – ideally outdoors or in a garage with open doors and windows. Never charge a battery in a sealed space.
- No Sparks, Flames, or Smoking: Because of that hydrogen gas, any source of ignition can be dangerous. Keep cigarettes, lighters, open flames, and anything that could create a spark far away from the battery. This includes tools that might accidentally short-circuit.
- Stable Ground: Make sure your car is parked on a level surface, and the parking brake is engaged. If you need to raise the car, use jack stands – never rely solely on a jack.
- Unplug the Charger First: Always, always ensure your battery charger is unplugged from the AC power outlet before you connect or disconnect any of its clamps to the battery. Connecting or disconnecting live clamps can create sparks, which, as we just learned, is a big no-no.
- Keep Water and Baking Soda Handy: In case of accidental acid spills, baking soda can neutralize the acid. A bucket of water can also help dilute any splashes.
Inspect the Battery: Battery Specific Safety Checks
A quick visual check can reveal potential hazards:
- Check for Damage: Look for any cracks, bulges, or leaks on the battery casing. A damaged battery could be dangerous to charge and might need replacement.
- Fluid Levels (if applicable): If you have a conventional lead-acid battery with removable caps, check the electrolyte levels. If they are low, top them up with distilled water (not tap water!) to just above the plates before charging.
- Corrosion: A white or greenish powdery substance around the terminals is corrosion. While it’s common, excessive corrosion can impede charging and indicate a leak. We’ll address cleaning this soon.
Taking these precautions seriously makes the process of how to attach a battery charger to a car battery not only effective but also completely safe. Now, with safety firmly in mind, let’s get to the practical steps!
Step-by-Step Guide: How to Attach a Battery Charger to a Car Battery
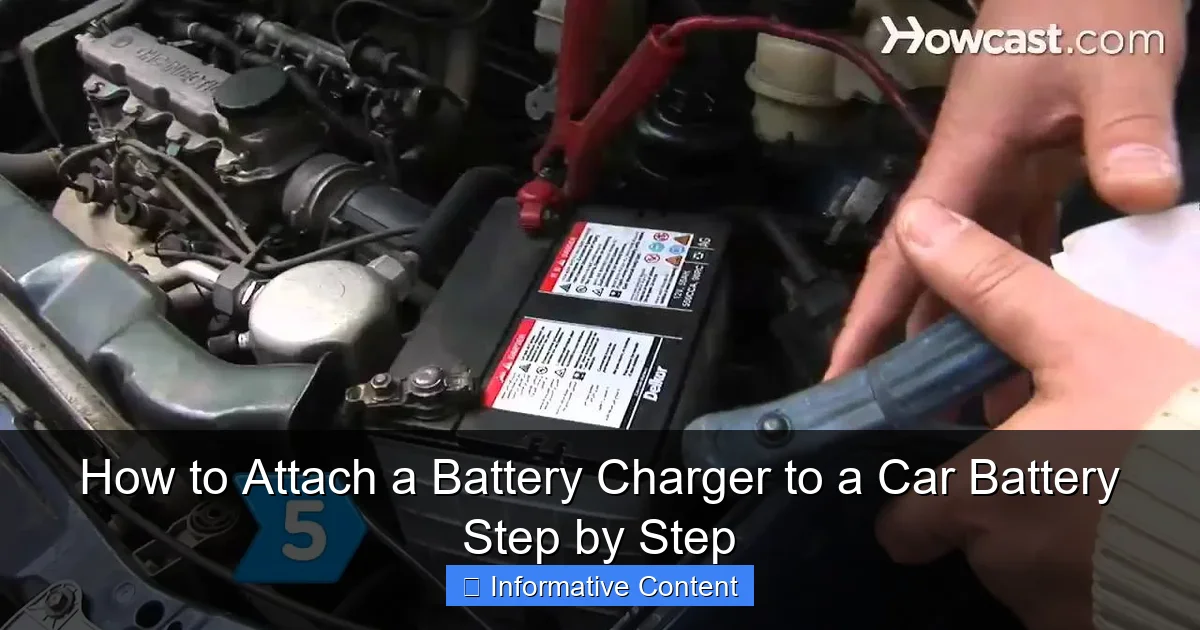
Visual guide about attach battery charger to car battery
Image source: i.ytimg.com
Alright, you’re geared up with safety knowledge, and you’re ready to tackle this! This is the core of our discussion – the precise steps on how to attach a battery charger to a car battery. Read through each step carefully before you start, and remember: patience and precision are your best friends here.
Step 1: Prepare Your Work Area and Gather Tools
First things first, let’s set the stage.
- Park Your Car: Ensure your vehicle is parked on a flat, stable surface. Turn off the engine, engage the parking brake, and remove the key from the ignition. This ensures the car’s electrical system is completely off.
- Open the Hood/Access the Battery: Locate your car battery. For most vehicles, it’s under the hood, but some cars have it in the trunk, under the back seat, or even in the wheel well. Consult your owner’s manual if you’re unsure.
- Gather Your Equipment: You’ll need your battery charger, an appropriate extension cord if the charger’s cord isn’t long enough (ensure it’s rated for outdoor use and heavy-duty current), your safety glasses and gloves, and possibly a wire brush or terminal cleaner if you suspect corrosion. A small wrench might be needed to remove terminal covers or loosen clamps if you need to fully disconnect.
Step 2: Locate the Battery and Identify Terminals
Once you’ve found the battery, you need to identify the positive and negative terminals. This is crucial for correctly connecting the battery charger.
- Positive Terminal (+): This terminal is usually marked with a “POS” or a plus sign (+). It often has a red cap or a red cable connected to it.
- Negative Terminal (-): This terminal is usually marked with a “NEG” or a minus sign (-). It typically has a black cap or a black cable connected to it.
If there’s any confusion, trace the cables. The positive cable usually leads to the starter motor, and the negative cable connects to the car’s chassis or engine block.
Step 3: Clean the Battery Terminals (If Necessary)
Corrosion can act as an insulator, preventing your battery charger from delivering a good charge. A clean connection is vital.
- Assess the Situation: Look for any white, greenish, or bluish powdery buildup around the battery terminals and cable clamps.
- Prepare Cleaning Solution: If you see corrosion, mix a paste of baking soda and water (about two tablespoons of baking soda to a small amount of water until it forms a paste).
- Clean Carefully: Apply the paste to the corroded areas. The baking soda will react with the acid, neutralizing it. Use a wire brush (a dedicated battery terminal brush is best) to scrub away the corrosion. You can also use a stiff non-metallic brush.
- Rinse and Dry: Once clean, wipe away the paste with a damp cloth, then thoroughly dry the terminals and clamps with a clean, dry cloth. Ensure no moisture remains.
Step 4: Connect the Charger Clamps Correctly (Charger OFF and UNPLUGGED!)
This is the moment we’ve been building up to. Remember our safety rule: the charger must be UNPLUGGED from the wall outlet and switched OFF before connecting the clamps.
- Connect the Red Positive (+) Clamp First: Take the red (positive) clamp from your charger and firmly attach it to the positive (+) terminal of your car battery. Ensure it has a good, solid connection and won’t easily slip off.
-
Connect the Black Negative (-) Clamp Second: Take the black (negative) clamp from your charger. Firmly attach it to the negative (-) terminal of your car battery. Again, ensure a secure connection.
*Important Note for Older Batteries/Increased Caution:* While connecting directly to the negative terminal is standard for charging a battery still installed in a vehicle with a modern charger, some older manuals or situations of extreme caution (e.g., jump-starting a completely dead battery) advise connecting the negative clamp to an unpainted, sturdy metal part of the car chassis away from the battery. This is to minimize the risk of a spark near the battery’s potentially explosive hydrogen gas. For charging, especially with smart chargers, direct terminal connection is generally safe and effective, provided the charger is unplugged during connection.
Double-check both connections. They should be snug and not wobbling.
Step 5: Plug In and Select Charger Settings
Now that the clamps are securely attached to the battery terminals, it’s time to bring the power.
- Plug in the Charger: Only now, after all connections are secure, plug your battery charger into a wall outlet (or an appropriate extension cord, which is then plugged into the wall).
- Select Settings (if applicable): If your charger has manual settings, select the correct voltage (usually 12V for cars) and amperage (amps). A lower amp setting (e.g., 2-4 amps) is a slower, gentler “trickle” charge, ideal for maintenance or deeply discharged batteries. A higher amp setting (e.g., 10 amps or more) will charge faster but should be monitored. Many modern “smart” chargers will automatically detect the battery type and state of charge, requiring no manual setting selection.
- Monitor the Process: Most smart chargers have indicator lights that show the charging status (charging, charged, fault). Some even have digital displays showing voltage or percentage. Periodically check on the charger and battery, but avoid lingering over the battery for extended periods due to gas production.
- Charging Time: How long it takes depends on your battery’s state of charge and the charger’s amperage. A fully dead battery might take 12-24 hours or even longer with a low-amp charger. A smart charger will typically stop charging and switch to maintenance mode when the battery is full.
Step 6: Disconnect the Charger Safely
Once your battery is fully charged (the charger indicates “full,” “float,” or switches to maintenance mode), it’s time to disconnect. This sequence is also critical to prevent sparks.
- Unplug the Charger First: Always, always unplug the battery charger from the AC power outlet before touching the clamps. This kills the power flow.
- Remove the Black Negative (-) Clamp First: Carefully detach the black (negative) clamp from the negative (-) terminal of the battery.
- Remove the Red Positive (+) Clamp Last: Finally, detach the red (positive) clamp from the positive (+) terminal.
- Tidy Up: Replace any terminal covers, close your hood or battery access, and store your charger in a clean, dry place.
Congratulations! You’ve successfully learned how to attach a battery charger to a car battery and safely disconnect it. This skill is a true lifesaver.
Common Charging Scenarios and Practical Tips
Knowing how to attach a battery charger to a car battery is one thing, but understanding when and how to apply that knowledge in different situations can make all the difference. Let’s look at some common scenarios and some tips to keep your battery in top shape.
Charging a Fully Dead Battery
If your battery is completely dead (no lights, no sound), it might take a while to revive.
- Patience is Key: A very low-voltage battery can sometimes be hard for smart chargers to detect. If your smart charger won’t start, try leaving it connected for an hour or two; sometimes it needs a small “nudge” to register the battery.
- Low Amperage is Better: For deeply discharged batteries, a slow, low-amperage charge is often best. This helps prevent overheating and can sometimes recover a battery that a fast charge might damage. It might take 24-48 hours.
- Check Battery Health: If a battery dies completely and struggles to hold a charge after several attempts, it might be time for a replacement.
Maintenance Charging / Winter Storage
If you store a vehicle for extended periods (like a classic car in winter or a motorcycle), maintenance charging is crucial.
- Battery Maintainers are Ideal: These are essentially smart trickle chargers designed to keep a battery at optimal charge without overcharging. You can leave them connected for weeks or months.
- Frequency: Even if not stored, if you only make short trips, your alternator might not fully recharge the battery. A monthly or bimonthly maintenance charge with a smart charger can significantly extend battery life.
Troubleshooting Common Issues
Sometimes things don’t go perfectly when you try to attach a battery charger to a car battery.
-
Charger Not Turning On/Starting:
- Check that the charger is plugged into a live outlet.
- Ensure the clamps are making good contact with the battery terminals (clean them if necessary).
- If the battery voltage is extremely low (below ~3-6V), some smart chargers won’t activate. You might need a specialized charger with a “repair” or “boost” mode, or try a temporary jump start to get a slight charge in it first.
- Battery Not Holding a Charge: This is a sign of a failing battery. Even if it charges to “full,” it quickly loses power.
- Overheating Battery/Charger: Disconnect immediately! This indicates a severe problem with either the battery or the charger.
When to Replace Your Battery
Even with the best care, batteries don’t last forever. Most car batteries last 3-5 years. Look out for these signs:
- Slow Cranking: The engine turns over sluggishly when you try to start it.
- Dim Lights/Electrical Issues: Headlights seem dim, or electrical accessories act erratically.
- Frequent Dead Batteries: If you’re constantly needing to attach a battery charger to a car battery, it’s a sign.
- Battery Age: If your battery is over 3-4 years old, it’s living on borrowed time, especially in extreme climates.
- Swollen Battery Case: A sign of internal damage or overcharging.
A local auto parts store can often test your battery’s health for free.
Data Table: Charger Type Comparison
To help you choose the right tool for the job, here’s a quick comparison of the main types of battery chargers we discussed. Knowing the strengths and weaknesses of each will help you decide which is best suited for your needs when you need to attach a battery charger to a car battery.
| Charger Type | Best Use Case | Pros | Cons |
|---|---|---|---|
| Trickle Charger | Long-term maintenance for stored vehicles; very slow, gentle charging. | Very gentle on battery; prevents overcharging; inexpensive; extends battery life during storage. | Extremely slow; not suitable for quickly recharging a dead battery. |
| Smart / Automatic Charger | Most general charging needs; maintenance; recovery of moderately discharged batteries. | Multi-stage charging (desulfation, bulk, absorption, float); prevents overcharging; automatic operation; versatile. | More expensive than trickle chargers; may not start if battery voltage is extremely low. |
| Rapid / Manual Charger | Quick boost for emergencies to start a vehicle; shop use for fast charging. | Very fast charging; can bring a dead battery to starting voltage quickly. | High risk of overcharging and damaging battery if not closely monitored; not for long-term use. |
| Portable Jump Starter | Emergency starting power for a dead battery when no other car is available. | Highly convenient and portable; instant starting power. | Does not charge the battery; needs to be recharged itself after use; usually more expensive than basic chargers. |
Advanced Tips and Best Practices for Battery Care
Now that you’re a pro at how to attach a battery charger to a car battery, let’s look at some proactive measures to minimize how often you actually need to do it! Good battery care is about consistency and a little bit of foresight.
Regular Battery Checks
Make it a habit to periodically inspect your battery, perhaps every oil change or once every few months.
- Visual Inspection: Look for any signs of damage to the casing, swelling, or leaks.
- Terminal Cleanliness: Keep those terminals free of corrosion. A thin layer of dielectric grease or a terminal protector spray after cleaning can help prevent future buildup.
- Fluid Levels (for conventional batteries): If your battery has removable caps, check the electrolyte levels. If low, add distilled water up to the fill line. Never overfill.
Understanding Battery Age
Batteries typically have a date stamp (usually on a sticker) indicating when they were manufactured or sold.
- Typical Lifespan: Most car batteries last between 3 to 5 years. Beyond this, even a well-maintained battery will start to lose its capacity and reliability.
- Climate Impact: Extreme heat tends to reduce battery life more quickly than cold, though cold weather makes a weak battery’s performance much more noticeable.
- Proactive Replacement: If your battery is approaching the 4-5 year mark, consider having it professionally tested, especially before winter or a long road trip. Replacing it proactively can save you from being stranded.
Avoiding Deep Discharges
Letting your battery go completely flat (a “deep discharge”) repeatedly is one of the quickest ways to kill it.
- Why it’s Bad: Each time a battery undergoes a deep discharge, it causes internal damage and reduces its overall capacity and lifespan.
- Preventative Measures: Ensure you turn off headlights, interior lights, and any accessories when you leave your car. If you have a dashcam or other devices that draw power when the car is off, consider their impact on battery drain. Use a battery maintainer if the car will sit for long periods.
Proper Storage of Your Battery Charger
Taking care of your charger means it will be ready when you need it most.
- Clean and Dry: Store your charger in a clean, dry place where it won’t be exposed to extreme temperatures, moisture, or dust.
- Cable Management: Wind the cables neatly and avoid kinking them. This prevents damage to the wires and keeps them tangle-free for the next use.
- Inspect Before Use: Always do a quick visual check of your charger’s cables and clamps for any damage (cracks, frayed wires) before each use.
Conclusion
So there you have it, my friend! From understanding the different types of batteries and chargers to meticulously following safety protocols and the step-by-step connection process, you’re now equipped with the essential knowledge on how to attach a battery charger to a car battery. What might have once felt like a daunting, high-stakes task is, in reality, a manageable and straightforward process when approached with care and confidence. You’ve learned the importance of proper setup, the crucial sequence of connecting and disconnecting, and vital tips for maintaining battery health in the long run.
Embrace this newfound skill! No longer will a weak battery leave you feeling helpless. Whether it’s to revive a dead battery after leaving your lights on, or simply to keep your vehicle’s power source in prime condition during periods of inactivity, you now possess the expertise. Remember the safety first mantra, be methodical in your connections, and empower yourself with the peace of mind that comes from being prepared. Your car, and your schedule, will thank you for it!
🎥 Related Video: How to Connect Jumper Cables #JumpStart #battery
📺 Drew Strickland
How to use jumper cables jump start https://walmrt.us/3wGqoIO.
Frequently Asked Questions
What safety precautions should I take before attaching a battery charger to a car battery?
Always wear safety glasses and gloves to protect your eyes and hands from potential battery acid or sparks. Ensure you are working in a well-ventilated area to safely disperse any hydrogen gas that the car battery might emit during charging.
What is the correct order to attach the battery charger clamps to a car battery?
First, connect the red positive (+) clamp to the positive terminal of the car battery. Next, connect the black negative (-) clamp to a metal part of the engine block or chassis, away from the battery itself, especially if the battery is still in the vehicle.
How can I identify the positive and negative terminals on my car battery?
The positive terminal is typically marked with a “+” sign and is often slightly larger than the negative terminal. The negative terminal will be marked with a “-” sign.
Why should I connect the negative clamp of the battery charger to the engine block or chassis, and not directly to the car battery’s negative terminal?
Connecting the negative clamp to a ground point away from the car battery helps to prevent sparks near the battery, which could potentially ignite hydrogen gas. This is a crucial safety measure, especially when the battery is still installed in the vehicle.
When should I plug in and turn on the battery charger?
You should only plug in the battery charger to the wall outlet and turn it on *after* both the positive and negative clamps are securely connected. This practice minimizes the risk of sparks occurring at the battery terminals during connection.
What is the proper procedure for disconnecting the battery charger from the car battery?
First, turn off and unplug the battery charger from the wall outlet. Then, remove the black negative (-) clamp from the engine block or chassis, followed by removing the red positive (+) clamp from the car battery’s positive terminal.