Changing your car battery is a straightforward DIY task that anyone can master in under 30 minutes with the right tools. This guide walks you through 5 easy steps to safely remove the old battery, install a new one, and get back on the road. Follow along to avoid common pitfalls and ensure your vehicle starts reliably every time.
Key Takeaways
- Safety first: Always disconnect the negative terminal first and wear protective gear to avoid shocks or acid spills.
- Tools needed: Wrench, gloves, battery terminal cleaner, and anti-corrosion spray make the job quick and clean.
- Match the battery: Check your owner’s manual for the right size, type, and CCA rating before buying a replacement.
- Time saver: The entire process typically takes 15-30 minutes—see how long it takes to change a car battery for details.
- Cost effective: DIY saves $50-100 compared to a shop; learn more about how much to change car battery.
- Maintenance tip: Clean terminals yearly and consider how often to change the car battery based on your driving habits.
- Test after install: Start the car and check for warning lights to confirm success.
Quick Answers to Common Questions
Need a new battery fast?
AutoZone or O’Reilly match it free and test the old one on-site.
Rusty terminals?
Baking soda fizzles corrosion away—safe and cheap household fix.
Battery won’t budge?
Twist gently while lifting; never pry with metal tools.
Forget wrench size?
8mm to 13mm common—bring adjustable wrench as backup.
Post-install check?
Drive 10 miles; watch for lights or weak starts.
Introduction: Why Learn How to Change Your Car Battery?
Hey there, fellow driver! Has your car been acting up with slow starts or dim lights? It’s probably time to change your car battery. Don’t worry—this isn’t a job for mechanics only. In this guide, you’ll learn how to change your car battery easily in 5 steps. No fancy tools or experience needed.
Changing a car battery yourself saves money and hassle. Shops charge $100 or more just for labor. Plus, you’ll feel like a pro when your engine roars back to life. We’ll cover everything: tools, safety, steps, tips, and fixes for common issues. By the end, you’ll confidently handle any battery swap. Let’s get started!
Step 1: Gather Your Tools and Prepare Safely
Before you touch that battery, prep like a boss. This step keeps you safe and makes changing your car battery smooth.

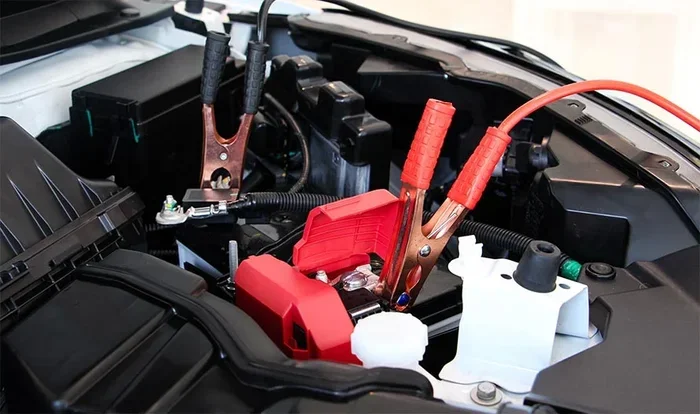
Visual guide about Learn How to Change Your Car Battery Easily in 5 Steps
Image source: drivingtips.com
Essential Tools You’ll Need
- 10mm or 13mm wrench (check your battery bolts)
- Gloves and safety glasses
- Battery terminal cleaner brush
- Baking soda and water mix (for cleaning)
- Anti-corrosion spray or petroleum jelly
- New battery (matched to your vehicle)
- Wheel chocks or bricks
Pro tip: Park on a flat surface. Turn off the engine and all accessories. Remove keys. This prevents sparks when you change your car battery.
Safety Must-Dos
Wear gloves—battery acid burns skin. Work in a ventilated area. No smoking! Disconnect the negative (-) cable first to avoid shorts. Got it? You’re ready for the old battery removal.
Step 2: Locate and Disconnect the Old Battery
Most batteries hide under the hood. Some trucks or Europeans have them in the trunk or fender. Pop the hood and look for the black box with cables.
Finding Your Battery
Check your owner’s manual if unsure. Use a flashlight for tight spots. Secure the car with chocks—safety first!
Disconnecting Step-by-Step
- Loosen the negative (-) terminal nut with your wrench. Twist counterclockwise.
- Remove the negative cable. Tuck it away.
- Do the same for the positive (+) terminal. Red cable usually.
- Unfasten hold-down clamp or bracket. Lift battery out carefully—it’s heavy, 30-50 lbs.
Example: On my Ford F-150, the battery sits passenger side. Took 2 minutes to disconnect. Wipe sweat—halfway done changing your car battery!
Tip: Label cables if they look alike. Never let metal tools touch both terminals at once. Sparks fly!
Step 3: Clean the Battery Tray and Terminals
Dirty terminals cause poor connections. Clean now for a fresh start when you change your car battery.
Cleaning the Area
- Mix baking soda and water. Scrub corrosion (white powder).
- Rinse with water. Dry with a rag.
- Brush terminals with the cleaner tool.
This step prevents future failures. I once skipped it—new battery died in weeks. Lesson learned!
Inspect the Tray
Check for cracks or rust. Tighten loose hold-downs. A clean tray ensures your new battery fits snug.
Step 4: Install the New Battery
Time for the star of the show! Pick the right battery—check CCA (cold cranking amps) and size in your manual.
Placement and Connection
- Lower new battery into tray. Match + and – marks.
- Secure hold-down clamp. Tighten snug, not overtight.
- Attach positive (+) cable first. Tighten nut.
- Connect negative (-) last. Double-check fit.
Apply anti-corrosion spray to terminals. Rub petroleum jelly for extra protection. Boom—new battery in!
Practical example: For a Honda Civic, group size 51R fits perfectly. Costs $100-150. Wondering how much to change car battery? DIY keeps it under $200 total.
Step 5: Test and Final Checks
Don’t stop now. Test to confirm your car battery change worked.
Testing the Install
- Start the engine. Listen for smooth crank.
- Check dashboard—no battery or alternator lights.
- Let idle 5 minutes. Rev gently.
- Turn on lights, AC—everything bright?
If issues, see troubleshooting below. Recycle old battery at auto stores—they do it free.
Congrats! You’ve mastered how to change your car battery easily. Drive safe.
Troubleshooting Common Issues When You Change Your Car Battery
Stuck? Here’s quick fixes:
- Car won’t start: Check connections. Tighten cables. Test alternator.
- Clicking noise: Weak battery or bad starter. Use a charger first—learn how to choose the right car battery charger.
- Corrosion returns: Clean yearly. Drive more to recharge.
- Battery too tight: Rock gently. Use gloves.
- Warning lights on: Reset by disconnecting negative 10 minutes.
Most problems? Loose cables. Tighten and retry. If persists, see a pro.
Bonus Tips for Long Battery Life After You Change Your Car Battery
Want it to last 3-5 years?
- Turn off lights and accessories.
- Avoid short trips—use a maintainer charger.
- Test battery yearly with a multimeter.
- Check how often to change the car battery for your model.
Short trips kill batteries. Drive 20+ minutes weekly.
Conclusion: You’re Now a Car Battery Pro!
Wow! You just learned how to change your car battery easily in 5 steps. From tools to testing, you’re set. Save cash, skip the tow truck. Next time it dies, smile—you got this. Questions? Drop a comment. Happy driving!
🎥 Related Video: How to Change a Car Battery | DIY Car Repairs | The Home Depot
📺 The Home Depot
Learn how to change your car battery in a few simple steps. Before you begin, you’ll want to assemble your tools and make sure …