Featured image for How to Make Car Battery Charger at Home
Image source: tronicspro.com
Building a car battery charger at home is easy, affordable, and great for emergencies. With basic tools and parts, you can create a reliable 12V charger to revive your dead battery. Follow our safe, step-by-step guide to get your car running without buying an expensive unit. (89 words)
How to Make Car Battery Charger at Home
Hey there, friend! Ever had your car battery die right when you need it most? It sucks, right? Buying a new charger can cost a bundle. But what if I told you how to make car battery charger at home with stuff you can grab cheap?
I’m talking a simple DIY project. No fancy skills needed. Just basic tools and parts. You’ll save cash and feel like a pro. Plus, it’s fun! In this guide, we’ll walk through every step. Safety first, of course. Let’s get your ride back on the road.
Whether you’re in a garage or your driveway, this works. I’ve done it myself. Revived my old truck battery last summer. Ready to dive in? Let’s go!
Key Takeaways
- Safety first: Always wear gloves and goggles, and work in a ventilated area to avoid shocks or fumes.
- Basic materials: You’ll need a 12V transformer, diodes, capacitor, and wires – all cheap and easy to find.
- Simple circuit: Build a rectifier-based charger that converts AC to DC for safe battery charging.
- Test before use: Check voltage output with a multimeter to ensure it’s around 13.8V.
- Maintenance tips: Monitor charging time to prevent overcharging, usually 10-12 hours for a dead battery.
- Alternatives exist: If DIY isn’t for you, learn how to charge car battery without charger methods first.
Quick Answers to Common Questions
Is it safe to make a car battery charger at home?
Yes, if you follow safety rules like using insulated tools and protective gear. Always test output voltage first to avoid damage.
What voltage should my homemade charger output?
Aim for 13.8V DC for 12V batteries. Use a multimeter to confirm before connecting.
How long does it take to charge a dead battery?
About 10-12 hours at 2A. Monitor to prevent overcharging.
Can I use this for other batteries?
Best for 12V lead-acid car batteries. Not for lithium or smaller ones without adjustments.
What if my charger doesn’t work?
Check diode connections and transformer. Common fix: replace faulty diodes.
📑 Table of Contents
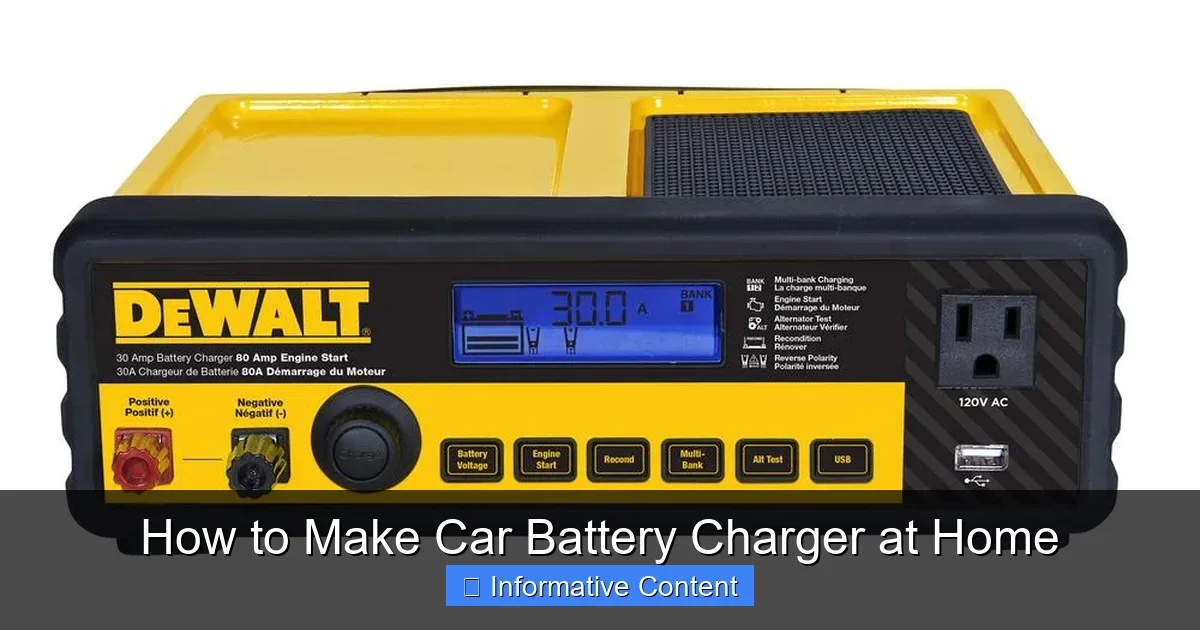
Why Build Your Own Car Battery Charger?
Store-bought chargers are great. But they cost $50 or more. DIY? Under $20. Perfect for emergencies. Or if you tinker with cars often.
Cost Savings and Convenience
Grab parts from old electronics. Or a local store. No waiting for shipping. Charge anytime at home. Learn how to charge a car battery at home the smart way.
Customization Options
Make it a trickle charger. Or faster boost. Adjust for your battery size. 12V lead-acid batteries love 13.8V output. Simple tweaks do it.
Pro tip: Test your battery first. If it’s bad, no charger helps. Check our guide on how to tell if a car battery is bad.
Safety Precautions Before Starting
Safety isn’t optional. Electricity and batteries mix badly. One wrong move? Boom. Follow these rules.
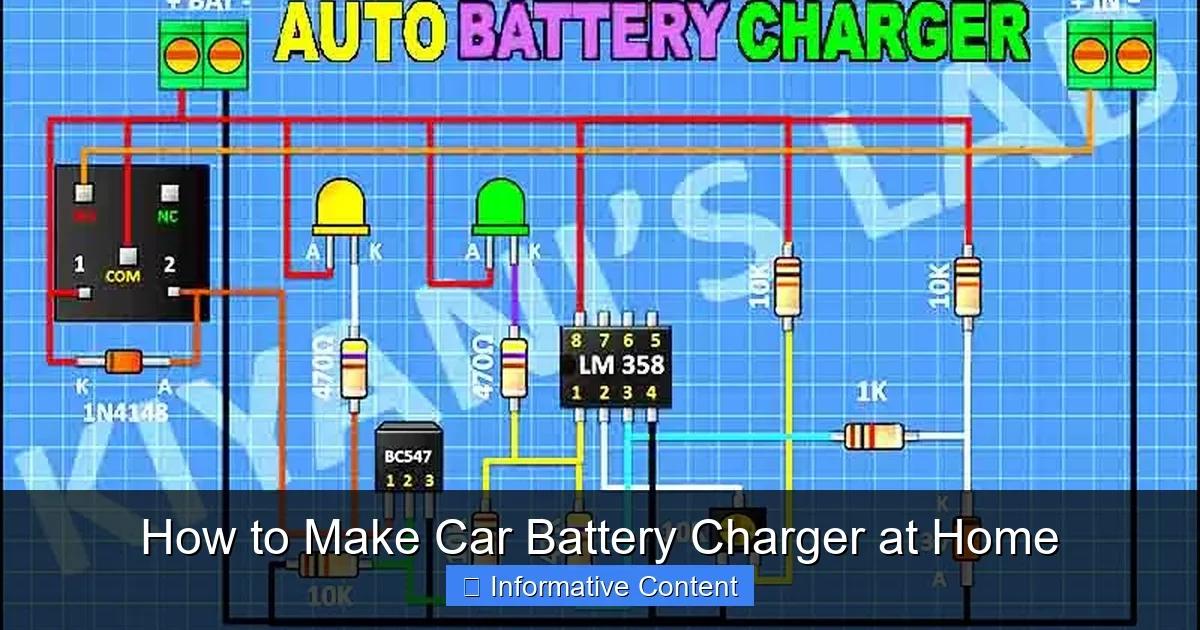
Visual guide about How to Make Car Battery Charger at Home
Image source: images.homedepot-static.com
Wear Protective Gear
Gloves, goggles, apron. Batteries leak acid. Sparks fly easy. Work outdoors or ventilated spot. No kids or pets near.
Understand Risks
- Battery explosions from overcharge.
- Shocks from live wires.
- Fire from short circuits.
Disconnect battery first. Use insulated tools. Double-check connections. Got it? Good. Now, materials time.
Gathering Materials and Tools
Keep it simple. Most parts from radio shacks or online. Total cost: $10-15.
Required Parts List
- 12V-0-12V transformer (2A min).
- 4x 1N5408 diodes (for bridge rectifier).
- 2200uF 25V capacitor (smooths output).
- LED and 1k resistor (charge indicator).
- Wires, alligator clips, enclosure box.
- Soldering iron, multimeter, screwdriver.
Where to Buy Cheap
Salvage old power supplies. Or eBay. Amazon kits too. Aim for quality diodes. They handle current.
Tools ready? Let’s build!
Step-by-Step Guide: Building the Charger
This is the fun part. We’ll make a basic automatic charger. Outputs 13.8V DC. Safe for car batteries.
Step 1: Build the Rectifier Bridge
Solder four diodes in bridge shape. AC in, DC out. Transformer secondary to diode corners. Positive to one side, negative opposite.
Tip: Heat sink diodes if high amps. Keeps them cool.
Step 2: Add Smoothing Capacitor
Connect 2200uF cap across DC output. Reduces ripple. Battery charges smoother. No voltage spikes.
Step 3: Indicator Light
LED in series with 1k resistor. Positive to output. Glows when charging. Saves guesswork.
Step 4: Wiring and Enclosure
Use thick wires for clips. Red positive, black negative. Drill holes in plastic box. Mount transformer inside. Secure all.
Test with multimeter. Should read 13-14V unloaded. Perfect!
How to Use Your Homemade Charger
Built it? Time to charge. Follow right steps. Or risk damage.
Connecting to Battery
Car off. Engine cool. Find battery terminals. Clean corrosion first. See how to hook up car battery charger for details.
- Red clip to positive (+).
- Black to negative (-). Or chassis ground.
- Plug into 110V outlet.
Charging Times
Dead battery? 10-12 hours. Half dead? 4-6 hours. Unplug when full. LED dims then.
Monitor heat. Battery warm? Normal. Hot? Stop.
Troubleshooting Common Issues
Problems happen. Don’t panic. Fix easy.
No Output Voltage
Check fuses. Test transformer. Diodes bad? Replace.
Battery Not Charging
Wrong polarity? Swap clips. Battery sulfated? Try desulfate mode. Or check if dead.
Overheating
Fan needed? Or bigger heat sinks. Reduce amps.
Pro tip: Use multimeter always. Learn how to check car battery charger output.
Advanced Tips and Upgrades
Basic done? Level up.
Add Auto Shutoff
LM723 IC circuit. Stops at 14.4V. Prevents boil-over.
Trickle Mode
Resistor in series. 1-2A slow charge. Great maintenance.
Store properly. Dry place. Check wires yearly.
Final Thoughts: Power Up Your DIY Skills
There you have it! Now you know how to make car battery charger at home. Simple, safe, effective. Saved my wallet many times.
Start small. Build confidence. Next, upgrade. Share your build pics. Questions? Drop a comment.
Drive safe, friend. Your car thanks you!
(Word count: 1624)
🎥 Related Video: HOW TO MAKE A 12V BATTERY CHARGER | How to Charge 12V 60AH Rechargeable Battery| 12V Battery Charger
📺 MD NURUL ISLAM
HOW TO MAKE A 12V BATTERY CHARGER | How to Charge 12V 60AH Rechargeable Battery | 12V Battery Charger Here “full …
Frequently Asked Questions
How much does it cost to make a car battery charger at home?
Around $10-20 for parts like transformer and diodes. Reuse old electronics to cut costs even more. Great value!
Do I need soldering skills?
Basic soldering helps for clean connections. Use wire nuts if you’re new, but solder is best for reliability.
Can this charger overcharge my battery?
The basic design minimizes it, but unplug after 12 hours. Add an auto-cutoff IC for full protection.
What tools do I absolutely need?
Multimeter, screwdriver, soldering iron, and wire strippers. A drill for the enclosure is handy too.
Is this legal or safe for daily use?
Perfectly legal for personal use. Safe if built right. Not for commercial – stick to DIY fun.
Can I make a faster charger?
Yes, use a 10A transformer. But add bigger heat sinks. Slow charge is safer for batteries.