Is your car struggling to start? Learn how to check car battery multimeter readings with ease using our comprehensive guide. Discover simple steps, understand what voltage numbers mean, and diagnose common battery issues to keep your vehicle running smoothly. This essential skill can save you time and money.
How to Check Car Battery Multimeter
Picture this: You’re running late, hop into your car, turn the key, and… nothing. Just a sad click or maybe a faint whine. We’ve all been there, and often, the culprit is a dead or dying car battery. It’s frustrating, inconvenient, and usually happens at the worst possible moment. But what if you could spot these issues *before* they leave you stranded?
That’s where a simple tool, the multimeter, comes in. Learning how to check car battery multimeter readings is a fundamental skill for any car owner. It empowers you to diagnose potential battery problems quickly, understand the health of your charging system, and even extend the life of your battery by addressing issues early. You don’t need to be a seasoned mechanic; with a little guidance, you can perform this essential check right in your driveway.
This comprehensive guide will walk you through everything you need to know about how to check car battery multimeter readings. We’ll cover the basics of your car battery, introduce you to the multimeter, outline crucial safety precautions, provide step-by-step instructions for testing, and help you interpret those all-important numbers. Get ready to take control of your car’s electrical health!
Key Takeaways
- Safety First: Always wear protective gear like safety goggles and gloves when working with car batteries to prevent acid contact or electrical shock.
- Multimeter Setup: Set your multimeter to the DC Volts (VDC) setting, typically in the 20V range, for accurate car battery voltage measurement.
- Engine Off Test: A fully charged and healthy car battery should read around 12.6 to 12.8 volts when the engine has been off for at least an hour.
- Engine Running Test: With the engine on, a properly functioning charging system (alternator) should produce readings between 13.7 and 14.7 volts.
- Interpreting Low Voltage: If your engine-off reading is consistently below 12.4 volts, your battery is likely discharged and may need charging or replacement.
- Alternator Check: Readings outside the 13.7-14.7V range with the engine running could indicate a problem with your alternator or voltage regulator.
- Regular Checks: Periodically checking your car battery with a multimeter can help identify potential issues early, preventing unexpected breakdowns and extending battery life.
Quick Answers to Common Questions
Question 1?
What setting should my multimeter be on to check a car battery?
Answer 1?
You should set your digital multimeter to the DC Volts (VDC) setting, specifically in the 20V range. This range is ideal for accurately measuring the 12-volt car battery.
Question 2?
What is a good voltage reading for a car battery when the engine is off?
Answer 2?
A healthy, fully charged car battery should read between 12.6 and 12.8 volts when the engine has been off for at least an hour.
Question 3?
What voltage should I see with the car engine running?
Answer 3?
With the engine running, a properly working charging system (alternator) should show a voltage between 13.7 and 14.7 volts at the battery terminals.
Question 4?
Why do I need to wear safety goggles when checking a car battery?
Answer 4?
You need to wear safety goggles because car batteries contain sulfuric acid, which is highly corrosive. Accidental splashes or fumes can cause severe eye damage, including blindness.
Question 5?
What does it mean if my engine-off battery reading is below 12.0 volts?
Answer 5?
A reading below 12.0 volts indicates a critically low or possibly dead battery. It likely won’t start your car and needs immediate charging or potential replacement if it can no longer hold a charge.
📑 Table of Contents
- Understanding Your Car Battery and Multimeter Basics
- Safety First: Essential Precautions When Working with Car Batteries
- Gather Your Tools: What You’ll Need
- Step-by-Step Guide: How to Check Car Battery Multimeter Readings
- Interpreting Your Multimeter Readings: What Do the Numbers Mean?
- Beyond Simple Voltage: What Else to Consider?
- Maintaining Your Car Battery for Longevity
- When to Call a Professional
- Conclusion
Understanding Your Car Battery and Multimeter Basics
Before we dive into the “how-to,” let’s quickly review the stars of our show: your car battery and the multimeter itself. Knowing what they do will make the testing process much clearer.
What Does Your Car Battery Do?
Your car battery is much more than just a power source. It’s a vital component that performs several key functions:
- Starting Power: Its primary role is to provide a large surge of electricity to the starter motor, which cranks the engine to life. This requires a significant amount of “cold cranking amps” (CCA).
- Voltage Regulation: When your engine is off, the battery powers your car’s electrical components like the radio, lights, and clock.
- Surge Protection: It acts as a stabilizer for the electrical system, smoothing out voltage spikes produced by the alternator.
Most car batteries are 12-volt lead-acid batteries. When fully charged and healthy, they should hold a charge of around 12.6 to 12.8 volts. Anything significantly lower indicates a problem.
Introducing the Multimeter
A multimeter is a handy electronic measuring instrument that combines several measurement functions in one unit. For our purposes, we’ll primarily use its voltmeter function to measure DC (Direct Current) voltage.
There are two main types:
- Digital Multimeters (DMMs): These are the most common and easiest to use for beginners. They display readings as numerical values on an LCD screen, making them simple to read.
- Analog Multimeters: These have a needle that points to values on a scale. While perfectly functional, they can be a bit trickier to read accurately for first-timers.
For checking your car battery, a digital multimeter is generally recommended due to its clear, precise readings. You’ll need to set it to measure DC voltage, usually denoted by “VDC” or “V” with a straight line and three dots above it. Most multimeters will have a “20V” range option, which is perfect for a 12-volt car battery.
Safety First: Essential Precautions When Working with Car Batteries
Working with car batteries involves electricity and corrosive chemicals, so safety should always be your top priority. Don’t skip these steps!
Personal Protective Equipment (PPE)
- Safety Goggles: Always wear eye protection. Batteries contain sulfuric acid, which can cause severe burns and blindness if it splashes into your eyes.
- Gloves: Wear heavy-duty rubber or nitrile gloves to protect your hands from acid and electrical shock.
- Old Clothes: Battery acid can damage clothing, so wear something you don’t mind getting dirty or potentially ruined.
Working Environment
- Ventilation: Batteries can produce hydrogen gas, which is highly flammable and explosive. Ensure you are working in a well-ventilated area, away from sparks, open flames, or anything that could ignite the gas.
- No Jewelry: Remove all metal jewelry (rings, watches, bracelets). Metal can conduct electricity, leading to shorts, burns, or even welding to battery terminals.
- Keep Clear: Make sure no tools are left on top of the battery, as they could accidentally bridge the terminals and cause a short circuit.
Handling Battery Terminals
Always be mindful of where your multimeter probes and hands are. Connecting the positive and negative terminals directly with a metal object will create a short circuit, which is dangerous and can damage the battery or your tools.
Gather Your Tools: What You’ll Need
Before you start, make sure you have everything ready. This will make the process smooth and efficient.
- Digital Multimeter: The star of the show. Make sure it has fresh batteries.
- Safety Goggles and Gloves: As discussed, these are non-negotiable.
- Wire Brush (Optional but Recommended): For cleaning corroded battery terminals.
- Rag or Paper Towels: For wiping terminals clean.
- Battery Terminal Cleaner (Optional): A specialized spray or solution to help clean corrosion.
Step-by-Step Guide: How to Check Car Battery Multimeter Readings
Now for the main event! Follow these steps carefully to accurately check your car battery with a multimeter. We’ll perform two crucial tests: one with the engine off and one with the engine running.
Step 1: Preparation – Get Your Car Ready
First things first, park your car on a level surface and ensure the engine has been off for at least an hour. This allows the battery to “rest” and provides a more accurate reading of its static charge. If you just drove the car, the battery will show a falsely high reading due to surface charge from the alternator.
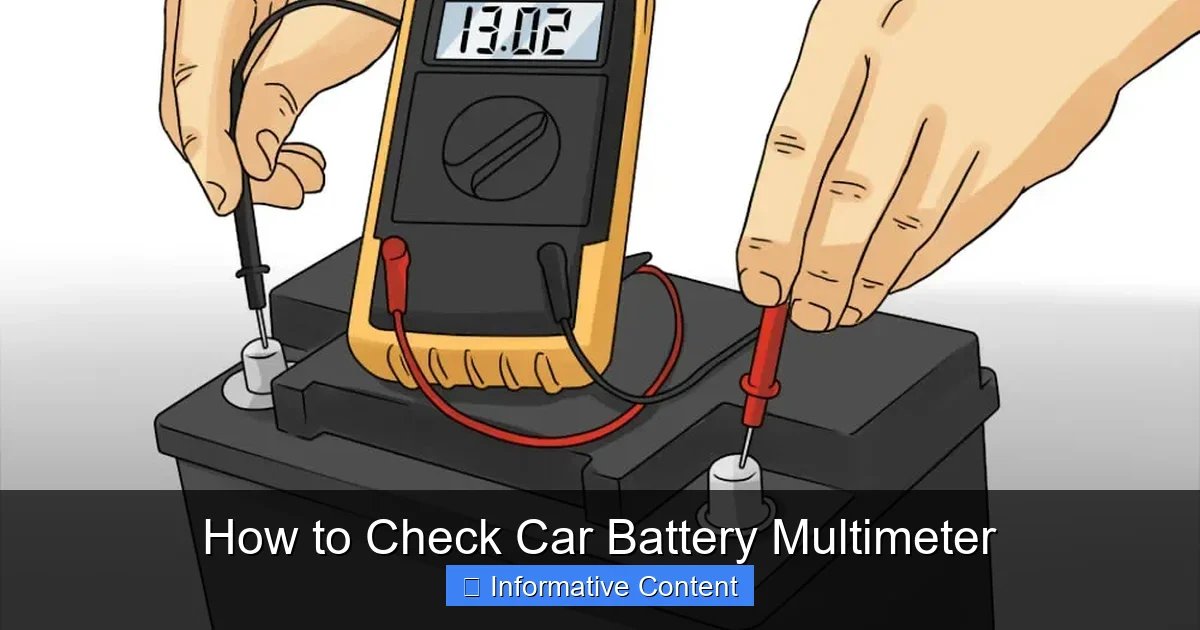
Visual guide about How to Check Car Battery Multimeter
Image source: res.cloudinary.com
Pop the hood and locate your car battery. You’ll see two terminals: a positive (+) terminal, usually marked with a plus sign and often covered with a red cap, and a negative (-) terminal, marked with a minus sign and often black.
Clean the Terminals (If Necessary): If you see any white, blue, or green powdery corrosion on the battery terminals, gently clean it off with a wire brush. Corrosion can interfere with the electrical connection and lead to inaccurate readings. Disconnect the negative terminal first (using a wrench) before cleaning, then the positive. Reconnect in reverse order (positive first, then negative) after cleaning.
Step 2: Setting Up Your Multimeter
Take your digital multimeter and turn the dial to the DC Volts (VDC) setting. Most multimeters have a range selector. For a 12-volt car battery, you should select the range that includes 12V but isn’t too high, typically “20V”. If you set it too high (e.g., 200V), your reading will lack precision. If you set it too low (e.g., 2V), it won’t be able to measure the battery’s full voltage.
Insert the red probe into the port labeled “VΩmA” or “V” (for voltage and ohms) and the black probe into the “COM” (common) port.
Step 3: Connecting the Probes to Your Battery
With your safety gear on, carefully connect the multimeter probes to the battery terminals:
- Connect the red (positive) probe to the positive (+) terminal of the battery.
- Connect the black (negative) probe to the negative (-) terminal of the battery.
Make sure the probes are making good, firm contact with the metal of the terminals. You should see a reading appear on your multimeter’s screen almost immediately.
Step 4: Test 1 – Engine Off Voltage Check
This is your primary test to determine the battery’s resting charge. With the engine off and the multimeter probes connected, read the voltage displayed on the screen. Take note of this number.
A healthy, fully charged car battery should read somewhere between 12.6 and 12.8 volts. This is your baseline for a good battery.
Step 5: Test 2 – Engine Running (Alternator) Voltage Check
This test helps you evaluate your car’s charging system, specifically the alternator. The alternator is responsible for recharging your battery while the engine runs and powering your car’s electrical components.
- Keep the multimeter probes connected to the battery terminals.
- Start your car’s engine.
- Read the voltage on your multimeter again.
- Briefly rev the engine to about 2000 RPM for a few seconds and observe if the voltage changes.
With the engine running, a properly functioning charging system should cause the voltage to rise to somewhere between 13.7 and 14.7 volts. This indicates that the alternator is doing its job and recharging the battery.
Interpreting Your Multimeter Readings: What Do the Numbers Mean?
You’ve got your numbers, but what do they tell you? Understanding these readings is key to diagnosing your battery’s health and your car’s charging system.
Engine Off Readings: Battery Health
These readings tell you the state of charge and overall health of your battery when it’s not being charged by the alternator.
- 12.6 – 12.8 Volts: Excellent. Your battery is fully charged and healthy.
- 12.4 – 12.5 Volts: Good. Your battery is about 75% charged. It’s in decent shape but might benefit from a top-up charge, especially if it’s consistently at this level.
- 12.0 – 12.3 Volts: Needs Charging. Your battery is significantly discharged (50-25% charged). It’s likely struggling to start the car and definitely needs a good charge.
- Below 12.0 Volts: Critically Low/Dead. Your battery is almost completely discharged or potentially damaged. It will likely not start your car and may need to be charged or replaced. Repeatedly falling to this level often indicates a failing battery that can no longer hold a proper charge.
Important Note: A battery can show good voltage but still have insufficient “cold cranking amps” (CCA) to start the car, especially in cold weather. Voltage only tells part of the story, but it’s a very good initial indicator.
Engine Running Readings: Alternator Health
These readings indicate how well your car’s charging system (alternator) is functioning.
- 13.7 – 14.7 Volts: Excellent. Your alternator and charging system are working correctly, recharging the battery and powering the car’s electronics. The voltage should ideally stay within this range, even when you rev the engine.
- Below 13.7 Volts: Charging Problem. If the voltage remains below 13.7V with the engine running, it suggests a problem with your alternator or voltage regulator. The battery isn’t being properly recharged, and it will eventually die.
- Above 14.7 Volts: Overcharging. Readings consistently above 14.7V could mean your alternator is overcharging the battery. This can boil the battery’s electrolyte, damage the battery, and even harm other electrical components in your car. This also points to an issue with the voltage regulator.
Beyond Simple Voltage: What Else to Consider?
While learning how to check car battery multimeter voltage is incredibly useful, it’s worth noting a few other things that contribute to battery health.
Visual Inspection
Always give your battery a quick visual check. Look for:
- Corrosion: Excess corrosion on terminals can impede current flow.
- Cracks or Bulges: These can indicate internal damage or overcharging and are signs that the battery needs immediate replacement.
- Leaking Fluid: Any signs of fluid around the battery are a major red flag for damage or overcharging.
- Loose Connections: Ensure the battery cables are securely fastened to the terminals.
Headlight Test (Simple Load Test)
A quick, informal load test can give you more insight:
1. Connect your multimeter to the battery terminals (engine off).
2. Turn on your headlights (don’t start the car).
3. Observe the voltage. A healthy battery should drop only slightly (e.g., from 12.6V to around 12.0-12.2V) and then stabilize. If the voltage drops significantly (below 11.5V) and keeps falling rapidly, the battery is weak.
When to Consider a Professional Load Test
A multimeter voltage test is a great diagnostic tool, but it doesn’t measure the battery’s “cold cranking amps” (CCA) – its ability to deliver a large burst of power. If your voltage readings are good, but your car still struggles to start, especially in cold weather, your battery might be weak on CCA. In this case, a professional mechanic can perform a dedicated load test, which simulates engine starting conditions and provides a definitive answer about the battery’s internal health and cranking power.
Maintaining Your Car Battery for Longevity
Now that you know how to check car battery multimeter readings, here are a few tips to keep it healthy and extend its lifespan:
- Keep it Clean: Regularly clean battery terminals to prevent corrosion build-up. A mixture of baking soda and water can neutralize acid, then rinse and dry thoroughly.
- Keep it Charged: Avoid letting your battery sit in a deeply discharged state for long periods. If your car sits for extended times, use a trickle charger or battery maintainer.
- Secure it Properly: Ensure the battery is securely fastened in its tray. Vibrations can damage internal components.
- Limit Short Trips: Frequent short trips don’t allow the alternator enough time to fully recharge the battery, especially if you’re using accessories like the radio, AC, or heated seats.
When to Call a Professional
While learning how to check car battery multimeter readings empowers you to do a lot, there are times when it’s best to call in the experts. If:
- Your readings are consistently low, even after charging, indicating a failing battery.
- Your alternator readings are out of range (too low or too high).
- You notice any physical damage, leaks, or strong sulfur smells from the battery.
- You’re unsure about any part of the testing process or interpretation.
A professional can perform more advanced diagnostics, including a proper load test, and safely replace your battery or troubleshoot charging system issues.
Conclusion
Congratulations! You’ve just learned how to check car battery multimeter readings, a valuable skill that puts you in the driver’s seat of your car’s electrical health. No more guessing games or being caught off guard by a dead battery. By regularly performing these simple tests, you can preemptively identify issues with your battery or charging system, saving yourself time, money, and a lot of frustration.
Remember, safety is paramount. Always wear your protective gear and work in a well-ventilated area. With your trusty multimeter and this guide, you’re well-equipped to keep your car starting strong and running reliably for years to come. Happy testing!
Frequently Asked Questions
How often should I check my car battery with a multimeter?
It’s a good practice to check your car battery with a multimeter every 3-6 months, especially before winter or during hot summer months. Regular checks can help you catch potential issues early and prevent unexpected breakdowns.
Can I use an analog multimeter to check my car battery?
Yes, you can use an analog multimeter, but a digital multimeter is generally recommended for beginners. Digital meters provide clear, precise numerical readings, which are easier to interpret compared to reading a needle on a scale.
My car battery reads 12.6V, but my car still won’t start. What could be wrong?
If your battery reads 12.6V but the car won’t start, the battery might have good voltage but insufficient “cold cranking amps” (CCA) to turn over the engine. Other issues could include a faulty starter motor, a bad alternator (not recharging the battery), or corrosion preventing good electrical contact.
Is it normal for the voltage to drop slightly when I start the car?
Yes, it’s normal for the voltage to drop momentarily when you initially turn the key to start the car, as the starter motor draws a large amount of power. However, it should quickly recover to the normal charging range (13.7-14.7V) once the engine is running.
What if my multimeter reads zero or “OL” (overload) when connected to the battery?
If your multimeter reads zero or “OL,” first double-check that the probes are correctly inserted into the right ports (COM and VΩmA) and that the dial is set to the correct VDC 20V range. Also, ensure the probes are making firm, clean contact with the battery terminals. If all connections are good and you still get this reading, your battery might be completely dead, or there could be an issue with your multimeter.
Can a car battery be “overcharged” by the alternator?
Yes, a car battery can be overcharged if the alternator’s voltage regulator is faulty and allows too much voltage (consistently above 14.7V) to be sent to the battery. Overcharging can damage the battery by causing its electrolyte to boil, leading to a shorter lifespan and potential hazards.