Maintaining your car battery’s health is effortless with a trickle charger, preventing discharge during long periods of inactivity. Simply connect the red clamp to the positive terminal and the black clamp to the negative terminal, then plug in the charger to keep your battery optimally charged and ready for use. This simple process extends battery life and ensures reliability.
Have you ever experienced that heart-sinking moment when you turn the key in your ignition, and all you hear is a weak click or, worse, absolute silence? It’s a feeling many of us know all too well – the sudden realization that your car battery has decided to call it quits, often at the least convenient time. Maybe your car has been sitting in the garage for a few weeks, or perhaps you’ve been doing a lot of short trips lately, never quite giving the battery a chance to fully recharge.
A dead car battery isn’t just an inconvenience; it can throw a serious wrench into your day. But what if there was a simple, proactive way to prevent this common headache? Enter the trickle charger – a small but mighty device designed to keep your car battery in top shape, extending its life and ensuring your vehicle is always ready to go when you are. Think of it as a life support system for your battery, providing a slow, steady stream of power to counteract the natural discharge that happens over time.
Learning how to use a trickle charger on your car battery isn’t complicated, but knowing the correct steps and safety precautions is crucial. This guide will walk you through everything you need to know, from understanding what a trickle charger does to connecting it safely and effectively. By the end, you’ll feel confident in maintaining your car’s power source, saving yourself from future roadside woes and giving your battery the long, healthy life it deserves. Let’s dive in and make that dead battery dread a thing of the past!
Key Takeaways
- Prioritize Safety: Wear protective gear and ensure ventilation always.
- Clean Terminals: Ensure proper connection by cleaning battery posts first.
- Connect Correctly: Attach positive clip first, then negative to chassis/battery.
- Plug In Last: Only connect charger to power outlet *after* battery connections.
- Monitor Charging: Follow charger instructions; disconnect when fully charged.
- Disconnect Safely: Unplug charger, then remove negative, then positive cable.
- Prevent Drain: Use trickle chargers for long-term battery health and storage.
Quick Answers to Common Questions
What exactly is a trickle charger used for?
A trickle charger is designed to maintain your car battery’s charge over long periods of inactivity, preventing it from self-discharging. It delivers a small, steady current to keep your battery topped up and ready to go.
How do I properly connect my trickle charger to the car battery?
First, connect the red (positive) clamp to your battery’s positive terminal, then the black (negative) clamp to a good metal ground point on the engine block, away from the battery. Only plug in the trickle charger to power once connections are secure.
Can I leave a trickle charger on my car battery indefinitely?
Absolutely! Modern trickle chargers are designed with smart technology to prevent overcharging, so you can safely leave them connected for weeks or even months without worry, especially for vehicles in storage.
When is the best time to use a trickle charger?
You should use a trickle charger whenever your car will be sitting idle for an extended period, such as during winter storage, vacations, or if you have a classic car that isn’t driven often. It’s perfect for maintaining charge and extending battery life.
Are there any safety tips I should know before using a trickle charger?
Always work in a well-ventilated area and avoid sparks near the battery, as it can emit flammable gases. Make sure to follow your specific trickle charger’s instructions carefully for the safest and most effective use.
📑 Table of Contents
- Understanding Your Trickle Charger and Car Battery
- Essential Safety First: Before You Connect Anything
- Step-by-Step Guide: Connecting Your Trickle Charger
- Monitoring the Charging Process and Disconnecting Safely
- Maximizing Battery Life: Tips for Long-Term Battery Health
- Trickle Charger vs. Battery Maintainer vs. Fast Charger
- Conclusion
Understanding Your Trickle Charger and Car Battery
Before we jump into the “how-to,” it’s super helpful to understand a bit about what a trickle charger actually is and how it interacts with your car battery. This knowledge will empower you to use it correctly and get the most out of your investment.
What Exactly is a Trickle Charger?
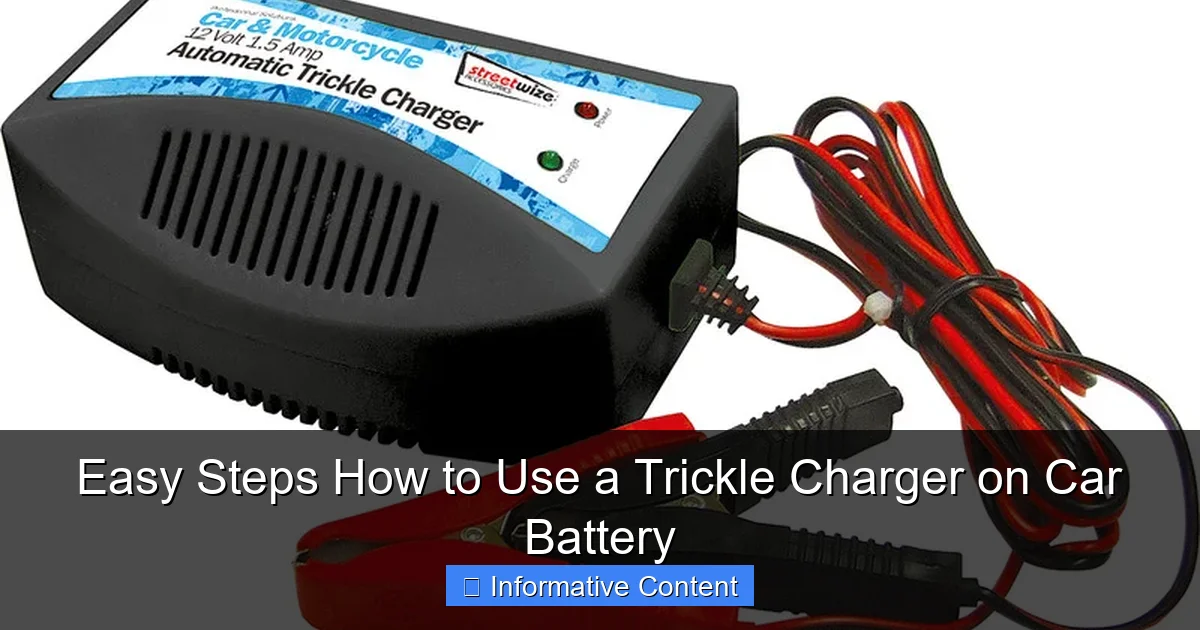
At its core, a trickle charger is a battery charger that delivers a very low, consistent amperage to your car battery. Unlike a powerful jump starter or a rapid charger designed to quickly bring a dead battery back to life, a trickle charger is all about gentle, long-term maintenance. It’s meant to counteract the natural discharge process that happens when your vehicle is parked and not in use. This slow charge prevents the battery from losing its charge completely, which can lead to damage over time.
Many modern trickle chargers are actually “smart chargers” or “battery maintainers.” These are even better because they monitor your battery’s voltage and automatically switch between charging and “float” modes. In float mode, the charger simply maintains the battery at a full charge without overcharging, making them ideal for long-term connection.
Types of Car Batteries You Might Encounter
Not all car batteries are created equal, and knowing what type you have can be important, especially if your trickle charger has specific settings. Most automotive batteries fall into these categories:
- Lead-Acid (Flooded/Wet Cell): These are the most common and traditional car batteries. They contain a liquid electrolyte solution and may sometimes require maintenance (checking and topping up fluid levels).
- AGM (Absorbed Glass Mat): A more advanced type of lead-acid battery where the electrolyte is absorbed into fiberglass mats. They are maintenance-free, spill-proof, and tolerate deep discharges better.
- Gel Cell: Similar to AGM, but the electrolyte is in a gel form. They are very resistant to vibration and spillage but require specific charging profiles to prevent damage from overcharging.
Most modern smart trickle chargers are designed to work with all common types of 12V automotive batteries, often with specific modes you can select. Always check your charger’s manual to confirm compatibility with your specific car battery.
When Do You Need a Trickle Charger?
A trickle charger isn’t just for emergencies. It’s a fantastic tool for proactive battery health in several scenarios:
- Long-Term Storage: If you have a classic car, motorcycle, RV, boat, or seasonal vehicle that sits unused for weeks or months, a trickle charger is essential. It prevents the battery from completely discharging and suffering permanent damage.
- Infrequent Driving: If you only drive short distances or use your car irregularly, the alternator might not have enough time to fully recharge the battery. A trickle charger ensures it stays topped up.
- Vehicles with Constant Draws: Modern cars often have computer systems, alarms, and other electronics that create a small, constant drain on the battery, even when the car is off. A battery maintainer helps combat this “parasitic draw.”
- Extending Battery Life: By preventing deep discharge and sulfation (a common cause of battery failure), a trickle charger can significantly extend the lifespan of your car battery, saving you money in the long run.
Remember, while a trickle charger is great for maintenance, it’s generally not designed for rapidly charging a completely dead battery. For that, you’d typically need a higher-amperage battery charger or a jump start.
Essential Safety First: Before You Connect Anything
When working with electricity and car batteries, safety isn’t just a suggestion – it’s an absolute must. Taking a few moments to prepare safely can prevent accidents, injuries, or damage to your vehicle. Think of this as your personal safety checklist before you even touch your trickle charger.
Visual guide about trickle charger car battery
Image source: cdn.aws.toolstation.com
Reading Your Trickle Charger’s Manual
This might sound basic, but it’s arguably the most important step. Every trickle charger is a little different. Your specific model’s manual will have crucial information about its features, safety warnings, proper connection procedures, and troubleshooting tips. It’s your primary source of truth for safe and effective operation. Don’t skip it, even if you’ve used chargers before!
Gathering Your Safety Gear
Always protect yourself. You’ll want to have these items handy:
- Safety Glasses or Goggles: Batteries contain sulfuric acid, which can cause severe eye damage if splashed. They also produce hydrogen gas, which can be explosive. Eye protection is non-negotiable.
- Gloves: Protect your hands from corrosive battery acid and potential shocks.
- Proper Ventilation: Car batteries emit hydrogen gas, especially during charging. This gas is highly flammable and explosive. Always charge your battery in a well-ventilated area, away from sparks, open flames, or anything that could ignite it. Avoid charging in an enclosed space like a sealed garage without proper airflow.
Inspecting Your Battery and Charger
Before connecting, give both your battery and your trickle charger a quick once-over:
- Check the Car Battery: Look for any cracks, bulges, or leaks on the battery casing. If you see significant damage, a leaky battery, or excessive corrosion that can’t be cleaned, do not attempt to charge it. It might be unsafe or beyond saving.
- Inspect Charger Cables: Make sure the cables on your trickle charger are not frayed, cut, or damaged in any way. Damaged cables can pose an electrical hazard.
- Clean Terminals: Ensure the battery terminals are clean and free of corrosion. A good connection is essential for effective charging and prevents sparks. We’ll cover cleaning in the next section.
Vehicle Considerations
If your battery is still in the car (which is usually the case for trickle charging):
- Engine Off, Ignition Off: Make absolutely sure your vehicle’s engine is off and the ignition is in the “off” position. Remove the keys from the ignition to prevent accidentally turning something on.
- Parking Brake Engaged: Set your parking brake to ensure the vehicle won’t accidentally move.
- Disconnecting Battery (Optional but Recommended for Some): For long-term storage or if you’re unsure about your vehicle’s sensitive electronics, you might consider disconnecting the battery from the car’s electrical system before charging. However, be aware that this will reset your car’s computer, radio presets, and other electronic settings. For most modern smart trickle chargers, disconnecting isn’t strictly necessary as they are designed to be safe for in-vehicle charging, but it’s always an option if you prefer maximum caution.
Taking these safety precautions seriously will make the entire process much smoother and safer for both you and your vehicle. Now, let’s get to the actual connection!
Step-by-Step Guide: Connecting Your Trickle Charger
You’ve prepped, you’re safe, and you’re ready to give your car battery some much-needed love. This section will guide you through the exact steps to connect your trickle charger correctly. Remember the sequence – it matters for safety!
Visual guide about trickle charger car battery
Image source: i2.wp.com
Prepare the Battery Terminals
A clean connection is a strong connection. Corrosion on battery terminals can prevent your charger from working effectively or even create a fire hazard. Here’s how to clean them:
- Identify Terminals: You’ll see two terminals on your car battery: a positive (+) terminal, usually marked with a plus sign and a red cap or cable, and a negative (-) terminal, marked with a minus sign and a black cap or cable.
- Disconnect (If Necessary for Deep Cleaning): If the corrosion is severe and you need to thoroughly clean the terminals, you might disconnect the battery cables from the battery itself. Always disconnect the negative (-) cable first, then the positive (+).
- Clean with a Wire Brush: Use a wire brush (a battery terminal brush works best) to scrub away any white or bluish corrosion from both terminals and the cable clamps.
- Baking Soda Paste (Optional): For stubborn corrosion, you can mix a paste of baking soda and water (about 2 tablespoons of baking soda to 1 tablespoon of water) and apply it to the corroded areas. Let it bubble, then scrub it off with the brush. Rinse with a little clean water and dry thoroughly with a rag.
- Reconnect (If Disconnected): If you disconnected the cables, reconnect the positive (+) cable first, then the negative (-). Ensure they are tight.
Connect the Charger Clamps
This is where the magic happens, but it’s critical to follow the correct order to avoid sparks or short circuits:
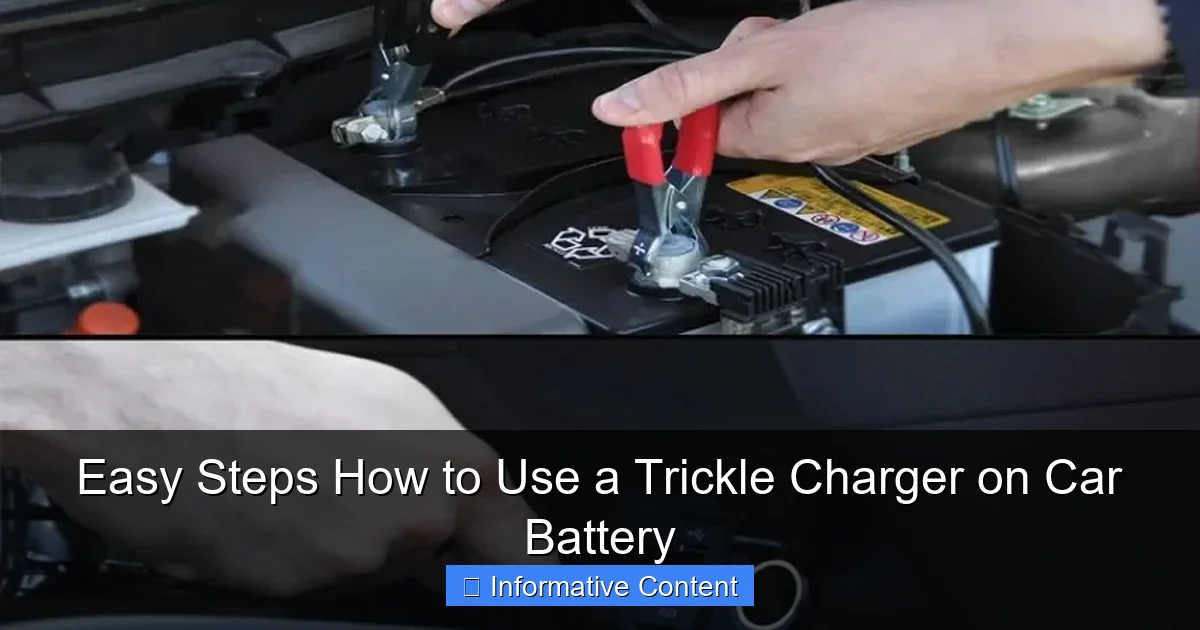
- Connect Positive First (Red Clamp): Take the red, positive (+) clamp from your trickle charger and firmly attach it to the positive (+) terminal of your car battery. Ensure it has a good, solid grip and won’t easily slip off.
- Connect Negative Second (Black Clamp) – This is Important!
- If the battery is still in the vehicle: Do NOT attach the black, negative (-) clamp directly to the negative (-) terminal of the battery. Instead, find a good, unpainted metal ground point on your vehicle’s engine block or chassis, away from the battery and fuel lines. This diverts any potential spark away from the battery, which can emit flammable hydrogen gas.
- If the battery is OUT of the vehicle: You can connect the black, negative (-) clamp directly to the negative (-) terminal of the battery. Since it’s outside the vehicle, the risk of ignition is lower, and you’re not dealing with vehicle electronics.
Double-check both clamps to ensure they are securely attached and won’t accidentally touch each other or other metal parts of the car.
Plug in the Trickle Charger
Only after the clamps are securely connected to the battery (or battery and ground point) should you plug your trickle charger into a standard electrical outlet (110V or 220V, depending on your region and charger). This sequence minimizes the risk of sparks. Once plugged in, your charger should power on, and you’ll typically see indicator lights illuminate.
Selecting the Right Mode (for Smart Chargers)
Many modern smart trickle chargers offer various settings. Now is the time to select the correct ones:
- Voltage: Most car batteries are 12V, but some specialty batteries (like those in garden tractors or ATVs) might be 6V. Ensure your charger is set to the correct voltage for your car battery.
- Battery Type: If your charger has settings for “Lead-Acid,” “AGM,” or “Gel,” select the one that matches your battery type. This ensures the charger uses the optimal charging profile.
- Maintenance/Float Mode: Some chargers have a dedicated “maintenance” or “float” mode. If you plan to leave the charger connected for an extended period, ensure it will automatically switch to this mode once the battery is fully charged. Most smart maintainers do this by default.
Once everything is connected and settings are chosen, your trickle charger will begin its work, gently topping up and maintaining your battery’s charge. It’s truly that simple!
Monitoring the Charging Process and Disconnecting Safely
Once your trickle charger is connected and running, you’re not entirely off the hook! Understanding how to monitor its progress and, crucially, how to disconnect it safely are the final pieces of the puzzle. This ensures both effectiveness and continued safety.
Understanding Charging Indicators
Most modern trickle chargers come equipped with indicator lights that tell you what’s happening. These vary by model but typically include:
- Power On/Connected: A light indicating the charger is plugged in and receiving power, and the clamps are properly connected to the battery.
- Charging: This light (often amber or red) signals that the charger is actively delivering current to the battery.
- Charged/Full/Float Mode: Once the battery reaches its full charge, the light will typically change (often to green) to indicate it’s complete. For smart chargers, this means it has switched to a “float” or “maintenance” mode, where it provides just enough current to keep the battery topped up without overcharging.
- Error/Fault: A flashing light or a specific color (e.g., red or orange) might indicate an issue, such as a bad connection, a faulty battery, or an incorrect setting. If you see an error light, disconnect the charger immediately and consult your manual.
Familiarize yourself with your specific charger’s indicator lights as outlined in its manual. They are your window into the charging process.
How Long Should You Trickle Charge?
This is a common question, and the answer depends on your battery’s state and the type of trickle charger you’re using:
- For a Slightly Discharged Battery: If your battery is only mildly drained, a trickle charger might take several hours, or even overnight, to bring it back to full charge. Since it’s a slow, gentle process, patience is key.
- For Maintenance (Smart Charger/Maintainer): The beauty of a smart trickle charger (battery maintainer) is that you can leave it connected indefinitely. Once the battery is fully charged, it automatically switches to float mode, safely maintaining the charge without risk of overcharging. This is ideal for vehicles in long-term storage.
- Manual Trickle Chargers (Older Models): If you have an older, simpler trickle charger that doesn’t have automatic shut-off or float mode, you’ll need to monitor it. Overcharging a battery can cause damage. In these cases, it’s best to check the battery voltage periodically with a multimeter. A fully charged 12V car battery should read around 12.6 to 12.8 volts when the engine is off. Once it reaches this range, disconnect the charger.
Always aim for a full charge, but with a modern smart trickle charger, you rarely need to worry about disconnecting it precisely. It’s designed for “set it and forget it” convenience.
Disconnecting Your Trickle Charger
Just like connecting, disconnecting requires a specific order to ensure safety:
- Unplug from Power Outlet FIRST: This is the golden rule. Always unplug the trickle charger from the wall socket before touching the clamps on the battery. This immediately removes any electrical current from the clamps, eliminating the risk of sparks.
- Remove Negative Clamp: Next, remove the black, negative (-) clamp from its connection point (either the ground point on the engine/chassis or the negative battery terminal if the battery was out of the vehicle).
- Remove Positive Clamp: Finally, remove the red, positive (+) clamp from the positive (+) terminal of the battery.
- Store Charger Properly: Coil the cables neatly and store your trickle charger in a clean, dry place, ready for its next use.
Following these steps will ensure you maintain your battery safely and efficiently, getting the most out of your trickle charger and preventing any accidental mishaps.
Maximizing Battery Life: Tips for Long-Term Battery Health
A trickle charger is a fantastic tool, but it’s part of a larger picture when it comes to keeping your car battery healthy and extending its lifespan. Here are some additional tips to ensure your battery provides reliable service for years to come.
Regular Maintenance is Key
Proactive care goes a long way. Incorporate these simple checks into your routine:
- Clean Terminals Periodically: Even with a trickle charger, corrosion can build up. Regularly inspect and clean your battery terminals (as described earlier) to ensure good electrical contact. This prevents resistance that can hinder charging and starting.
- Check Fluid Levels (for Flooded Batteries): If you have a traditional flooded lead-acid battery (not AGM or Gel), you might have caps on top that allow you to check the electrolyte levels. If low, add distilled water (never tap water!) to the fill line. Always wear safety glasses and gloves when doing this.
- Regularly Check Battery Voltage: While your trickle charger handles charging, a multimeter can give you a quick snapshot of your battery’s health. A fully charged 12V battery should read between 12.6 and 12.8 volts. If it consistently reads lower after charging, it might be showing signs of weakness.
- Secure the Battery: Ensure your battery is securely mounted in its tray. Vibrations from driving can damage the internal components of the battery and shorten its life.
The Benefits of a Smart Trickle Charger
While any trickle charger can help, a smart charger or battery maintainer offers significant advantages for long-term battery health:
- Prevents Overcharging: This is arguably their biggest benefit. Smart chargers monitor the battery’s voltage and automatically stop charging or switch to a “float” mode once the battery is full. This prevents the battery from being overcharged, which can boil off electrolytes (in flooded batteries) or damage internal plates in any battery type.
- Automatic Float Mode: As mentioned, this mode simply maintains the battery at an optimal charge, replacing only the minimal self-discharge. It’s perfect for indefinite connection.
- Desulfation Features: Some advanced smart chargers include a desulfation mode. Sulfation is the buildup of lead sulfate crystals on the battery plates, which reduces the battery’s capacity and ability to hold a charge. A desulfation feature can sometimes reverse this process, especially if caught early, potentially extending the battery’s life.
- Temperature Compensation: More advanced models can adjust their charging output based on ambient temperature, which is crucial for optimal charging in extreme hot or cold conditions.
Investing in a good quality smart trickle charger is a small price to pay for the peace of mind and extended lifespan it can offer your car battery.
When to Replace Your Car Battery
Even with the best maintenance and regular use of a trickle charger, all car batteries have a finite lifespan. Typically, a car battery lasts between 3 to 5 years, though this can vary greatly depending on climate, usage, and maintenance. Be aware of the signs that your battery might be nearing its end:
- Slow Cranking: The engine turns over sluggishly when you try to start it.
- Dim Headlights: Headlights appear dim when the engine is off or at idle.
- Frequent Need for Charging: You find yourself needing to connect your trickle charger more and more often, even after short periods of non-use.
- Warning Lights: Your dashboard battery or check engine light illuminates.
- Visual Signs of Damage: Swelling, cracks, or excessive corrosion that rapidly returns after cleaning can indicate internal battery problems.
Don’t rely on a trickle charger to indefinitely revive a truly dead or damaged battery. It’s a maintainer, not a miracle worker. If your battery is consistently failing, it’s time for a professional to test it and likely replace it.
Trickle Charger vs. Battery Maintainer vs. Fast Charger
To help clarify the differences, here’s a quick comparison of various charging devices you might encounter, highlighting why a trickle charger (or battery maintainer) is specifically suited for long-term battery health.
| Feature | Trickle Charger (Traditional) | Battery Maintainer (Smart Trickle Charger) | Fast Charger / Standard Charger |
|---|---|---|---|
| Charge Rate (Amperage) | Very low (e.g., 0.5 – 2 Amps) | Very low (e.g., 0.75 – 3 Amps) | Moderate to High (e.g., 4 – 20 Amps) |
| Purpose | Slow charge, compensates for self-discharge. Prevents deep discharge. | Maintains optimal charge, prevents overcharging, extends battery life. | Recharges a discharged battery relatively quickly. |
| Overcharge Protection | Limited or none; requires manual disconnection. | Automatic float mode; safe for indefinite connection. | Some have automatic shut-off, others require monitoring. |
| Ideal Use Case | Occasional top-up for stored vehicles, but requires vigilance. | Long-term maintenance for stored vehicles, seasonal equipment, or infrequently driven cars. | Recharging a moderately to deeply discharged battery that still has life. |
| Battery Type Compatibility | Usually lead-acid specific. | Often multi-chemistry (Lead-Acid, AGM, Gel) with specific modes. | Varies; some are basic, others more versatile. |
Conclusion
Nobody enjoys the frustration of a dead car battery, especially when you’re in a hurry. By understanding and properly utilizing a trickle charger, you gain a powerful ally in the fight against unexpected battery failures. It’s not just about rescuing a weak battery; it’s about proactive maintenance, extending the life of your expensive automotive power source, and ensuring your vehicle is always ready for your next adventure, whether it’s a daily commute or a long-awaited road trip.
We’ve covered everything from the basics of what a trickle charger does, to the critical safety precautions, the step-by-step connection process, and smart tips for maximizing battery health. Remember, the key takeaways are always to prioritize safety by wearing protective gear and working in a well-ventilated area, and to follow the correct connection and disconnection sequence for your charger and car battery.
Embrace the simplicity and effectiveness of regular battery maintenance. A small investment in a good quality trickle charger and a few minutes of your time can save you significant hassle, money, and stress down the road. Keep your battery happy, and it will keep your car starting strong every single time. Happy driving!
🎥 Related Video: How to Connect A Trickle Charger To Your Battery!
📺 RobMotive
The correct way to hook up a battery trickle charger. Great if you’re gonna be away for a while! #batterycharger #carbattery #howto …
Frequently Asked Questions
What is a trickle charger and when should I use one for my car battery?
A trickle charger is a low-amperage device designed to slowly charge and maintain a car battery over extended periods. It’s ideal for vehicles stored for weeks or months, like classic cars, motorcycles, or seasonal vehicles, to prevent self-discharge and keep the battery healthy.
How do I safely connect a trickle charger to my car battery?
First, ensure good ventilation and turn off the vehicle. Connect the red positive (+) clamp to the positive terminal of your car battery and the black negative (-) clamp to a grounded metal part of the vehicle’s chassis, away from the battery. Only then plug the charger into a power outlet.
Can I leave a trickle charger connected to my car battery indefinitely?
Most modern trickle chargers are actually “battery maintainers” and are designed to be left connected indefinitely without overcharging. These smart chargers monitor the battery’s voltage and automatically switch to a float mode, providing only the necessary current to keep the car battery at optimal charge.
How long does it take for a trickle charger to fully charge a car battery?
The charging time varies greatly depending on the car battery’s size and its current state of discharge. A deeply discharged battery could take anywhere from 24 hours to several days to reach a full charge using a low-amperage trickle charger.
What safety precautions should I take when using a trickle charger on my car battery?
Always work in a well-ventilated area to dissipate any hydrogen gas produced by the battery and wear eye protection. Ensure the charger is unplugged before connecting or disconnecting the clamps to avoid sparks, and always follow the specific instructions in your charger’s manual.
Will a trickle charger fix a completely dead car battery?
Generally, a basic trickle charger is not designed to revive a completely dead or deeply discharged car battery. Its low amperage is best suited for maintaining charge or slow charging a battery that still has some voltage. For severely depleted batteries, a higher amperage smart charger with a reconditioning mode may be needed.