Revive your dead car battery safely and effectively with this comprehensive guide on how to charge a car battery with a charger. We’ll walk you through selecting the right charger, essential safety precautions, step-by-step connection, and monitoring the charging process to ensure your vehicle starts reliably every time.
How to Charge Car Battery with Charger
There’s nothing quite like the disheartening click-click-click of a car that won’t start. Maybe you left your lights on, or perhaps it’s been a while since your last drive. Whatever the reason, a dead car battery is a common inconvenience that can leave you stranded. The good news is, with the right tools and a little know-how, you can bring your battery back to life using a car battery charger. Learning how to charge a car battery with a charger is a valuable skill that empowers you to handle these situations with confidence, saving you time, money, and the hassle of calling for roadside assistance.
This comprehensive guide will walk you through everything you need to know about how to charge a car battery with a charger safely and effectively. We’ll cover selecting the right equipment, preparing your battery, making the correct connections, monitoring the charging process, and even troubleshooting common issues. By the end, you’ll feel completely comfortable tackling this essential car maintenance task, ensuring your vehicle is always ready to hit the road. Let’s get started on revitalizing your car’s power source!
Key Takeaways
- Safety First: Always prioritize safety by wearing protective gear (gloves, eye protection) and ensuring good ventilation when you charge car battery with charger.
- Choose the Right Charger: Understand the difference between trickle, smart/automatic, and portable chargers, and select one appropriate for your battery type (e.g., lead-acid, AGM).
- Prepare the Battery: Before connecting, inspect the battery for damage, clean corrosive terminals with a wire brush, and ensure it’s accessible.
- Correct Connection is Crucial: Connect the positive (+) clamp to the positive terminal and the negative (-) clamp to a clean, unpainted metal surface on the car chassis (or the negative battery terminal if removing the battery).
- Monitor the Charging Process: Smart chargers will often indicate completion, but for manual chargers, carefully follow instructions to prevent overcharging and ensure optimal battery health.
- Troubleshoot Common Issues: If charging fails, check connections, charger settings, or consider if the battery might be too old or damaged to accept a charge.
- Regular Maintenance Extends Life: Periodically inspect and clean your battery terminals, and ensure proper charging practices to prolong its lifespan and reliability.
Quick Answers to Common Questions
Can I charge my car battery without disconnecting it?
Yes, you can charge most car batteries without disconnecting them from the car. Just make sure the ignition is off and all accessories are turned off. Connect the negative charger clamp to a clean, unpainted metal part of the car’s chassis, away from the battery, to minimize sparks near the battery itself.
How long does it take to fully charge a dead car battery?
The time it takes depends on the battery’s size, its state of discharge, and the charger’s output. A moderately discharged battery might take 4-8 hours with a 10-amp smart charger, while a completely dead one could take 10-24 hours or more with a lower-amp charger.
What does it mean if my charger won’t turn on?
If your charger won’t turn on, first check if the power outlet is working. Then, ensure the charger clamps are connected correctly (positive to positive, negative to ground/negative). Many smart chargers won’t activate if there’s a reverse polarity or if the battery voltage is extremely low (e.g., below 2-3 volts).
Is it safe to leave a smart charger on overnight?
Yes, most modern smart or automatic car battery chargers are designed to be left on overnight or for extended periods. They automatically switch to a “float” or “maintenance” mode once the battery is fully charged, preventing overcharging and keeping the battery topped off.
Do I need to add water to my car battery before charging?
Only if you have a flooded lead-acid battery with removable caps and the electrolyte levels are low. If so, add distilled water until the plates are covered. AGM and Gel batteries are sealed and do not require water. Never add tap water to any battery.
📑 Table of Contents
Understanding Your Car Battery and Charger
Before you even think about connecting anything, it’s really helpful to understand what you’re working with. Car batteries aren’t all the same, and neither are their chargers. Knowing the basics will help you choose the right tools and ensure you’re charging safely.
Types of Car Batteries
Most passenger vehicles use a 12-volt battery, but the internal chemistry can vary. The most common types you’ll encounter are:
- Lead-Acid (Flooded/Wet Cell): These are the traditional batteries with removable caps that allow you to check and top off electrolyte levels with distilled water. They are typically the most affordable and robust.
- AGM (Absorbed Glass Mat): A type of sealed lead-acid battery where the electrolyte is absorbed into fiberglass mats. They are maintenance-free, more vibration resistant, and charge faster than flooded batteries.
- Gel Cell: Also sealed, these batteries use a gelled electrolyte. They are very resistant to vibration and can be discharged deeply without damage, but they require specific charging voltages and can be damaged by overcharging.
It’s important to know your battery type because some chargers have settings specifically for AGM or Gel batteries. Using the wrong setting can damage your battery, so always check your battery’s label.
Types of Car Chargers
Just like batteries, chargers come in different forms, each with its own benefits:
- Trickle Chargers: These deliver a low, steady current (usually 1-2 amps) over a long period. They are great for maintaining a battery during long-term storage but can take a very long time to fully charge a dead battery. Many modern trickle chargers are “smart” and will switch to maintenance mode once the battery is full.
- Smart/Automatic Chargers: These are arguably the best choice for most car owners. They can assess the battery’s condition, deliver the appropriate current, and automatically switch to a float or maintenance mode once the battery is fully charged, preventing overcharging. They often have multiple charge settings for different battery types. These are ideal for how to charge car battery with charger without constant monitoring.
- Portable Jump Starters: While not designed for a full charge, these compact devices can provide enough juice to start your car in an emergency. Some have small charging capabilities, but their primary purpose is a quick boost.
- Manual Chargers: These require you to set the voltage and current output and monitor the charging process yourself. If you don’t disconnect them once the battery is full, they can overcharge and damage the battery. Use these with extreme caution.
For most people, a smart or automatic charger is the safest and most convenient option when learning how to charge car battery with charger.
Essential Safety Precautions
Before you even touch your battery or charger, remember this: safety is paramount. Car batteries contain corrosive acid and produce explosive hydrogen gas. Follow these guidelines religiously:
- Wear Protective Gear: Always wear safety glasses or goggles and acid-resistant gloves.
- Ensure Good Ventilation: Charge the battery in an open, well-ventilated area to prevent the buildup of hydrogen gas. Never charge in an enclosed space like a garage with the door closed.
- No Sparks, No Flames: Keep cigarettes, open flames, and sparking tools away from the battery. A spark near a gassing battery can cause an explosion.
- Remove Jewelry: Metal jewelry can short-circuit the battery if it accidentally touches the terminals, causing severe burns.
- Read Your Manuals: Always read both your car’s owner’s manual and the charger’s instruction manual before starting.
- Have Baking Soda Handy: In case of an acid spill, baking soda can neutralize the acid.
Gathering Your Tools and Preparing for Charging

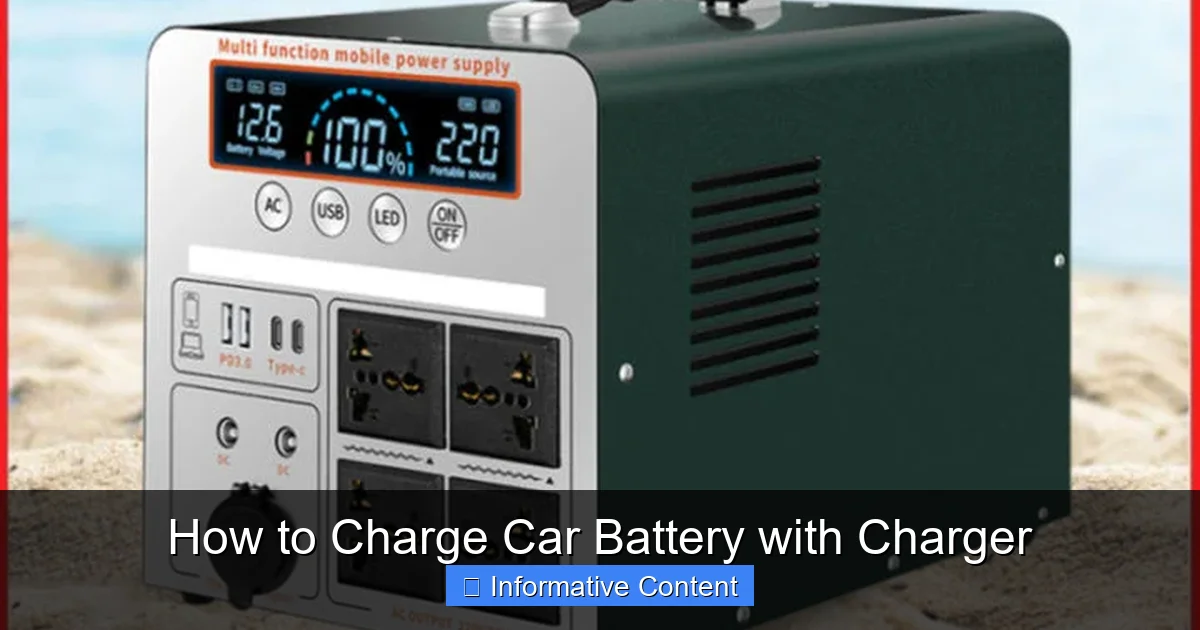
Visual guide about How to Charge Car Battery with Charger
Image source: vehiclescene.com
With safety in mind, let’s get everything ready. Preparation is key to a smooth and successful charging process.
What You’ll Need
You’ll need a few items to safely and effectively charge your car battery:
- Car Battery Charger: A smart/automatic charger is highly recommended.
- Safety Glasses/Goggles and Gloves: Non-negotiable!
- Wire Brush or Battery Terminal Cleaner: To clean corrosion.
- Wrench/Socket Set: To disconnect battery terminals (if removing for charging).
- Distilled Water: Only for flooded lead-acid batteries that have low electrolyte levels.
- Baking Soda and Water: For cleaning corrosion and neutralizing acid.
- Well-Ventilated Area: Crucial for safety.
Locating and Inspecting Your Battery
Your car battery is typically found under the hood, but in some vehicles, it might be in the trunk, under the back seat, or even in the wheel well. Consult your car’s owner’s manual if you can’t find it.
Once located, perform a quick inspection:
- Check for Damage: Look for cracks, bulges, or leaks on the battery casing. If you see any, do not attempt to charge it; a damaged battery can be dangerous.
- Look for Corrosion: White or bluish-green powdery substance around the terminals is corrosion. This hinders charging and starting.
- Check Electrolyte Levels (Flooded Batteries Only): If you have a flooded lead-acid battery with removable caps, carefully pry them off and check the fluid levels. If they are low, add distilled water (not tap water!) until the plates are covered. Do not overfill. Replace the caps securely.
Cleaning Battery Terminals
Corrosion acts as an insulator, preventing your charger from delivering a full charge and your car from starting properly. Here’s how to clean them:
- Safety First: Ensure your protective gear is on.
- Disconnect (Optional but Recommended): If the corrosion is severe or you plan to remove the battery, disconnect the cables. Always disconnect the negative (-) terminal first, then the positive (+).
- Mix Solution: Make a paste of baking soda and water.
- Apply and Scrub: Apply the paste to the corroded areas and scrub with a wire brush or battery terminal cleaner until the corrosion is gone.
- Rinse and Dry: Rinse the terminals with clean water and dry them thoroughly with a clean cloth.
Connecting the Charger Safely and Correctly
This is where many people get nervous, but if you follow the steps carefully, it’s quite straightforward.
Disconnecting the Battery (If Desired)
While you can often charge a car battery while it’s still connected to the car, some people prefer to remove it for better access, especially if it’s heavily corroded or located in a confined space. If you decide to disconnect it:
- Negative First: Using your wrench, loosen the nut on the negative (-) terminal and remove the negative cable. Tuck it away from the battery.
- Positive Second: Next, loosen the nut on the positive (+) terminal and remove the positive cable. Again, tuck it away.
- Remove Battery: Once both cables are disconnected, you can safely remove the battery from its tray.
If you keep the battery in the car, make sure your car’s ignition is off and all accessories are turned off.
Connecting the Charger Clamps
This is the most critical step to get right. Incorrect connections can cause sparks, damage the battery, or even injure you.
If the Battery is STILL Connected to the Car:
- Positive to Positive: Connect the red (+) positive clamp from the charger to the positive (+) terminal on your car battery.
- Negative to Ground: Connect the black (-) negative clamp from the charger to a clean, unpainted metal part of your car’s chassis or engine block, away from the battery and fuel lines. This provides a ground connection and minimizes the risk of sparks near the battery itself.
- Plug In Charger: ONLY after both clamps are securely connected, plug your car battery charger into an electrical outlet.
If the Battery is DISCONNECTED from the Car (on the ground or workbench):
- Positive to Positive: Connect the red (+) positive clamp from the charger to the positive (+) terminal on your car battery.
- Negative to Negative: Connect the black (-) negative clamp from the charger to the negative (-) terminal on your car battery.
- Plug In Charger: ONLY after both clamps are securely connected, plug your car battery charger into an electrical outlet.
The key is to *always* connect the charger to the battery first, then plug the charger into the power source. This reduces the risk of sparking near the battery.
Double-Checking Connections and Settings
Before turning on the charger, take a moment to review everything:
- Are the clamps securely attached and making good contact?
- Is the charger plugged into a working outlet?
- Have you selected the correct voltage (12V for most car batteries)?
- If your charger has different battery type settings (e.g., AGM, Gel), have you selected the correct one for your battery?
- Is the charging area well-ventilated and free of flammable materials?
Once you’re satisfied, you can turn on the charger.
The Charging Process: What to Expect
Now that everything is connected, it’s time to let the charger do its work.
Monitoring the Charge
Most modern smart chargers are “set it and forget it.” They have indicators that show the charging progress (e.g., lights changing from red to yellow to green, or a digital display showing percentage). Some might even tell you the voltage.
If you’re using a manual charger, you’ll need to monitor it more closely. Keep an eye on the charger’s ammeter, which will show the current flowing into the battery. As the battery charges, the amperage will gradually decrease.
How Long Does It Take?
The charging time varies significantly based on several factors:
- Battery Size (Ah – Amp-hours): Larger batteries take longer.
- Charger Output (Amps): A 10-amp charger will charge faster than a 2-amp charger.
- Battery’s State of Discharge: A completely dead battery will take longer than one that’s only partially discharged.
- Battery’s Age and Condition: Older, weaker batteries may take longer or never fully recover.
As a rough guide, a moderately discharged 12V car battery might take 4-8 hours with a 10-amp smart charger. A completely dead battery could take 10-24 hours or more, especially with a lower-amp charger. Smart chargers typically switch to a maintenance or “float” mode once the battery is full, which is safe for long-term connection. For manual chargers, disconnect when the ammeter drops to a very low level (usually 1-2 amps) or the battery voltage reaches around 12.6-12.8 volts (use a voltmeter to check).
What to Do After Charging
Once your battery is fully charged, it’s time to disconnect everything safely:
- Unplug Charger First: Disconnect the car battery charger from the electrical outlet. This is the crucial first step to prevent sparks.
- Remove Negative Clamp: Remove the black (-) negative clamp from the car’s chassis or the negative battery terminal.
- Remove Positive Clamp: Remove the red (+) positive clamp from the positive battery terminal.
- Reconnect Battery (If Disconnected): If you disconnected your car battery, reconnect the positive (+) cable first, then the negative (-) cable. Ensure both are tight.
Wipe down any residue, double-check all connections, and you’re ready to try starting your car!
Troubleshooting Common Charging Issues
Even with the best preparation, sometimes things don’t go as planned. Here are a few common problems you might encounter when you charge car battery with charger.
Charger Not Turning On/Indicating Error
- Check Power Outlet: Is the outlet working? Try plugging in another device.
- Check Charger Fuses: Some chargers have internal fuses that might blow.
- Reverse Polarity: Many smart chargers have reverse polarity protection and won’t turn on if the clamps are connected incorrectly. Double-check your positive and negative connections.
- Battery Too Dead: Some smart chargers won’t initiate a charge if the battery voltage is extremely low (e.g., below 2-3 volts). You might need a specialized charger with a “desulfation” or “repair” mode, or try a temporary jump start to get a slight charge in it first.
Battery Not Holding a Charge
If you charge your car battery and it quickly dies again, or doesn’t start your car, the issue might not be the charging process itself:
- Battery Age: Car batteries typically last 3-5 years. If yours is older, it might be at the end of its life and unable to hold a charge anymore.
- Sulfation: If a battery sits discharged for too long, lead sulfate crystals can build up on the plates, preventing it from accepting or holding a charge efficiently. Some smart chargers have a desulfation mode that *might* help, but it’s not a guaranteed fix.
- Alternator Issue: Your car’s alternator charges the battery while the engine is running. If the alternator is faulty, it won’t recharge the battery as you drive, leading to repeated dead batteries. Get your alternator tested at an auto parts store or mechanic.
- Parasitic Drain: Something in your car (e.g., a faulty light, a short circuit, an aftermarket accessory) might be drawing power even when the car is off, slowly draining the battery.
In these cases, a new battery or a visit to a mechanic might be necessary.
Overcharging Risks
This is primarily a concern with older, manual chargers. Overcharging a battery can cause:
- Gassing: Excessive hydrogen gas production.
- Heat Damage: High temperatures can warp battery plates and boil off electrolyte.
- Reduced Battery Life: Premature wear and failure.
Modern smart chargers are designed to prevent overcharging by switching to a maintenance mode, making them much safer for unattended charging. However, if using a manual charger, always monitor the battery’s temperature (it shouldn’t be hot to the touch) and disconnect once fully charged.
Maintaining Your Battery for Longer Life
Knowing how to charge car battery with charger is great, but preventative maintenance is even better for extending its lifespan.
Regular Inspections
Make it a habit to periodically check your battery terminals for corrosion, ensure the cables are tight, and for flooded batteries, check the electrolyte levels. A quick visual inspection can prevent problems down the road.
Keeping it Clean
A clean battery stays cooler and performs better. Wipe down the top of your battery regularly to remove dust and grime. Address any signs of corrosion immediately.
Driving Habits
Frequent short trips don’t give your alternator enough time to fully recharge the battery, especially in modern cars with many electronics. If you mostly drive short distances, consider periodically putting your car on a smart charger for a full charge, especially during winter months when batteries are under more stress.
Conclusion
Learning how to charge car battery with charger is an incredibly practical skill that can save you from inconvenient breakdowns and costly service calls. By following the steps outlined in this guide – prioritizing safety, preparing your battery properly, making correct connections, and monitoring the charging process – you can confidently revive your car’s power source.
Remember, a healthy battery is crucial for a reliable vehicle. Regularly inspecting and maintaining your battery, along with knowing how to charge it correctly, will ensure your car starts every time you turn the key. So, the next time you face a dead battery, you’ll be well-equipped to handle it like a pro. Drive safe, and keep that battery fully charged!
Frequently Asked Questions
What is the difference between a trickle charger and a smart charger?
A trickle charger delivers a low, constant current, primarily for maintaining a battery over long periods. A smart charger, on the other hand, monitors the battery’s condition, adjusts its output, and automatically stops or switches to maintenance mode once fully charged, making it more versatile and safer for full charging.
Can charging a car battery damage my car’s electronics?
When done correctly with the battery connected in the car, modern smart chargers are generally safe for your car’s electronics. Always ensure your car’s ignition is off and all accessories are unplugged or turned off. If concerned, you can always disconnect the battery from the car before charging.
How often should I charge my car battery?
If you drive regularly, your car’s alternator usually keeps the battery charged. However, if you make frequent short trips, store your car for extended periods, or live in extreme climates, charging your battery with a smart charger every few weeks to a month can help prolong its life.
What are the signs that my car battery is fully charged?
For smart chargers, there will usually be an indicator light (e.g., green light) or a digital display showing “Full” or 100%. For manual chargers, the ammeter will drop to a very low reading (1-2 amps), and a voltmeter connected to the battery will read around 12.6-12.8 volts.
What if my battery still won’t start the car after charging?
If your car still won’t start after charging, the battery might be too old or damaged to hold a charge, or there could be another issue like a faulty alternator, a parasitic drain, or a problem with the starter motor. It’s best to have the battery and charging system tested by a professional.
Is it safe to use jumper cables to charge a battery?
Jumper cables are for jump-starting a dead battery, not for fully charging it. A jump start provides enough power to get your engine running so the alternator can then recharge the battery. You should never leave jumper cables connected for an extended period to attempt a full charge.