Testing your car battery with a multimeter is a straightforward way to diagnose its health and avoid unexpected breakdowns. This guide will walk you through preparing your multimeter, taking accurate voltage readings, and understanding the results to determine if your battery needs charging or replacement. You’ll gain the confidence to proactively maintain your vehicle’s power system.
There’s nothing quite like the feeling of turning the key in your ignition, hearing that familiar crank, and feeling your engine roar to life. It’s a small moment, but one we often take for granted – that is, until it doesn’t happen. A dead car battery is a universal frustration, capable of derailing your morning commute or stranding you far from home. But what if you could foresee trouble before it strikes?
The good news is, you absolutely can! With a simple tool called a multimeter and a few minutes of your time, you can quickly assess the health of your car’s battery. This isn’t just about avoiding roadside emergencies; it’s about proactive car maintenance, saving money on unnecessary replacements, and gaining a deeper understanding of your vehicle. Learning how to use a multimeter to test a car battery is a fundamental skill for any car owner, and it’s much easier than you might think.
In this comprehensive guide, we’ll demystify the process of how to use a multimeter to test a car battery. We’ll cover everything from what you need to get started and crucial safety precautions, to step-by-step instructions for performing various tests, and most importantly, how to interpret those numbers so you know exactly what your battery is telling you. So, grab your multimeter, and let’s get ready to empower you with the knowledge to keep your car starting strong!
Key Takeaways
- Safety First: Always wear appropriate personal protective equipment (PPE) like gloves and eye protection when working with car batteries to prevent acid burns or electrical shocks.
- Multimeter Setup: Set your multimeter to the “DC Volts” (V= or VDC) setting and choose a range appropriate for 12V batteries, typically 20V if not auto-ranging.
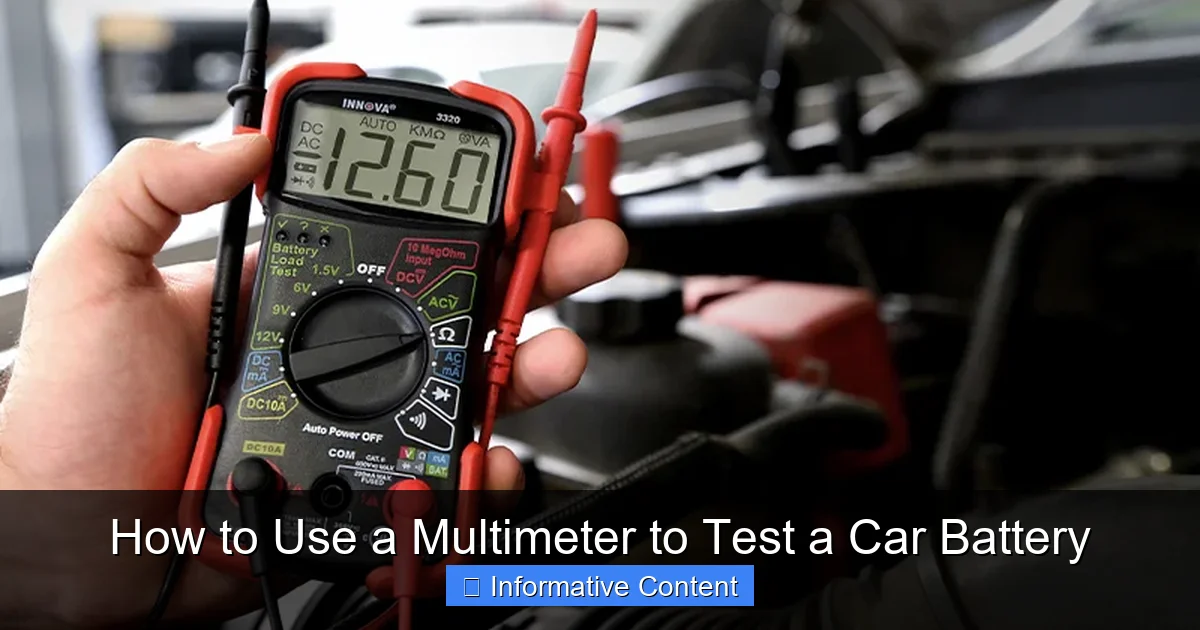
- Resting Voltage Test: For an accurate resting voltage reading, ensure your car’s engine has been off for at least 2-4 hours and all accessories are turned off. A healthy, fully charged battery should read 12.6 volts or higher.
- Connecting Probes: Connect the multimeter’s red (positive) lead to the battery’s positive (+) terminal and the black (negative) lead to the battery’s negative (-) terminal.
- Cranking Voltage Test: This advanced test checks battery performance under load. A healthy battery shouldn’t drop below 9.6-10.5 volts during engine cranking.
- Alternator Test: To check your car’s charging system, measure battery voltage with the engine running. A healthy alternator should maintain a voltage between 13.7 and 14.7 volts.
- Interpreting Results: Understand that different voltage readings indicate different battery conditions, from fully charged to deeply discharged, or even a failing battery or alternator.
Quick Answers to Common Questions
What’s a good resting voltage for a car battery?
A fully charged, healthy car battery that has been resting for at least 2-4 hours should typically read 12.6 volts or higher on a multimeter. Anything consistently below 12.4 volts indicates a discharge or a weakening battery.
Can I test a battery while it’s charging?
While you can connect a multimeter to a battery that’s charging, the reading will show the charging voltage (usually 13.7-14.7V from the charger or alternator), not the battery’s true resting voltage. To get an accurate reading of the battery’s state of charge, disconnect the charger and let the battery rest for a few hours first.
What if my multimeter doesn’t have an auto-range setting?
If your multimeter doesn’t have an auto-range feature, you’ll need to manually select a voltage range. For a 12-volt car battery, choose the next highest DC Volts range available, typically 20V. This ensures the multimeter can accurately measure the battery’s voltage without being overloaded or imprecise.
How often should I test my car battery?
It’s generally recommended to test your car battery at least twice a year, ideally before the start of extreme cold and hot weather seasons. You should also test it if you notice any signs of weakness (slow cranking, dim lights), or before a long road trip, or if your car sits unused for extended periods.
What does a “surface charge” mean?
A “surface charge” is a temporary higher voltage reading a battery can display immediately after being charged or after the engine has just run. This charge quickly dissipates, and if you test too soon, you’ll get an artificially high reading. Always let the battery rest for 2-4 hours after charging or driving to get an accurate resting voltage.
📑 Table of Contents
Why Testing Your Car Battery Matters (and When to Do It)
Your car battery is the silent workhorse of your vehicle’s electrical system. It provides the initial burst of power to start the engine and then acts as a stabilizer for the electrical system, absorbing voltage spikes and ensuring a consistent flow of power to your accessories. Over time, batteries degrade, and their ability to hold a charge diminishes. Regular testing is your first line of defense against unexpected battery failure.
Signs of a Weak Battery
Before you even grab your multimeter, your car might be trying to tell you something. Keep an eye (and ear) out for these common symptoms:
- Slow Engine Crank: Does your engine sound sluggish or take longer than usual to start? This is often the first and most obvious sign.
- Dim Headlights: Especially noticeable when the engine isn’t running, dim or flickering headlights can indicate a weak battery.
- Dashboard Warning Lights: The battery warning light, or sometimes other electrical system warnings, can illuminate.
- Clicking Noise: If you hear a rapid clicking sound when you try to start the car, but the engine doesn’t turn over, it often means the battery doesn’t have enough power to engage the starter motor.
- Accessory Malfunctions: Power windows moving slowly, radio cutting out, or other electrical components behaving strangely.
Proactive Maintenance
Don’t wait for these warning signs! Proactive battery testing can save you a lot of hassle. We recommend you learn how to use a multimeter to test a car battery:
- Seasonally: Test your battery at least twice a year, ideally before extreme weather hits (e.g., before winter and summer). Cold weather significantly impacts battery performance, and hot weather can accelerate battery degradation.
- Before a Long Trip: Give yourself peace of mind by checking your battery before embarking on an extended journey.
- If Your Car Sits: Vehicles that aren’t driven frequently tend to drain their batteries slowly. Test regularly if your car is often parked for weeks.
- After Jumps: If your car needed a jump start, it’s crucial to test the battery afterward to understand why it failed in the first place.
Getting Started: What You’ll Need and Safety First!
Before you dive into how to use a multimeter to test a car battery, let’s gather your tools and, more importantly, discuss safety. Working with car batteries involves electricity and corrosive chemicals, so proper precautions are non-negotiable.
Visual guide about How to Use a Multimeter to Test a Car Battery
Image source: s3.amazonaws.com
Essential Tools
- Digital Multimeter: This is your primary tool. Analog multimeters can work, but digital ones are easier to read for precise voltage measurements.
- Safety Glasses/Goggles: To protect your eyes from battery acid or sparks.
- Gloves: Acid-resistant gloves are ideal to protect your hands.
- Wire Brush or Battery Terminal Cleaner: To clean corrosive buildup on battery terminals for accurate readings.
- Rag or Shop Towel: For cleaning.
Prioritizing Safety
These safety tips are paramount when you’re preparing to use a multimeter to test a car battery:
Safety Gear
Always wear your safety glasses or goggles. Battery acid is highly corrosive and can cause severe eye damage. Gloves will protect your hands from acid and grease. Remember, safety isn’t just a suggestion; it’s a requirement.
Ventilation
Car batteries can produce hydrogen gas, which is highly flammable. Work in a well-ventilated area to prevent gas buildup. If working indoors, ensure windows are open or a fan is running.
Avoid Shortcuts
Never short-circuit the battery terminals (touching the positive and negative terminals with a metal object simultaneously). This can cause sparks, an explosion, and serious injury. Remove any metal jewelry (rings, watches) that could accidentally short-circuit the battery. Make sure your tools don’t accidentally bridge the terminals either.
Cleanliness
Before connecting anything, inspect the battery for cracks, leaks, or excessive corrosion. If you see significant damage, it’s best to have a professional handle it. Never try to charge a frozen battery; it could explode.
Setting Up Your Multimeter for Car Battery Testing
Now that you’re geared up and safety-conscious, let’s get your multimeter ready. Don’t be intimidated by all the numbers and symbols; we’ll focus on just a few key settings for testing your car battery.
Understanding Your Multimeter
Most multimeters, especially digital ones, have a few common features:
- Digital Display: Where your readings will appear.
- Rotary Dial: Used to select the measurement type (volts, amps, ohms) and range.
- Ports for Probes: Typically labeled “COM” (common/negative) and “VΩmA” (volts, ohms, milliamps/positive).
- Test Probes: Red for positive, black for negative.
Digital vs. Analog
Digital multimeters are generally preferred for car battery testing because they give a precise numerical readout, which is easier to interpret than an analog needle swinging across a scale.
Key Controls (Dial, Probes)
The main thing you’ll be using is the rotary dial to select the right measurement. The black probe always goes into the “COM” port. The red probe typically goes into the port labeled for voltage measurements (often “VΩmA” or similar).
Dialing in the Right Settings
This is a crucial step when you want to use a multimeter to test a car battery. You need to tell the multimeter what kind of electricity you’re measuring and its expected magnitude.
DC Volts (V=, VDC)
Car batteries use direct current (DC) electricity, not alternating current (AC) like your household outlets. Look for the “V” symbol on your multimeter dial, usually accompanied by a straight line with three dots above it (V=) or sometimes labeled “DCV” or “VDC”. This signifies DC Volts. If there’s an “ACV” or “V~” option, avoid it for battery testing.
Voltage Range (20V or Auto-ranging)
Most car batteries are 12-volt systems. So, you’ll need a range that can accommodate slightly more than 12 volts.
- Auto-ranging Multimeters: If your multimeter has an “Auto” setting for DC Volts, simply select that. It will automatically detect the correct voltage range. This is the easiest option.
- Manual Ranging Multimeters: If your multimeter requires you to select a specific range, choose the next highest range above 12V. For example, if your options are 2V, 20V, 200V, select 20V. Choosing a range too low won’t give you a reading, and choosing one too high will give you a less precise reading.
Make sure your probes are correctly inserted: black into “COM” and red into the voltage port.
Step-by-Step: How to Test Your Car Battery’s Resting Voltage
This is the most common and fundamental test you’ll perform to assess your battery’s general state of charge. It’s an excellent way to use a multimeter to test a car battery without putting it under load.
Preparing Your Car and Battery
Engine Off, Accessories Off
For an accurate “resting voltage” reading, the battery needs to be truly at rest. This means:
- Engine Off: Ensure the car’s engine has been turned off for at least 2-4 hours. This allows any “surface charge” (a temporary higher voltage reading that dissipates quickly after the engine is turned off) to normalize. The longer it rests, the more accurate the reading.
- Accessories Off: Double-check that all electrical accessories are off – headlights, radio, interior lights, phone chargers, etc. Even a small draw can affect the reading.
Clean Battery Terminals
Corrosion can act as an insulator, preventing your multimeter from getting an accurate connection and reading. If you see any white, blue, or green powdery substance on the battery terminals:
- Disconnect Terminals (Optional but Recommended for Deep Cleaning): If you plan a thorough cleaning, disconnect the negative (-) terminal first, then the positive (+).
- Brush Away Corrosion: Use a wire brush or a specialized battery terminal cleaner to scrub away the corrosion.
- Wipe Clean: Use a rag to wipe away residue. Reconnect terminals if you disconnected them (positive first, then negative).
Connecting the Multimeter
Now for the actual measurement. This is the core of how to use a multimeter to test a car battery:
- Position Yourself Safely: Ensure you have good footing and are not leaning over the battery in an awkward way.
- Connect Red to Positive: Carefully connect the red (positive) probe of your multimeter to the positive (+) terminal of your car battery. The positive terminal is usually larger and marked with a plus sign.
- Connect Black to Negative: Connect the black (negative) probe of your multimeter to the negative (-) terminal of your car battery. This terminal is usually smaller and marked with a minus sign.
- Read the Display: Observe the voltage reading on your multimeter’s digital display.
Interpreting Resting Voltage Readings
The number you see is crucial. Here’s what different readings typically mean for a 12-volt car battery:
- 12.6 Volts or Higher: Your battery is fully charged and in good health. Excellent!
- 12.4 Volts: The battery is about 75% charged. It’s still functional but starting to lose charge. Consider a trickle charge if it often sits at this level.
- 12.2 Volts: The battery is only about 50% charged. It’s likely weak and might struggle to start your car, especially in cold weather. It definitely needs a charge.
- 12.0 Volts or Lower: The battery is deeply discharged (25% or less). It will struggle to start your car and likely needs charging immediately. Prolonged deep discharge can damage the battery.
- Below 12.0 Volts consistently: This often indicates a failing battery that likely needs replacement, even after a charge attempt.
Tip: Let it rest! The longer the battery rests after use, the more accurate your resting voltage test will be. Don’t test immediately after a drive.
Advanced Tests: Cranking Voltage and Alternator Output (Charging System)
While the resting voltage test is foundational, two additional tests can give you a more complete picture of your battery’s and your car’s charging system’s health. These show you how to use a multimeter to test a car battery under working conditions.
Testing Cranking Voltage (Load Test Simulation)
This test simulates a load test by observing the battery’s voltage drop during engine cranking. It’s a great indicator of how well your battery can deliver power when it’s needed most.
Why it’s important
A battery might show a good resting voltage but fail under the heavy load of starting the engine. This test helps identify such a scenario, preventing you from being stranded.
Procedure (start engine, observe drop)
- Multimeter Connected: Keep your multimeter connected to the battery terminals (red to positive, black to negative).
- Prepare for Observation: You’ll need to watch the multimeter display while someone else (or you, if safe to do so from the driver’s seat) cranks the engine. If alone, some multimeters have a “MIN/MAX” function that can record the lowest voltage.
- Crank the Engine: Ask your helper to turn the ignition key to start the engine. Do not let them hold the key in the “start” position for more than 5-10 seconds to avoid overheating the starter motor.
- Observe Lowest Voltage: As the engine cranks, watch the multimeter display. The voltage will drop significantly. Note the lowest voltage it reaches *during* cranking.
- Stop Cranking: Once the engine starts (or after 5-10 seconds if it doesn’t), the voltage should quickly return to a higher level (your alternator will start charging).
Interpreting Cranking Voltage
- Above 10.5 Volts: Generally good. Your battery has sufficient power to crank the engine effectively.
- 9.6 to 10.5 Volts: The battery is marginal. It might start the car reliably now, but it’s likely getting weak and could fail soon, especially in cold weather.
- Below 9.6 Volts: The battery is weak and struggling under load. It’s probably time for a replacement.
Checking Your Alternator’s Charging Output
The alternator is responsible for recharging your battery while the engine is running and providing power to your car’s electrical systems. A faulty alternator will leave you with a dead battery even if the battery itself is healthy. This test is crucial for understanding the full health of your car’s power system.
Why it’s important (battery isn’t charging if alt is bad)
If your battery keeps dying even after being charged, the problem might not be the battery itself, but a failing alternator that isn’t recharging it properly. This test helps differentiate between the two.
Procedure (engine running, check voltage at terminals)
- Start the Engine: Start your car’s engine.
- Idle the Engine: Let the engine idle for a few minutes.
- Connect Multimeter: Connect your multimeter probes to the battery terminals again (red to positive, black to negative).
- Read Voltage: Observe the voltage reading on the multimeter.
- Increase RPMs (Optional): If possible, have someone gently rev the engine to around 1500-2000 RPMs while you watch the voltage. It should remain stable or increase slightly.
- Turn on Accessories (Optional): Turn on headlights, radio, and A/C to see how the system handles a load. The voltage should ideally remain above 13.0V.
Interpreting Alternator Readings (13.7-14.7V)
- 13.7 to 14.7 Volts: This is the ideal range. Your alternator is charging the battery correctly and maintaining the electrical system.
- Above 14.7 Volts: The alternator might be overcharging the battery. This can lead to premature battery failure and damage to other electrical components. Seek professional help.
- Below 13.7 Volts (with engine running): The alternator is likely undercharging. This could be due to a failing alternator, a loose belt, or faulty wiring. Your battery won’t get adequately recharged, leading to repeated drain.
Conclusion
Congratulations! You’ve just learned how to use a multimeter to test a car battery, diagnose its health, and even check your car’s charging system. This isn’t just a technical skill; it’s a valuable step towards becoming a more informed and empowered car owner. By performing these simple tests regularly, you can catch battery issues early, avoid the inconvenience of unexpected breakdowns, and potentially save money on towing and unnecessary repairs.
Remember the key takeaways: prioritize safety with proper gear and ventilation, set your multimeter to DC Volts and the appropriate range, and carefully interpret your readings. A healthy battery means reliable starts and peace of mind on the road. So, make it a habit to check your battery periodically, and keep your vehicle’s heart beating strong!
Frequently Asked Questions
What tools do I need besides a multimeter?
Beyond the multimeter itself, you’ll want safety glasses and gloves to protect your eyes and hands from battery acid. A wire brush or battery terminal cleaner is also helpful for removing corrosion and ensuring a good connection, and a rag or shop towel for cleaning up.
Is it safe to test a car battery?
Yes, testing a car battery with a multimeter is generally safe if you follow proper precautions. Always wear safety glasses and gloves, ensure you’re in a well-ventilated area, and avoid creating sparks by short-circuiting the terminals. Always connect the red probe to positive and the black probe to negative.
Can a multimeter tell me if my battery is bad?
A multimeter can provide strong indicators of a bad battery. A consistently low resting voltage (below 12.0V even after charging) or a significant voltage drop during the cranking test (below 9.6V) are clear signs the battery is failing and likely needs replacement.
What’s the difference between testing voltage and CCA?
Voltage testing measures the battery’s electrical potential and state of charge, telling you if it has enough power. Cold Cranking Amps (CCA) is a rating that indicates the battery’s ability to deliver a large current at low temperatures, reflecting its power output capacity. A multimeter measures voltage, not CCA; you need a specialized load tester or battery analyzer for CCA testing.
My battery voltage drops when I start the car. Is that normal?
Yes, it’s completely normal for the battery’s voltage to drop significantly when you start the car. The starter motor draws a large amount of current, which causes a temporary voltage dip. The key is how much it drops: a healthy battery should not drop below 9.6-10.5 volts during cranking.
How long does a car battery usually last?
The lifespan of a car battery varies widely depending on climate, driving habits, and maintenance, but typically lasts between 3 to 5 years. Extreme temperatures, frequent short trips, and lack of maintenance can significantly shorten its life, while regular testing can help extend it by addressing issues early.