Knowing how to test a car battery with a voltmeter is a fundamental skill for any car owner, empowering you to diagnose potential issues before they leave you stranded. This comprehensive guide walks you through the entire process, from understanding your battery and voltmeter to interpreting crucial voltage readings and maintaining your battery for optimal performance. You’ll gain the confidence to perform this simple yet vital check yourself, saving time and money.
Hey there, fellow car enthusiast! Ever had that sinking feeling when you turn the key, and all you hear is a weak click or, even worse, nothing at all? Chances are, you’ve experienced the frustration of a dead car battery. It’s a common problem, but one that can often be avoided with a little preventative maintenance and a simple tool: a voltmeter. Learning how to test a car battery with a voltmeter is a surprisingly easy skill that can save you a lot of headaches, time, and money.
Think of your car battery as the heart of your vehicle’s electrical system. It provides the initial burst of power needed to start the engine and then helps to stabilize the electrical supply to all your car’s components. Over time, batteries can weaken due to age, extreme temperatures, or improper charging. Catching these issues early on is key, and that’s exactly what testing your car battery with a voltmeter allows you to do. This comprehensive guide will walk you through everything you need to know, from understanding your battery to interpreting crucial readings, all in a friendly, easy-to-understand way. Let’s get started and empower you to keep your car running smoothly!
Key Takeaways
- Regular Testing is Crucial: Proactively testing your car battery with a voltmeter can help you identify a weakening battery before it fails completely, preventing unexpected breakdowns.
- Safety First: Always wear safety glasses and gloves when working with car batteries, and ensure proper ventilation to avoid exposure to corrosive acid and explosive gases.
- Understand Your Voltmeter: Familiarize yourself with your voltmeter’s settings, especially the DC voltage range (V= or DCV), to get accurate readings.
- Three Key Tests: Learn to perform static (resting), cranking (starting), and charging system tests to get a complete picture of your battery’s health and the car’s electrical system.
- Interpreting Readings: A healthy car battery at rest should read around 12.6 volts or higher. Readings below 12.4 volts often indicate a need for charging or replacement.
- Beyond the Battery: Voltmeter tests can also help diagnose issues with your alternator or starter by observing voltage fluctuations during cranking and while the engine is running.
- Maintenance Matters: Regular cleaning of terminals, ensuring secure connections, and appropriate charging habits significantly extend your car battery’s lifespan.
Quick Answers to Common Questions
Q1: Can I test a car battery with a multimeter?
A: Yes, absolutely! A multimeter is simply a versatile test tool that combines the functions of a voltmeter, ammeter, and ohmmeter. You’ll use the voltmeter function of your multimeter to test your car battery.
Q2: What does “DCV” mean on a voltmeter?
A: “DCV” stands for Direct Current Voltage. Your car battery produces direct current, so it’s essential to set your voltmeter to this setting when performing battery tests.
Q3: How long should I wait before performing a static battery test after driving?
A: You should wait at least 4 hours, or ideally overnight, before performing a static battery test. This allows any “surface charge” to dissipate and provides a more accurate reading of the battery’s true state of charge.
Q4: Is it normal for the voltage to drop slightly during cranking?
A: Yes, it is normal for the voltage to drop during cranking because the starter motor draws a large amount of current. However, a healthy battery should not drop below 9-10 volts during this process.
Q5: What if my charging system voltage is too high?
A: A charging system voltage above 14.7 volts indicates overcharging, which can damage your battery and electronics. This usually points to a faulty voltage regulator, which is often integrated into the alternator, meaning the alternator may need replacement.
📑 Table of Contents
- Understanding Your Car Battery and How a Voltmeter Helps
- What is a Voltmeter and How to Set It Up
- Safety First: Gathering Your Tools and Precautions
- Step-by-Step Guide: How to Test Your Car Battery with a Voltmeter
- What Your Voltmeter Readings Mean: Troubleshooting Common Issues
- Maintaining Your Car Battery for Longevity
Understanding Your Car Battery and How a Voltmeter Helps
Before we dive into the “how-to,” let’s quickly chat about what your car battery does and why a voltmeter is such a valuable diagnostic tool. Your car battery is typically a 12-volt lead-acid battery, designed to deliver a large amount of current for a short period to crank the engine, and then a smaller, steady stream of power to run accessories when the engine isn’t running. It’s recharged by the alternator once the engine starts.
The Basics of a Car Battery
Most car batteries consist of six cells, each producing approximately 2.1 volts, which combine to give you the nominal 12.6 volts when fully charged. These cells contain lead plates immersed in an electrolyte solution of sulfuric acid and water. A chemical reaction between the lead plates and the electrolyte generates electricity. As the battery discharges, this chemical reaction reverses when the alternator recharges it. Understanding this basic principle helps in appreciating why voltage readings are so important. A slight drop in voltage can indicate a significant loss of charge or an internal problem.
Why Use a Voltmeter?
A voltmeter is a device that measures the electrical potential difference between two points in a circuit, expressed in volts. When you use a voltmeter to test your car battery, you’re essentially checking its “state of charge” and its ability to hold that charge under different conditions. It’s a non-invasive way to get a quick snapshot of your battery’s health without needing specialized, expensive equipment. While a voltmeter won’t tell you the battery’s Cold Cranking Amps (CCA) or internal resistance (which requires a dedicated battery load tester), it’s excellent for basic diagnosis.
What is a Voltmeter and How to Set It Up
A voltmeter is your trusty companion for this task. It’s a relatively inexpensive tool that every DIY mechanic or car owner should have in their toolbox. They come in both analog and digital forms, but digital multimeters are generally preferred for their precision and ease of reading.
Digital vs. Analog Voltmeters
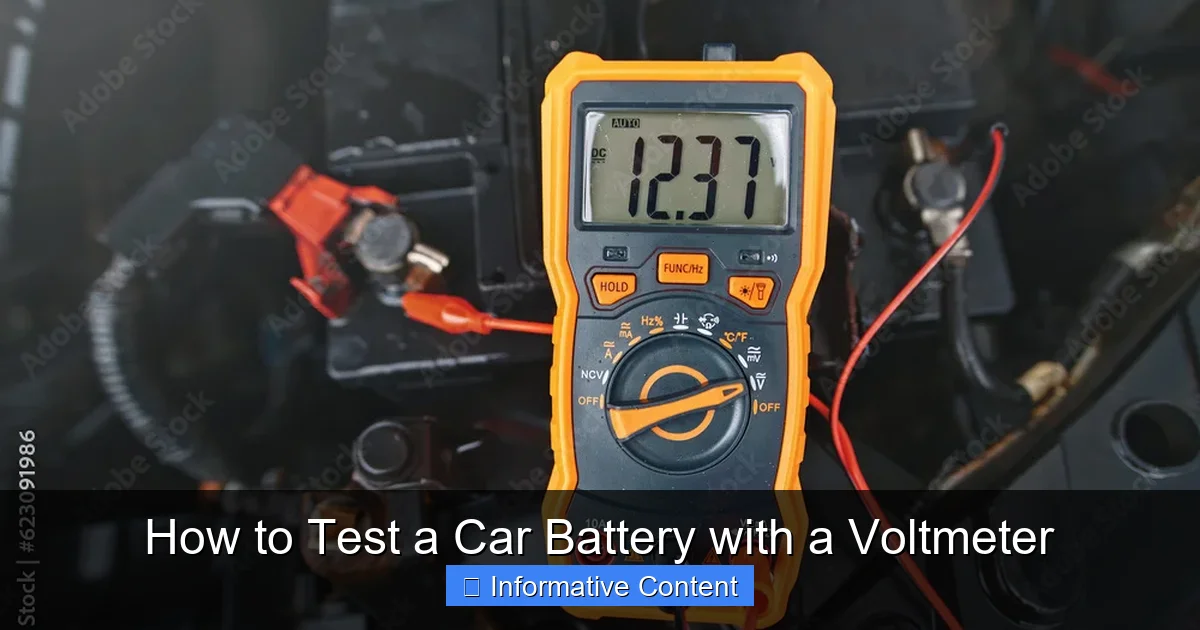
Digital Voltmeters: These are the most common and recommended type. They display the voltage reading as a number on an LCD screen, making them very easy to read and accurate. Most digital multimeters also have other functions, like measuring current (amps) and resistance (ohms).
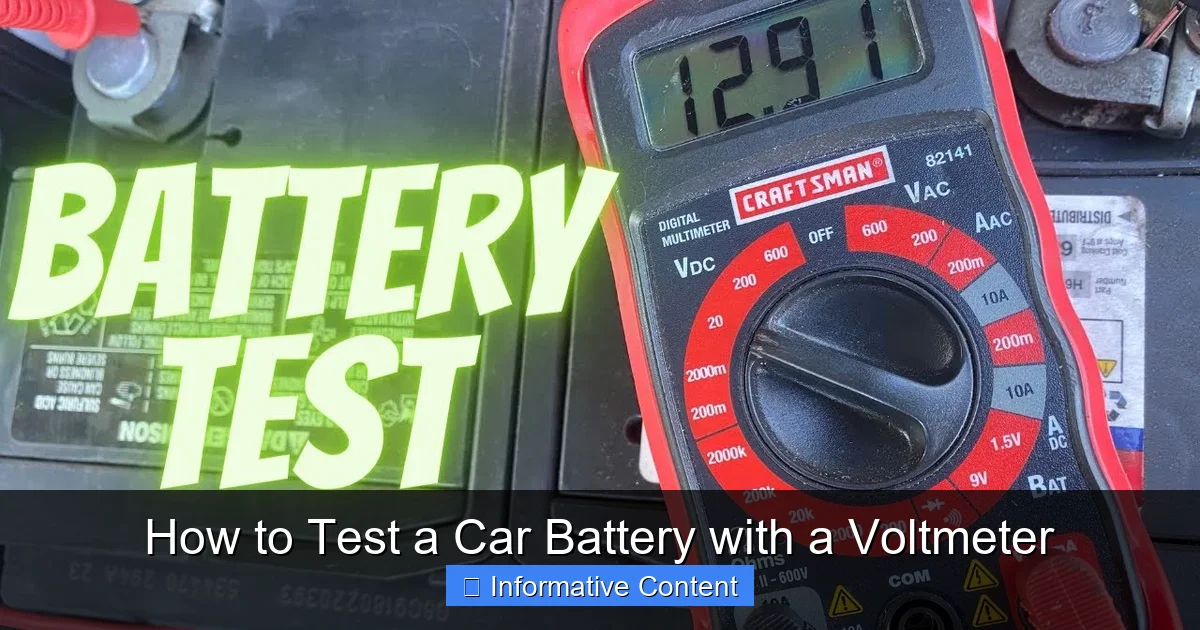
Visual guide about How to Test a Car Battery with a Voltmeter
Image source: i.ytimg.com
Analog Voltmeters: These have a needle that points to a number on a scale. While they work, they can be harder to read precisely, especially for beginners. For testing your car battery with a voltmeter, digital is usually the better choice.
Setting Up Your Voltmeter for Battery Testing
Before you begin, ensure your voltmeter is set correctly:
- Turn the Dial: Rotate the dial on your voltmeter to the “DCV” (Direct Current Voltage) or “V=” setting. Your car battery produces direct current, so this is crucial.
- Select the Range: Choose a range that is higher than 12 volts but not excessively high. Most multimeters have a 20V DC range, which is perfect for car battery testing. If you select a range that is too low (e.g., 2V), it won’t be able to read the battery’s voltage. If you select one too high (e.g., 200V), your reading might be less precise.
- Connect the Probes: Plug the red test lead into the “VΩmA” or “V” jack on your multimeter. Plug the black test lead into the “COM” (common) jack. The red lead is for positive measurements, and the black lead is for negative.
Once your voltmeter is set, you’re almost ready to learn how to test a car battery with a voltmeter!
Safety First: Gathering Your Tools and Precautions
Working with car batteries involves chemicals and electricity, so safety is paramount. Never skip these steps.
Essential Tools You’ll Need
- Digital Voltmeter: As discussed, set to DCV, 20V range.
- Safety Glasses: To protect your eyes from accidental acid splashes or sparks.
- Gloves: Acid-resistant gloves (like nitrile or rubber) are ideal to protect your hands.
- Wire Brush or Battery Terminal Cleaner: For cleaning corroded terminals.
- Baking Soda and Water Mixture: To neutralize any battery acid.
- Wrench (Optional): To tighten or loosen battery terminals if cleaning is needed.
Crucial Safety Precautions
- Wear Safety Gear: Always put on your safety glasses and gloves before touching the battery.
- Good Ventilation: Car batteries can release hydrogen gas, which is highly flammable and explosive. Work in a well-ventilated area.
- No Smoking or Open Flames: Keep any sources of ignition away from the battery. This includes cigarettes, lighters, and sparks.
- Avoid Metal Contact: Do not let tools or jewelry touch both battery terminals at the same time, as this can cause a short circuit, sparks, and potentially a battery explosion.
- Neutralize Acid: If you get battery acid on your skin or clothes, flush immediately with water and neutralize with a baking soda solution.
- Engine Off, Accessories Off: Ensure the car’s engine is off and all accessories (lights, radio, AC) are turned off before you begin testing.
With safety in mind and your tools ready, let’s get to the practical steps of how to test a car battery with a voltmeter.
Step-by-Step Guide: How to Test Your Car Battery with a Voltmeter
We’ll cover three main tests: the static voltage test (battery at rest), the cranking voltage test (during engine start), and the charging system test (engine running). Each provides different insights.
1. Preparing for the Test
First, pop open your hood and locate your car battery. You’ll see two terminals: a positive (+) terminal, usually marked with a plus sign and often covered with a red cap, and a negative (-) terminal, marked with a minus sign and often a black cap.
2. Performing a Static Voltage Test (Battery at Rest)
This is the simplest and most common test. It tells you the battery’s state of charge when it hasn’t been under load for a while.
- Ensure “Resting” State: For the most accurate reading, your car should have been off for at least 4 hours, or ideally overnight. This allows the “surface charge” to dissipate, giving you a true reading of the battery’s internal voltage. If you’ve just driven the car, turn everything off, wait 15-30 minutes, and then proceed.
- Inspect Terminals: Check for any corrosion on the battery terminals. If present, clean them thoroughly with a wire brush or battery terminal cleaner. Corrosion can impede electrical flow and lead to inaccurate readings.
- Connect the Voltmeter:
- Touch the red (positive) probe of your voltmeter to the positive (+) terminal of the battery.
- Touch the black (negative) probe of your voltmeter to the negative (-) terminal of the battery.
Hold the probes firmly in place to ensure good contact.
- Read the Display: Note the voltage reading on your voltmeter’s screen.
Interpreting Static Voltage Readings
Here’s what your static voltage reading typically means:
- 12.6 volts or higher: Your battery is fully charged and in good health.
- 12.4 to 12.6 volts: Your battery is around 75-100% charged. It’s in fair condition but might need a top-up charge.
- 12.0 to 12.4 volts: Your battery is between 25-75% charged. It definitely needs charging. If it consistently reads in this range after charging, it might be weakening.
- Below 12.0 volts: Your battery is largely discharged or has a significant issue. It likely needs a full charge and a subsequent retest. If it quickly drops to this level after charging, it’s probably time for a replacement.
Remember, a fully charged battery provides more than just the nominal 12 volts; it should be closer to 12.6 volts. This is a critical piece of information when you learn how to test a car battery with a voltmeter.
3. Performing a Cranking Voltage Test (Optional but Recommended)
This test helps evaluate the battery’s ability to deliver current under load, which is its primary job during engine start-up. It also gives insight into the starter’s health. You’ll need an assistant for this test.
- Connect Voltmeter: Keep the voltmeter connected to the battery terminals as you did for the static test.
- Start the Engine (briefly): Have your assistant crank the engine for about 5-10 seconds while you watch the voltmeter. Do not let the engine fully start. If the car starts immediately, that’s fine, but the goal is to observe the voltage drop during the cranking process.
- Note the Lowest Voltage: Observe the lowest voltage reading displayed on the voltmeter during cranking. Most digital voltmeters will have a “MIN” function that captures the lowest reading.
Interpreting Cranking Voltage Readings
- Above 10 volts: This is generally a good sign. It indicates that your battery has enough power to crank the engine effectively.
- 9 to 10 volts: The battery might be weak, or your starter motor could be drawing too much current. It’s borderline and might indicate an issue during cold weather.
- Below 9 volts: This usually indicates a weak or failing battery that can’t supply enough power to start the car reliably. It could also point to a faulty starter motor, but a weak battery is the more common culprit.
If your static voltage was good but your cranking voltage is low, it suggests the battery struggles under load.
4. Performing a Charging System Test (Engine Running)
This test assesses whether your alternator is properly recharging your battery and supplying power to your car’s electrical system while the engine is running.
- Start the Engine: Start your car and let it idle for a few minutes.
- Connect Voltmeter: Connect the red probe to the positive (+) terminal and the black probe to the negative (-) terminal of the battery.
- Read the Display: Observe the voltage reading on your voltmeter.
- Turn on Accessories: Turn on various electrical accessories one by one (headlights, radio, AC, defroster) and watch how the voltage changes.
Interpreting Charging System Readings
- 13.7 to 14.7 volts: This is the ideal range. It indicates that your alternator is working correctly and charging the battery. The voltage might fluctuate slightly as you turn accessories on and off, but it should remain within this range.
- Below 13.7 volts (engine running): This could mean your alternator isn’t charging the battery enough. Your battery might slowly drain while you drive.
- Above 14.7 volts (engine running): This indicates overcharging, which can damage the battery and other electrical components. This often points to a faulty voltage regulator, which is usually part of the alternator.
This comprehensive set of tests using a voltmeter provides a full picture of your battery’s health and the charging system, crucial for understanding how to test a car battery with a voltmeter effectively.
What Your Voltmeter Readings Mean: Troubleshooting Common Issues
Now that you know how to get your readings, let’s explore what common issues these readings might signify.
Low Voltage Readings (Static, Cranking, or Charging)
Static Test Low: If your battery consistently reads below 12.4V even after a full charge, it’s likely a weak or failing battery. It might have an internal short or simply be at the end of its lifespan. It might also be that your car has a parasitic drain (something constantly drawing power even when the car is off).
Cranking Test Low: A healthy battery might show a good static voltage but then drop significantly during cranking. This suggests the battery can’t handle the load, indicating it’s weak and needs replacement. A very low cranking voltage could also be due to a faulty starter motor drawing excessive current.
Charging Test Low: If the voltage stays below 13.7V with the engine running, your alternator isn’t doing its job. This could be a failing alternator, a loose or damaged serpentine belt, or wiring issues. Eventually, your battery will die because it’s not being recharged.
High Voltage Readings (Charging Test)
If your charging system test shows readings consistently above 14.7V, your alternator is overcharging the battery. This is dangerous as it can boil the electrolyte, severely damage the battery, and potentially harm other sensitive electronics in your car. A faulty voltage regulator, usually integrated into the alternator, is the common cause.
Fluctuating or Inconsistent Readings
Erratic voltage readings could point to loose or corroded battery terminals, a bad ground connection, or an intermittent issue with the alternator. Always double-check your connections and clean your terminals if you see inconsistent results.
Maintaining Your Car Battery for Longevity
Knowing how to test a car battery with a voltmeter is just one part of the equation. Proper maintenance can significantly extend its life.
Regular Cleaning of Terminals
Corrosion (a white, powdery, or bluish-green substance) on battery terminals can prevent proper electrical flow. Use a wire brush or a specialized terminal cleaner to remove it. You can neutralize any acid with a mixture of baking soda and water before cleaning.
Secure Connections
Ensure that the battery cables are tightly secured to the terminals. Loose connections can lead to poor performance and charging issues.
Proper Charging Habits
Avoid fully discharging your battery frequently. If your car sits for long periods, consider using a trickle charger or battery maintainer to keep it topped up. Short trips where the engine doesn’t run long enough to fully recharge the battery can also shorten its life.
Environmental Factors
Extreme temperatures (very hot or very cold) are hard on batteries. In cold weather, a weak battery has even less capacity. In hot weather, the electrolyte can evaporate faster, leading to internal damage. If possible, park in shaded areas in summer and in a garage in winter.
By combining regular testing with a voltmeter and good maintenance practices, you can dramatically improve the reliability and lifespan of your car battery. You’ll be able to spot potential problems early, often preventing that dreaded moment when your car refuses to start.
So there you have it! Testing your car battery with a voltmeter isn’t just for mechanics; it’s a skill every car owner can master. With the right tools, a bit of safety consciousness, and these step-by-step instructions, you’re now equipped to perform these vital checks yourself. Regular voltage checks can keep your battery healthy, your car reliable, and your peace of mind intact. Happy testing, and safe driving!
Frequently Asked Questions
How often should I test my car battery with a voltmeter?
It’s a good practice to test your car battery with a voltmeter at least twice a year, perhaps before winter and again before summer. If your battery is older than three years or if you’re experiencing any starting issues, more frequent checks are advisable.
Can a fully charged battery still be bad?
Yes, a battery can show a full charge (e.g., 12.6V static) but still be “bad” if it can’t deliver enough current under load. This is why the cranking voltage test is important, as it reveals if the battery is truly capable of starting your engine.
What does “surface charge” mean, and why should I wait for it to dissipate?
A “surface charge” is a temporary, elevated voltage reading that can occur immediately after the battery has been charged or driven. Waiting for it to dissipate ensures you get an accurate reading of the battery’s true resting voltage, preventing false positives about its health.
Can I test an automotive battery with the terminals connected to the car?
Yes, all the tests described (static, cranking, and charging) are performed with the battery terminals connected to the car. This is crucial for evaluating how the battery performs within the vehicle’s electrical system.
My car won’t start, but the lights work. Is it the battery?
If your lights, radio, and other accessories work but the car won’t start or only clicks weakly, it’s a classic sign of a weak or dead battery. While the battery might have enough power for low-drain accessories, it lacks the high current needed to turn over the engine.
How can I extend the life of my car battery?
To extend your car battery’s life, ensure it’s regularly charged, avoid deep discharges, keep the terminals clean and secure, and protect it from extreme temperatures. Regular short trips can prevent it from fully recharging, so consider a battery maintainer if you drive infrequently.