Disconnecting a car battery is a crucial skill for car maintenance, repair, or long-term storage, but it demands strict adherence to safety protocols. Always wear protective gear and ensure your vehicle is off before you begin. The cardinal rule is to disconnect the negative terminal first, then the positive, to prevent dangerous sparks and electrical shorts. Reconnection follows the opposite order: positive first, then negative, ensuring all connections are tight and secure.
How to Disconnect a Car Battery
Have you ever faced a dead battery, needed to perform some car maintenance, or simply wanted to store your vehicle for a while? If so, knowing how to safely disconnect a car battery is a fundamental skill that every car owner should master. It might seem daunting at first, with all those wires and the risk of electrical shock, but with the right knowledge and precautions, it’s a straightforward process you can confidently tackle yourself.
Whether you’re planning to replace an old battery, prevent a parasitic drain on your car’s electrical system, or simply need to perform repairs that involve working with electrical components, understanding how to properly disconnect the battery is paramount. Doing it incorrectly can lead to dangerous sparks, electrical shorts, damage to your vehicle’s electronics, or even personal injury. But don’t worry, we’re here to guide you through every step with clarity and ease.
This comprehensive guide will walk you through every step of disconnecting your car battery, from gathering the necessary tools to understanding crucial safety measures. We’ll explain why you might need to do this, what gear to wear, and how to execute each step meticulously. Our goal is to empower you with the confidence and know-how to perform this task safely and efficiently, whether you’re a seasoned DIY mechanic or just starting your automotive journey. Let’s dive in!
Key Takeaways
- Safety First: Always wear safety glasses and gloves to protect against battery acid and electrical hazards when working with a car battery.
- Tools Required: Gather a wrench (usually 10mm or 13mm), a wire brush, and possibly a battery terminal puller before you start.
- Order Matters for Disconnection: To prevent sparks and short circuits, always disconnect the negative (-) terminal cable first, followed by the positive (+) terminal cable.
- Secure Cables: Once removed, ensure the cables are tucked away and cannot accidentally come into contact with the battery terminals or any metal part of the car.
- Reconnection Order: When reconnecting, the order is reversed: connect the positive (+) terminal first, then the negative (-) terminal.
- Check Connections: After reconnecting, gently wiggle the cables to ensure they are tight and secure on the terminals.
- Reasons for Disconnection: You might need to disconnect your battery for repairs, preventing parasitic drain during long storage, resetting the car’s computer, or replacing the battery itself.
Quick Answers to Common Questions
Question 1?
You should always disconnect the negative terminal first because it is connected to the car’s chassis (ground). Removing the negative cable first breaks this ground circuit, significantly reducing the risk of accidental sparks or short circuits if your wrench were to touch the positive terminal and a metal part of the car simultaneously.
Question 2?
To safely disconnect a car battery, you will primarily need a wrench or socket set (typically 10mm or 13mm for the terminal clamps), safety glasses, and gloves. A wire brush or battery terminal cleaner can also be very helpful for removing corrosion.
Question 3?
No, it is not safe to disconnect your car battery while the engine is running. Doing so can cause a sudden voltage spike that could severely damage your car’s alternator or other sensitive electronic components. Always ensure your vehicle is completely off before attempting to disconnect the battery.
Question 4?
If you accidentally spill battery acid on your skin or clothing, immediately flush the affected area with large amounts of water for at least 15 minutes. For skin contact, follow up with a baking soda and water paste to neutralize any remaining acid. If acid gets in your eyes, flush thoroughly with water and seek immediate medical attention.
Question 5?
Disconnecting a car battery is a relatively quick process once you have the right tools and understand the steps. It typically takes less than 5 to 10 minutes from start to finish, not including any additional cleaning or battery removal.
📑 Table of Contents
Why You Might Need to Disconnect Your Car Battery
Knowing how to disconnect a car battery is useful, but understanding why you would need to is equally important. There are several common scenarios where this skill becomes invaluable.
Repairs and Maintenance
Anytime you’re working on electrical components under the hood, like changing an alternator, starter, or even just replacing a headlight, it’s a good practice to disconnect the battery. This eliminates the risk of accidental electrical shorts, which can damage sensitive electronics or even cause a fire. Think of it as hitting the “off” switch for your car’s entire electrical system, ensuring your safety and the longevity of your vehicle’s components during repairs.
Preventing Parasitic Drain
If you plan to leave your car unused for an extended period – say, a few weeks or months – you might find the battery completely dead upon your return. This is often due to what’s called a “parasitic drain,” where certain electrical components (like the radio memory, alarm system, or onboard computer) continue to draw a small amount of power even when the car is off. To prevent this slow drain and keep your battery healthy, disconnecting it is an effective solution. This ensures your battery holds its charge for when you next need to start your vehicle.
Resetting Onboard Computers
Modern cars are essentially computers on wheels. Sometimes, glitches can occur, leading to warning lights, erratic idling, or transmission issues. Much like restarting a frozen computer, disconnecting the car battery for a short period (usually 15-30 minutes) can sometimes reset the car’s onboard computer (ECU). This can clear fault codes and restore default settings, often resolving minor electronic hiccups without a trip to the mechanic.
Long-Term Storage
For classic car owners, snowbirds, or anyone storing a vehicle for many months, disconnecting the battery is essential. Beyond preventing parasitic drain, it also helps preserve the battery’s overall lifespan. A battery that remains connected but unused can degrade more quickly than one that is disconnected and properly maintained or even trickle-charged. This simple step can save you the cost and hassle of replacing a prematurely dead battery.
Replacing the Battery
This might seem obvious, but you can’t replace an old car battery without first knowing how to safely disconnect a car battery. Removing the old unit and installing a new one requires careful handling of the terminals to avoid sparks and ensure a safe, secure installation. It’s the foundational step for any battery replacement job.
Essential Tools and Safety Gear
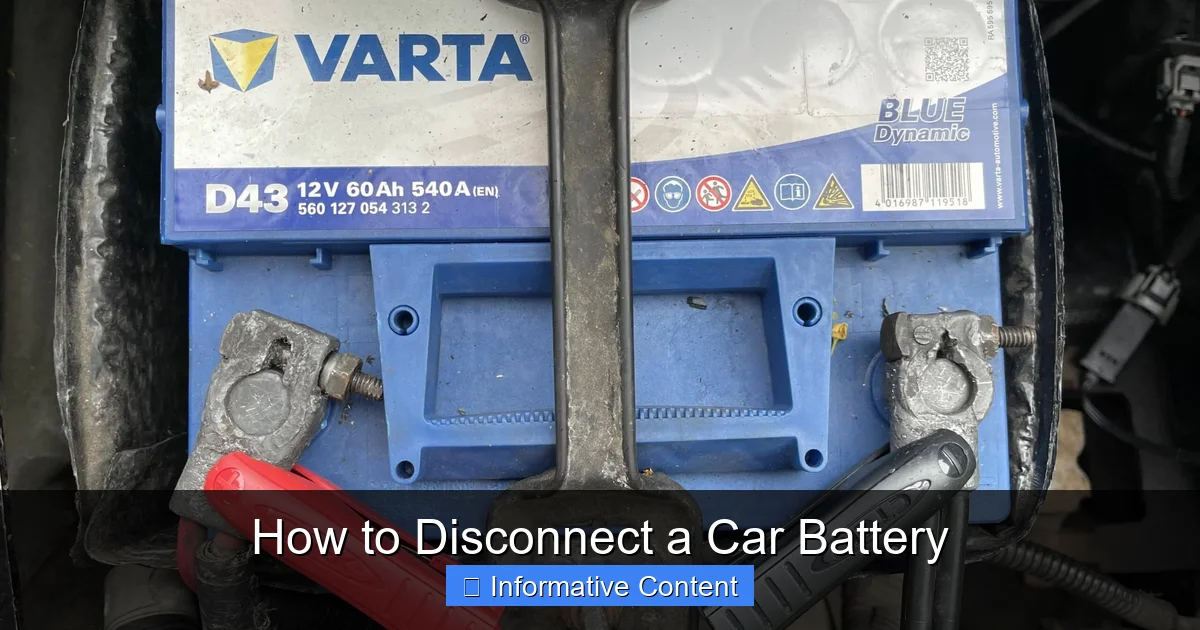
Visual guide about How to Disconnect a Car Battery
Image source: classiccarmaintenance.com
Before you even think about touching your car battery, it’s absolutely crucial to gather the right tools and, more importantly, put on the necessary safety gear. Skipping these steps can lead to serious injury or damage to your vehicle.
Basic Tools
- Wrench or Ratchet Set: You’ll typically need a 10mm or 13mm wrench or socket to loosen the battery terminal clamps. Some cars might use a different size, so having a small set is ideal.
- Wire Brush or Battery Terminal Cleaner: Over time, corrosion can build up on battery terminals, making connections poor and difficult to remove. A wire brush helps clean these off for better contact and easier removal.
- Battery Terminal Puller (Optional but Helpful): Sometimes, clamps can be stuck due to corrosion or tight fit. A specialized puller can make removing them much easier and safer, preventing damage to the battery posts.
Crucial Safety Gear
- Safety Glasses or Goggles: This is non-negotiable. Battery acid can splash, and sparks can fly. Eye protection is paramount to prevent permanent damage.
- Gloves: Wear heavy-duty work gloves or, even better, acid-resistant nitrile gloves. Battery acid is corrosive and can cause chemical burns to your skin.
- Old Clothes: Battery acid can easily ruin clothing. Don’t wear your Sunday best when working on your car battery!
Additional Helpful Items
- Battery Post Cleaner: A dedicated tool to clean the inside of the battery cable clamps and the battery posts themselves.
- Baking Soda and Water Mixture: Keep this handy. If you spill battery acid, a paste of baking soda and water can help neutralize it.
- Flashlight or Headlamp: Especially useful if you’re working in a dimly lit garage or if your battery is located in a tricky spot.
- Battery Maintainer/Memory Saver (for reconnection): If you want to avoid losing radio presets or computer memory during battery disconnection, a memory saver (which plugs into your car’s OBD-II port or cigarette lighter) can provide temporary power.
Step-by-Step Guide to Disconnecting Your Car Battery
Now that you understand the “why” and have your tools and safety gear ready, let’s get to the “how.” Follow these steps carefully to safely disconnect a car battery.
Step 1: Park Safely and Turn Off Your Car
Always start by parking your car on a level surface, engaging the parking brake, and turning off the engine. Ensure all lights, the radio, and any other electrical accessories are off. Remove the key from the ignition or keep it far away if you have a push-button start to prevent accidental power cycling.
Step 2: Locate the Battery
Most car batteries are located under the hood, but some vehicles place them in the trunk, under the rear seat, or even in the wheel well. Consult your owner’s manual if you’re unsure of its location. Once found, make sure there’s enough space to work safely around it.
Step 3: Identify Terminals (Negative First!)
Look at the battery. You’ll see two terminals, each with a cable attached.
- The Negative (-) terminal is typically marked with a minus sign and usually has a black cable connected to it.
- The Positive (+) terminal is marked with a plus sign and typically has a red cable connected to it.
Remember this rule above all else: you will always disconnect the negative terminal first. This prevents accidental short circuits if your wrench touches both the positive terminal and the car’s metal body simultaneously.
Step 4: Loosen the Negative Terminal Clamp
Using your appropriate-sized wrench (usually 10mm or 13mm), loosen the nut or bolt on the negative (-) terminal clamp. Turn it counter-clockwise until the clamp feels loose enough to be moved freely on the battery post. You don’t need to remove the nut entirely, just enough to free the clamp.
Step 5: Remove the Negative Cable
Once loosened, gently twist and pull the black negative cable straight up and off the negative battery post. If it’s stuck due to corrosion, use a battery terminal puller if you have one. Never pry directly on the battery post itself, as this can damage the battery. Once the cable is free, tuck it away from the battery, ensuring it cannot accidentally swing back and touch either battery terminal or any metal part of the car’s body. You can secure it with a bungee cord or zip tie if needed.
Step 6: Loosen the Positive Terminal Clamp
Now, repeat the loosening process for the positive (+) terminal. Using your wrench, loosen the nut or bolt on the red positive terminal clamp by turning it counter-clockwise.
Step 7: Remove the Positive Cable
Carefully twist and pull the red positive cable straight up and off the positive battery post. Like the negative cable, secure it away from the battery and any metal surfaces. At this point, your car battery is completely disconnected and safe to work around or remove.
Step 8: Clean Terminals (Optional, but Recommended)
With both cables off, now is a great time to clean any corrosion from the battery posts and the inside of the cable clamps using your wire brush or battery terminal cleaner. Clean connections ensure better electrical flow and extend battery life. If there’s heavy corrosion, you can use a baking soda and water paste to neutralize it, scrubbing gently, then rinsing with clean water and drying thoroughly.
Step 9: Remove the Battery Hold-Down Clamp (if necessary)
If your goal is to remove the entire battery (for replacement or bench charging), you’ll need to loosen and remove the battery hold-down clamp. This clamp prevents the battery from moving or tipping over while driving. Once it’s removed, you can carefully lift the battery out. Remember, car batteries are heavy, so lift with your legs, not your back!
Safety Precautions and What NOT to Do
Working with car batteries involves potential hazards. Adhering to these safety guidelines is paramount to protect yourself and your vehicle.
Always Wear Safety Gear
We’ve mentioned it before, but it bears repeating: never work on your car battery without safety glasses and gloves. A splash of battery acid can cause severe burns and permanent eye damage. Sparks can also cause discomfort or injury.
Avoid Metal Contact
When you are loosening or removing the terminals, be extremely careful not to let your wrench or any other metal tool accidentally touch both battery terminals at the same time, or touch a terminal and the car’s metal frame (ground) simultaneously. This can cause a severe short circuit, creating dangerous sparks, melting the tool, and potentially damaging the battery or your car’s electrical system. This is precisely why you disconnect the negative terminal first – because the negative terminal is connected to the car’s chassis (ground), removing it first breaks this ground connection, making it safer to then work on the positive terminal.
Never Touch Terminals Together
Even with the cables removed, never let the positive and negative battery posts directly touch each other, or allow the removed positive and negative cables to touch each other. This will create a powerful short circuit, which can be very dangerous.
Mind the Fumes and Acid
Car batteries contain sulfuric acid and can release hydrogen gas, which is highly flammable and explosive. Work in a well-ventilated area to disperse any fumes. Avoid smoking or any open flames near the battery. If you smell rotten eggs, it’s a sign of a leaking battery or one that’s overcharging. If battery acid comes into contact with your skin or eyes, flush immediately with plenty of water for at least 15 minutes and seek medical attention.
Don’t Rush
Take your time with each step. Rushing can lead to careless mistakes that compromise your safety or damage your vehicle. If you’re unsure about anything, consult your car’s owner’s manual or a professional mechanic.
Reconnecting Your Car Battery (Briefly)
Once you’ve completed your task, you’ll need to reconnect the battery. The process is essentially the reverse of disconnecting, but the order of terminals is just as critical for safety.
The Reconnection Order (Positive First!)
When you’re ready to reconnect your car battery, the order is reversed:
- Connect the Positive (+) terminal first: Place the red positive cable onto the positive battery post. Tighten the clamp securely with your wrench.
- Connect the Negative (-) terminal next: Place the black negative cable onto the negative battery post. Tighten the clamp securely.
Why this order? If you connect the negative first, and your wrench accidentally touches the positive terminal and a grounded metal part of the car while you’re connecting the positive cable, you could create a short circuit. Connecting positive first minimizes this risk, as the negative terminal (ground) is still disconnected.
Checking for a Secure Connection
After tightening both clamps, give each cable a gentle wiggle to ensure it’s firmly seated and doesn’t move. Loose connections can lead to intermittent power, charging issues, and poor starting performance.
Post-Reconnection Checks
Once everything is reconnected, you can start your car. Don’t be alarmed if some settings (like your radio presets, clock, or power window auto-up/down functions) have been reset. This is normal. You may need to reprogram your radio stations or reset your clock. Some cars may also require a short drive or specific actions to re-learn idle settings. If you used a memory saver, you likely won’t have these issues.
Conclusion
Learning how to safely disconnect a car battery is a valuable skill that empowers you to handle various car maintenance and repair tasks with confidence. By understanding the reasons for disconnection, gathering the right tools, and meticulously following the step-by-step process, you can perform this task safely and effectively.
Remember, safety is always your top priority. Always wear protective gear, adhere to the correct terminal order (negative first for disconnection, positive first for reconnection), and take your time. With this comprehensive guide, you’re now equipped with the knowledge to safely manage your car battery whenever the need arises. Drive safely and keep those sparks at bay!
🎥 Related Video: How to Disconnect and Reconnect the Car Battery
📺 FIX MY CAR
Thank You for your Donation: https://www.paypal.com/donate/?hosted_button_id=TQ2UTNS5WDC46 SUBSCRIBE So We Can …
Frequently Asked Questions
Will disconnecting my battery erase all my car’s settings?
Yes, disconnecting your car battery will typically erase volatile memory settings, such as radio presets, the clock, and potentially some learned engine parameters. Modern cars might retain some settings, but be prepared to re-enter radio stations and reset the time after reconnection.
Can I disconnect my battery without tools?
No, you should never attempt to disconnect your car battery without the proper tools. The terminal clamps are designed to be tightened with a wrench, and trying to force them off with bare hands or improper tools can damage the battery terminals, cables, or cause injury.
What happens if I connect the cables in the wrong order?
Connecting the battery cables in the wrong order (e.g., connecting the negative cable first when reconnecting, then touching the positive with your wrench to a grounded part of the car) can cause dangerous sparks, an electrical short circuit, and potentially damage your car’s electrical system or battery.
How often should I disconnect my battery for maintenance?
You don’t typically need to disconnect your battery for routine maintenance unless you’re storing the car long-term, working on electrical components, or trying to reset the car’s computer. Regular cleaning of terminals and checking the charge are usually sufficient.
What’s the difference between a parasitic drain and a dead battery?
A parasitic drain refers to a continuous, small draw of electrical current from your battery even when the car is off, slowly depleting its charge over time. A dead battery, however, means the battery no longer has enough charge to start the car, which could be due to a parasitic drain, leaving lights on, or the battery simply reaching the end of its lifespan.
Can I jump-start a car that has had its battery disconnected?
No, you cannot jump-start a car with a disconnected battery. Jump-starting requires the car’s battery to be properly connected to the vehicle’s electrical system to receive and store the charge from the donor vehicle and provide the necessary power to crank the engine.
